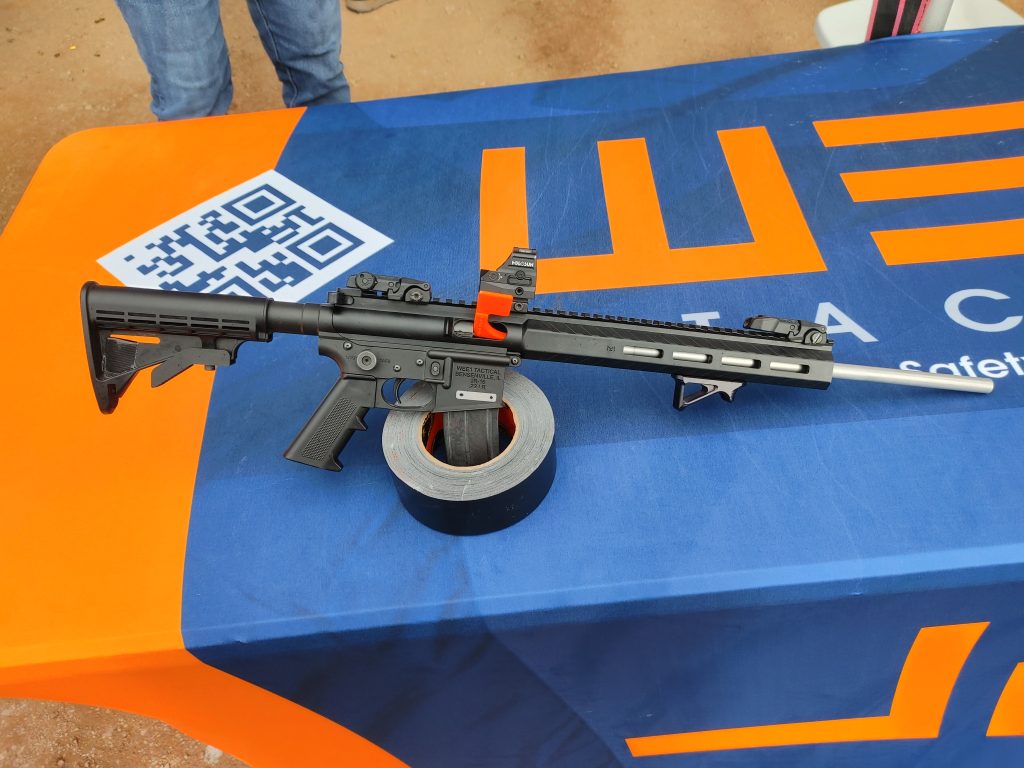
Sometimes during SHOT, you find something that is just cool. It might not be completely practical or totally useful, but it just stands out for being unique. My pick this year for just cool is the JR-15. The JR-15 is an AR-15 clone or replica, or, you know, I’m not sure what to call it. Wee 1 Tactical produces the JR-15 and what they did was simple. Take your typical rimfire AR design and scale it down. It’s scaled down to accommodate younger shooters who might be too small for anything else. It’s basically an AR 15 build kit gun.
The JR-15 – The Cutest Gun of Shot
The JR-15 features all the normal AR carbine goodies. This includes an M-LOK rail, an optic rail, and collapsing stock. However, it weighs only 2.49 pounds in total. It’s so small and cute and optimized in every way for a youthful shooter. The gun is not optimized for a six-foot-five-inch tall gorilla like me, but I still had fun with it at the range. The JR-15 is scaled down by about 20% when compared to a normal AR.
It’s your typical straight blowback operated .22LR. The JR-15 is only an AR-15 in appearance and functions like any other rimfire AR rifle. It’s just optimized for inexperienced, younger shooters. Some of the modifications include an interesting safety that would be difficult to turn off accidentally. You have to pull a knob up and rotate it.
Wee 1 Tactical also produces three magazine sizes. You have your typical 10-round magazine, as well as a 5-round magazine, but you also have a 1-round option. To me, that’s great for shooters who may turn excitedly on the range. Should they do so, the gun is empty after firing the first and only shot in the mag. I will also go ahead and say the magazines are adorable. They are just miniaturized magazines that are identical to actual AR mags.
At range day, they just had the JR-15, but at their booth, they also had an upcoming mini AK series. It’s scaled down, in .22LR, and has the most adorable little magazine. With an MSRP of about 500 bucks, these offer an affordable rifle with that tactical appeal that might speak to modern kiddos.
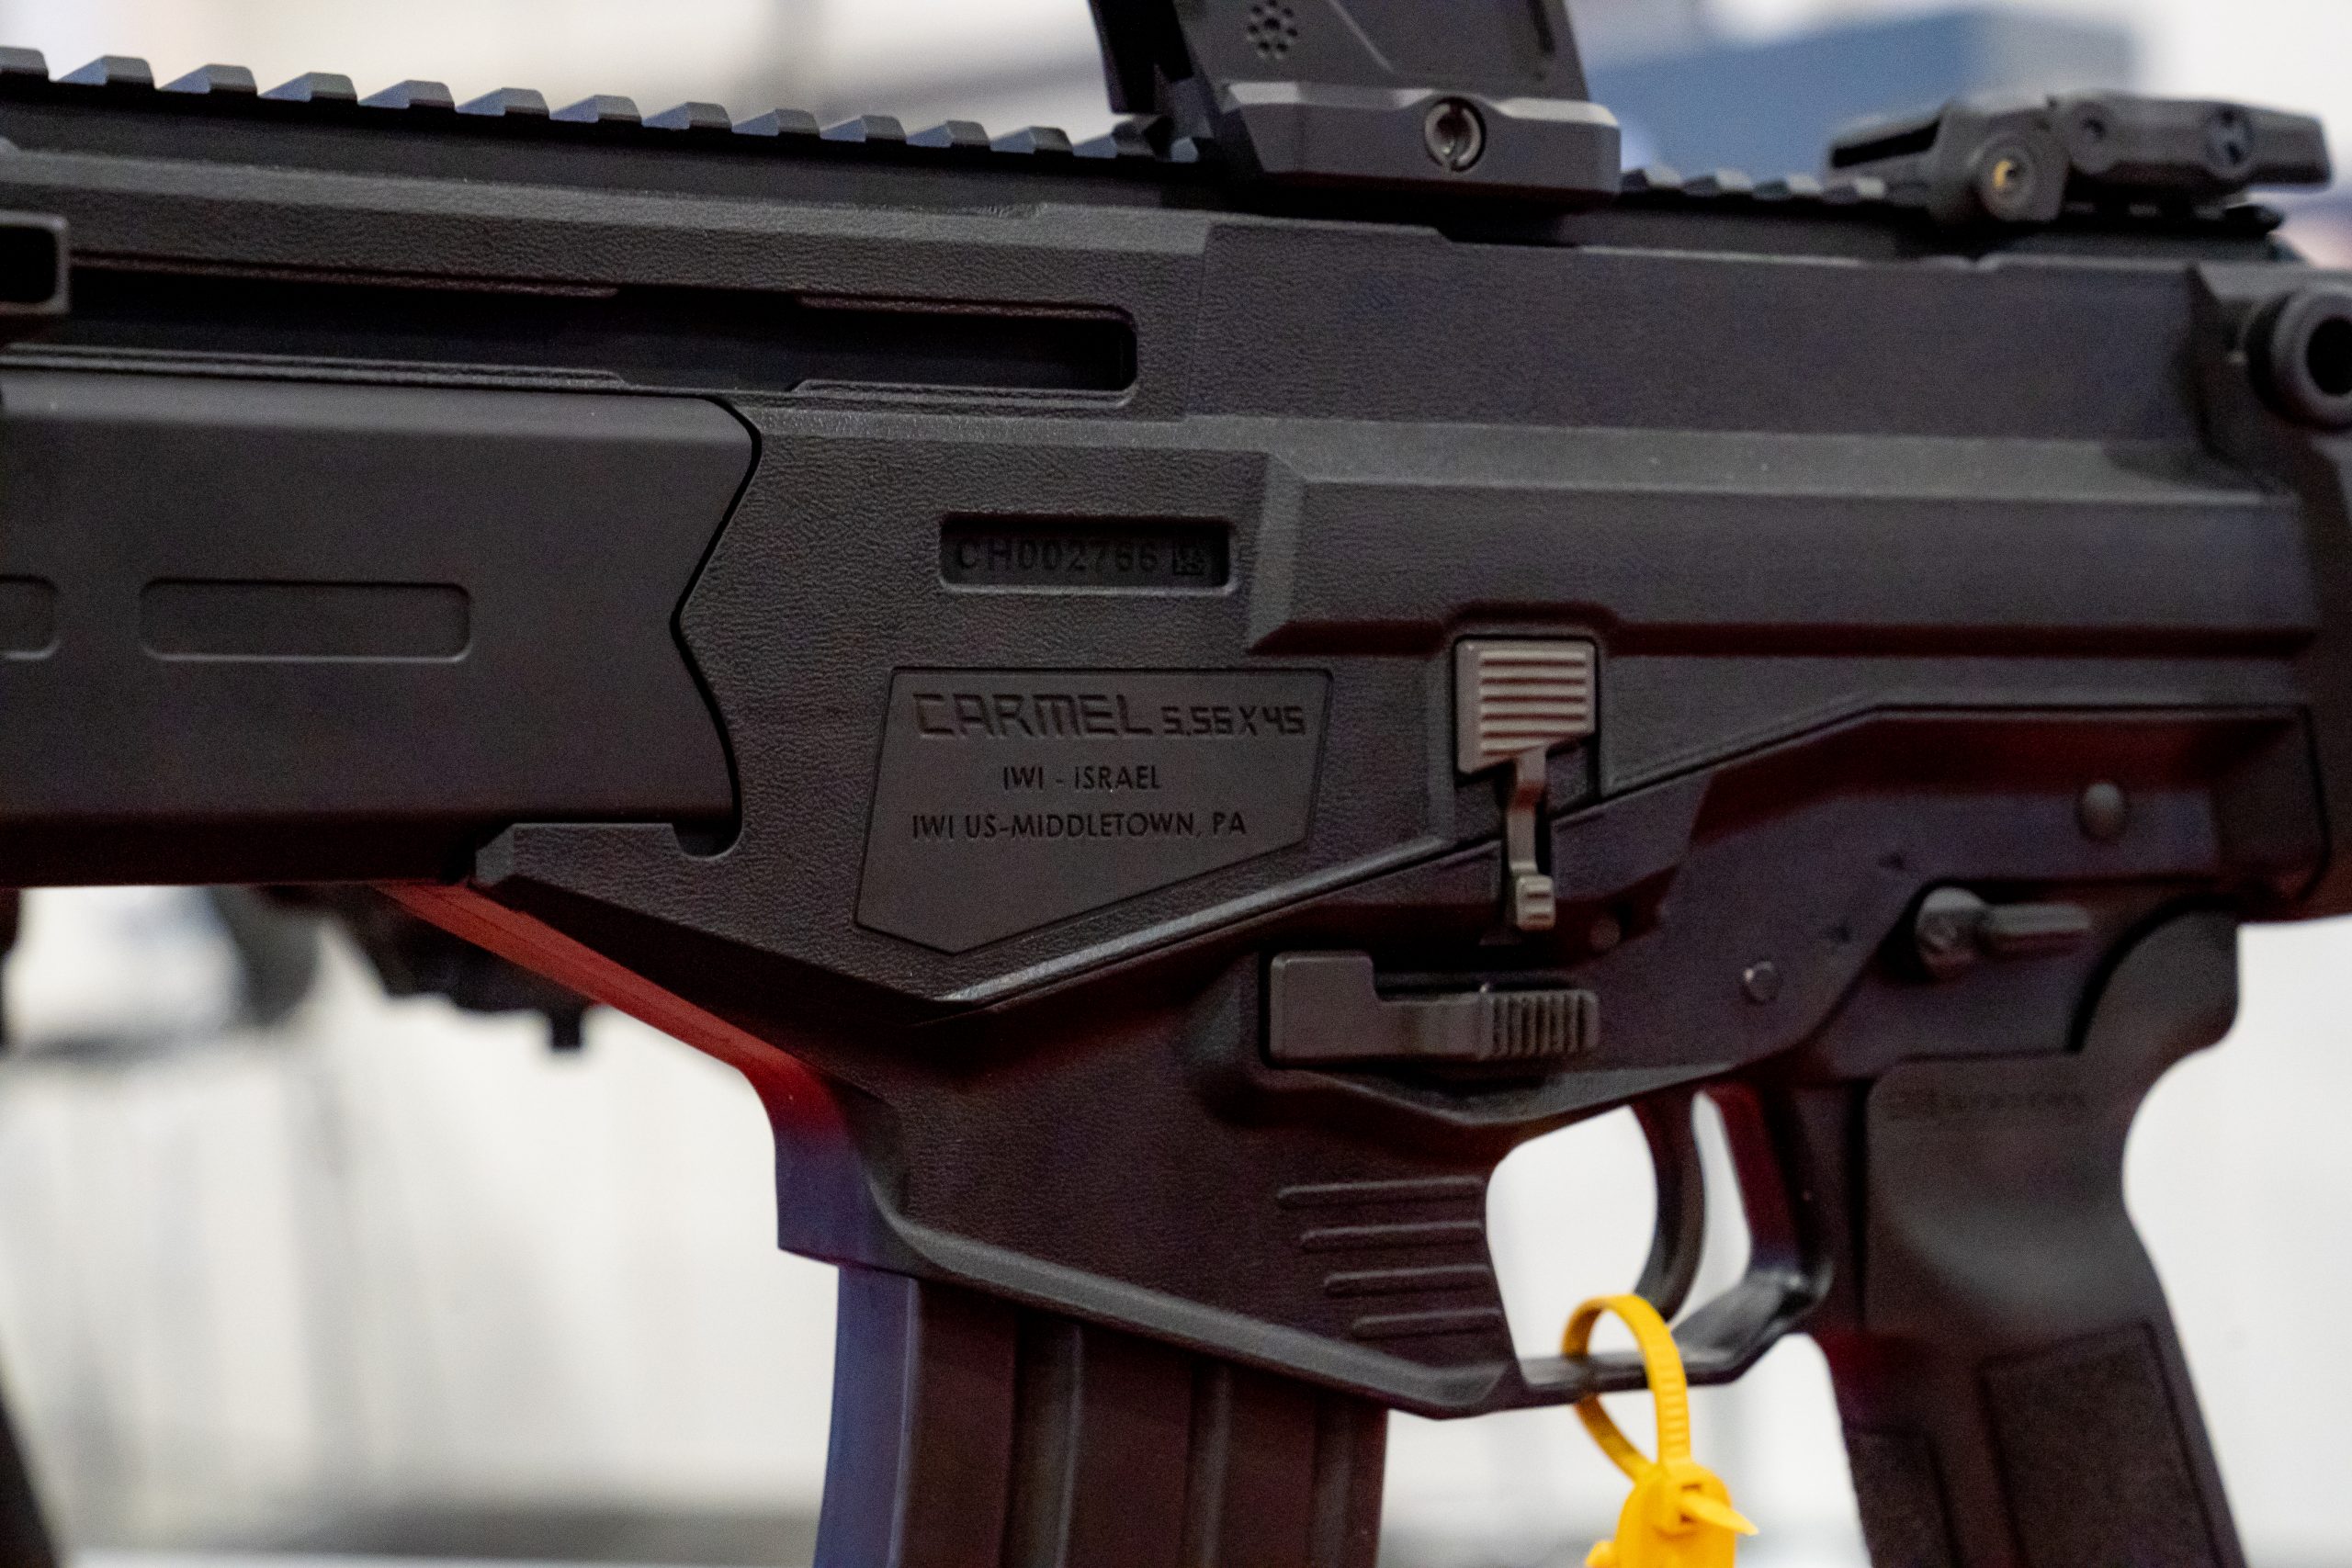
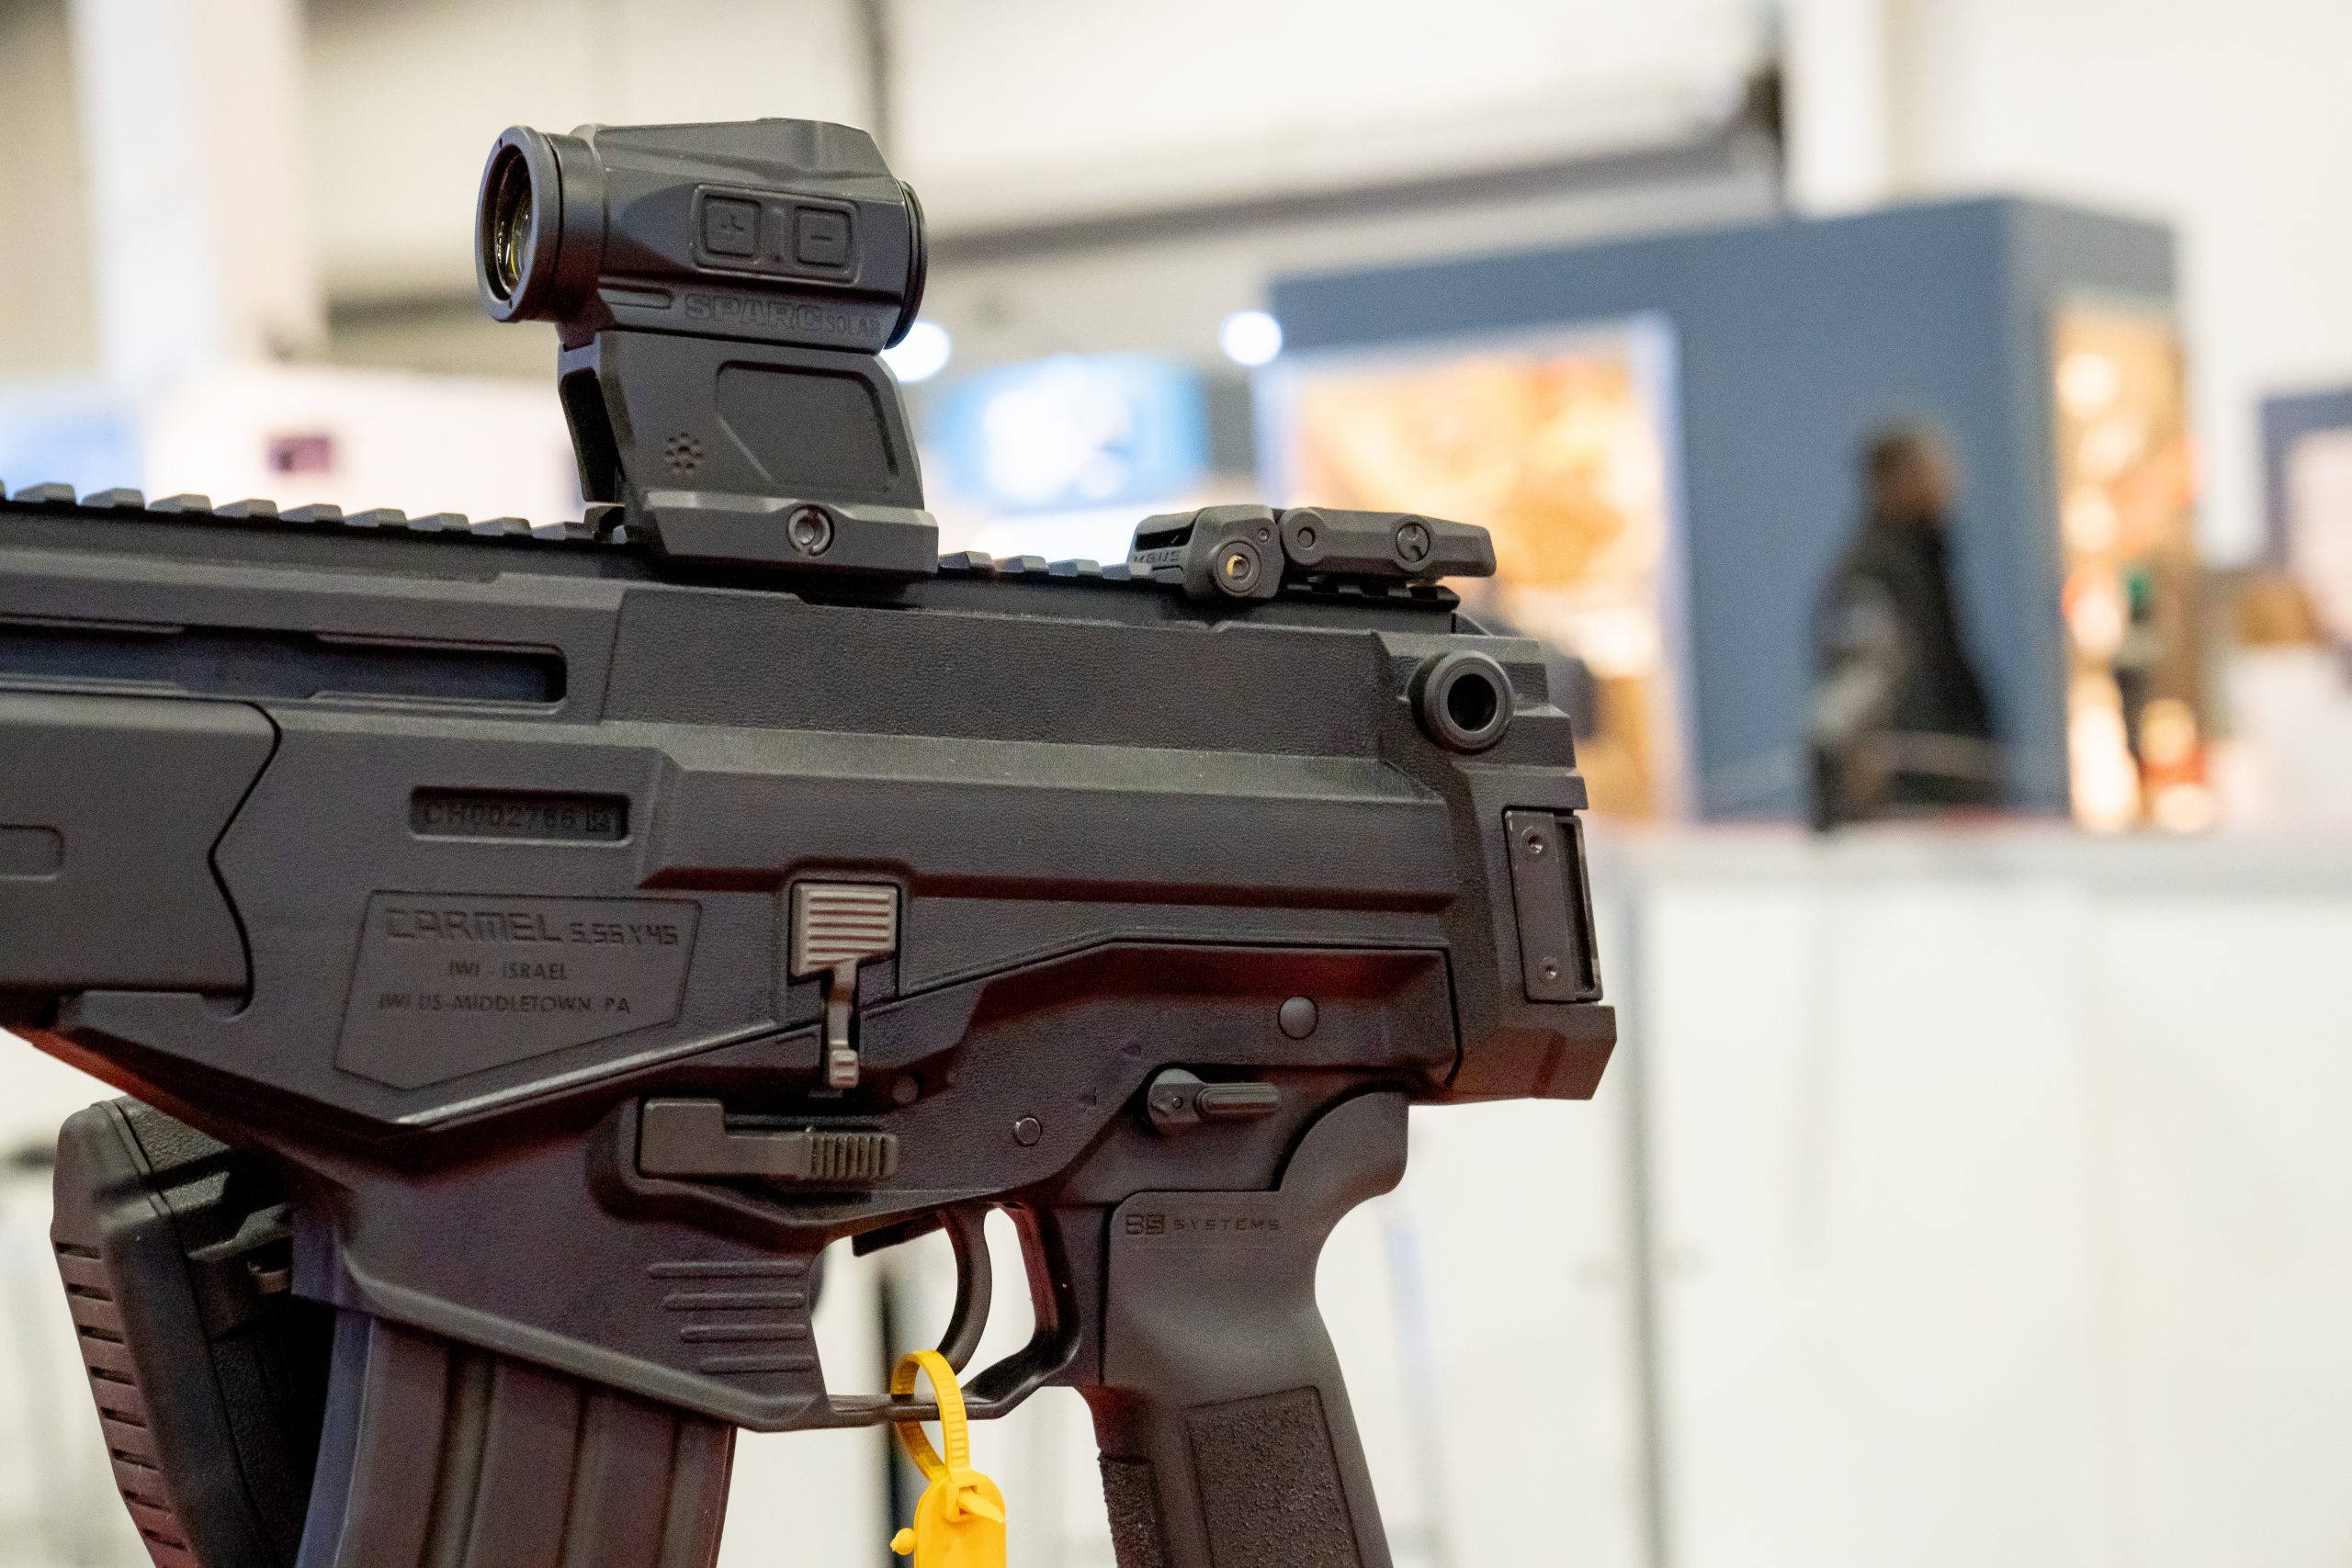
A rifle that originally popped up on the Brazilian branch of IWI’s media channels as a military/LEO export project, the Carmel intrigued US gun audiences immediately and it is no surprise why. The US has been awash in NextGen carbine hype since the FN SCAR and Magpul Masada. We’ve been seeking a ‘better’ rifle than the AR-15. We were promised an AR-15 successor.
We’ve been promised much and left underwhelmed, unless price was no object. But let’s be honest, price is always an object when it comes to logistics. I may be able to afford the latest high dollar super gat at a moment it releases and I may not, that’s subjective to my tastes and preferences. What doesn’t make sense from the cold calculations of performance vs logistics is getting a $3,500 rifle in the same performance envelope as at $1,500 rifle.
That era is ending.
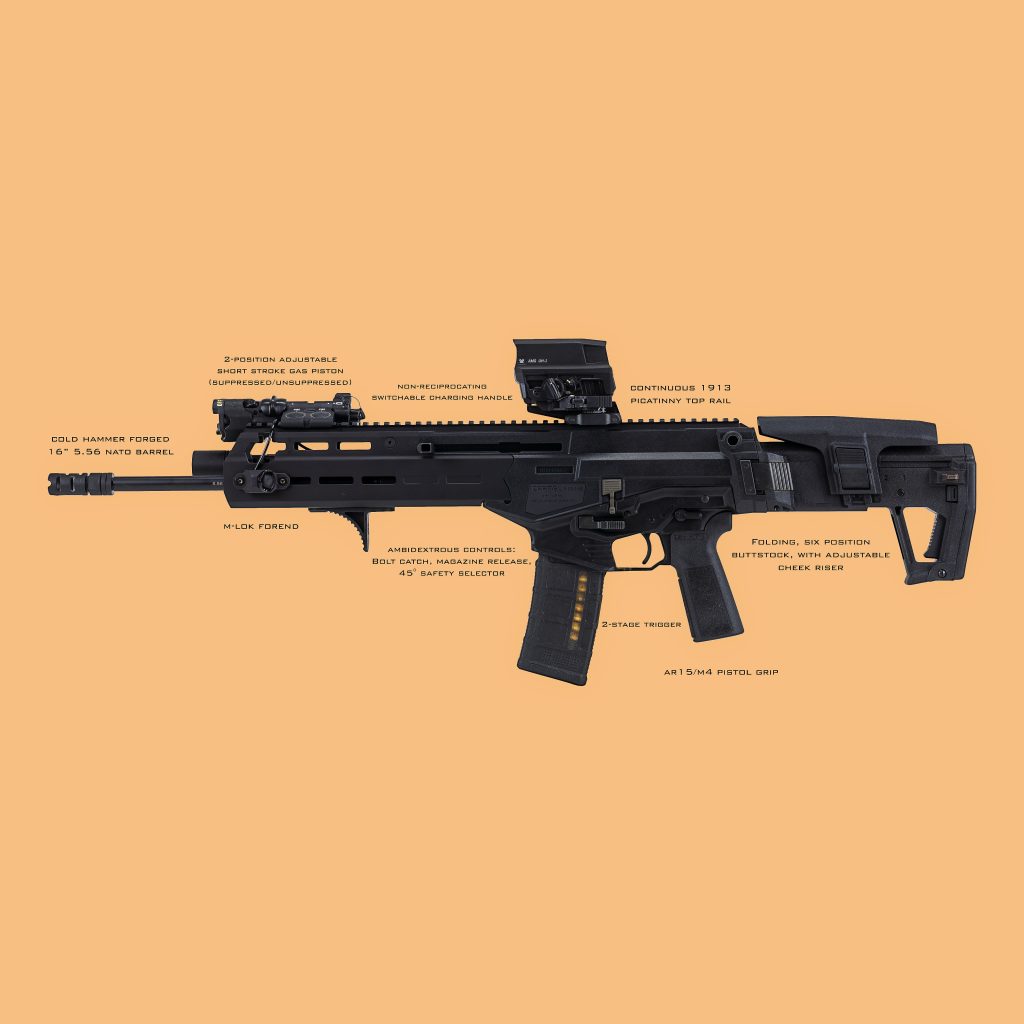
Specs:
16” 5.56 NATO CHF Barrel.
2-position adjustable short stroke gas piston (suppressed/unsuppressed).
Free float M-LOK forend.
Continues top 1913 picatinny rail.
Ambidextrous controls; bolt catch, magazine release, and 45° safety selector.
Gun cannot eject left side, only right side.
Non-reciprocating switchable charging handle (left or right side)
Two-stage trigger (proprietary)
M4/AR15 style pistol grip.
Folding buttstock with adjustable length of pull and adjustable comb height.
MSRP: $1,799
Freefloat M-LOK HandguardAdjustable Gas, 2-PositionAmbidextrous Fire ControlAdjustable Length of Pull and Comb, Folding ButtstockFolds to the right
The consensus of GWOT and post-GWOT seems to be that… there isn’t really a better rifle than the AR-15, not significantly better and not cost effectively better. Especially if we are considering one of the ambi-receiver designs that we see out of KAC, BG, FCD, LMT, LWRCi, Geissele and so on, the AR continues to hold its own just fine. .
But if there is one rifle type that seems to be emerging as the next weapon, because it is better in an objective performance sense, it’s a modern variant of the AR-18/AR-180. I’ll even include piston drive AR designs like HK, PWS, and LWRCi in this category. The modern modular takes on the AR-18 short stroke gas piston design are in most of the dominant modern rifle designs.
But price has controlled the NextGen market space more than any other factor. $2,000 gets you a fine selection of options in the AR-15 market, with top shelf materials and quality control. It hasn’t touched the NextGen carbines until now.
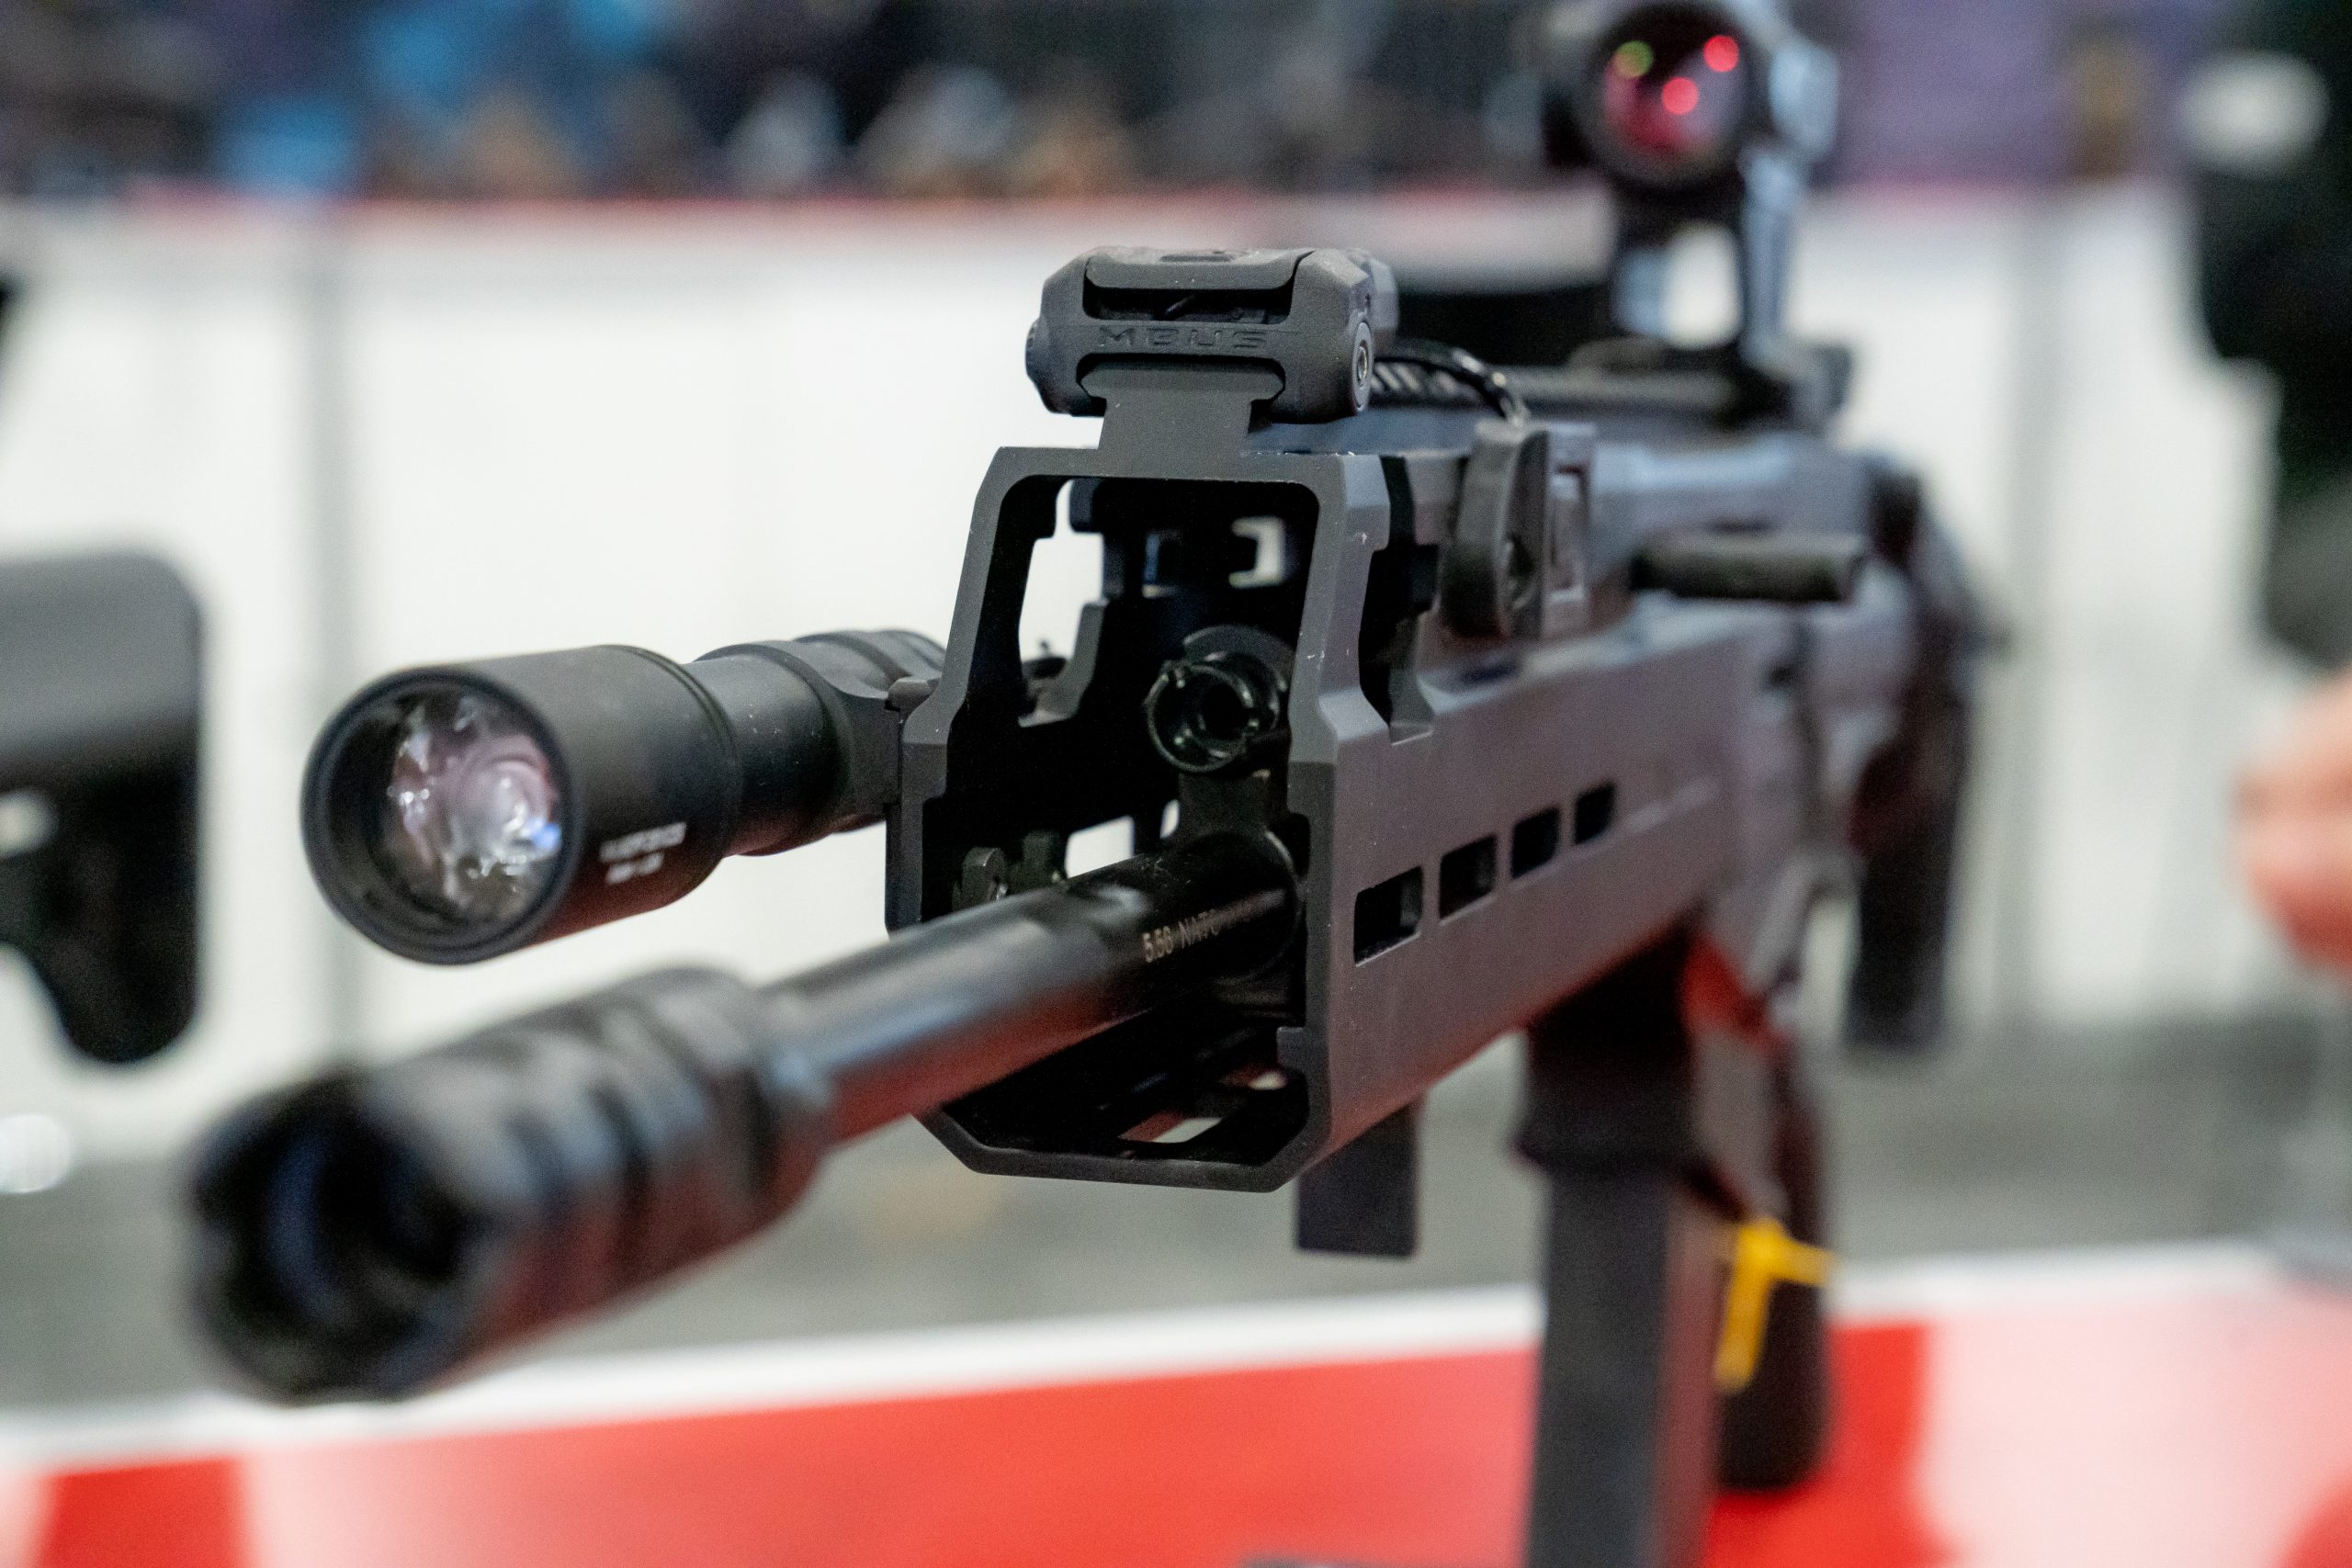
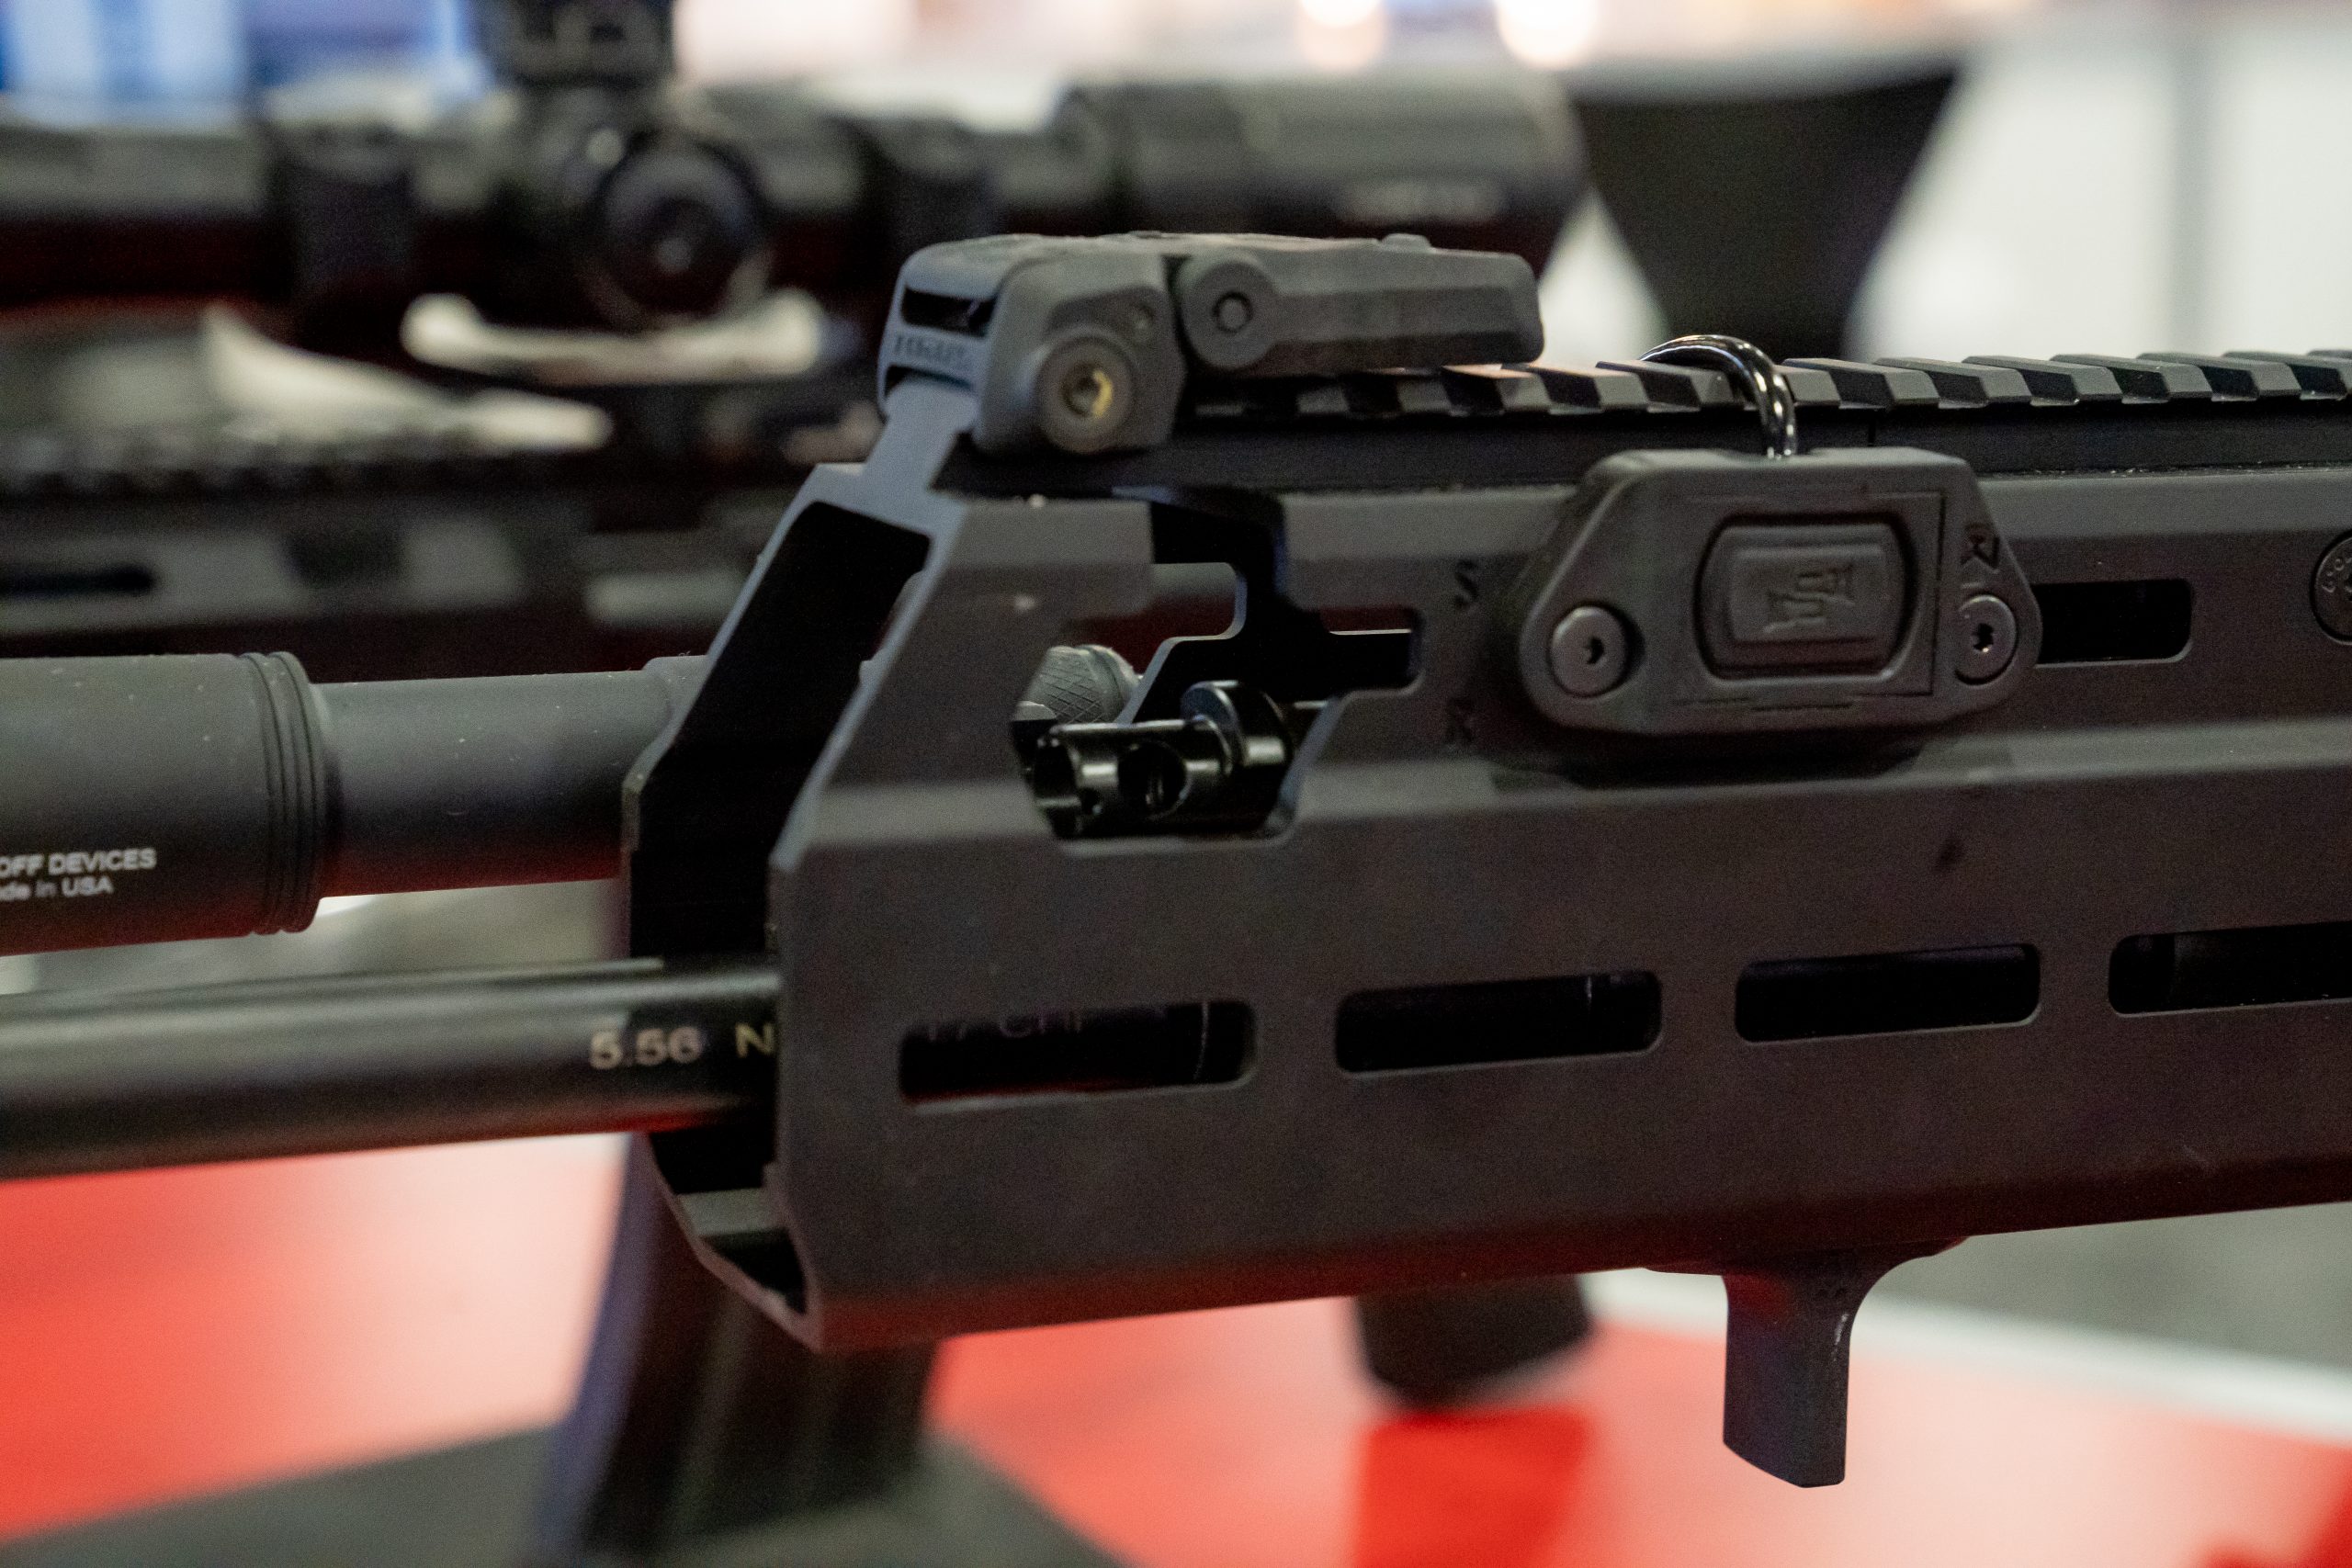
A keen eye and a good memory will note that the US version of the Carmel doesn’t match the original we saw from years back. The rifle has been upgraded in several respects for the highly discerning and prone to modify US Market.
We like longer handguards and M-LOK, we got those
We like the ability to utilize our preferred grip, we got that too.
Several small PIP type improvements from the US and International teams were incorporated into this latest version
The Carmel is entering a now aging field of NextGen 5.56 systems, but it is doing so with a stronger feature set than most of those rifles launched with. Notably, it’s trigger puts to shame most stock AR and NextGen rifle triggers. Better than stock SCAR, MCX, and mil-spec weight ARs, especially if you prefer a 2-stage. I do.
It’s greatest selling point however is the price, and given the market we are seeing emerge in 2023 new rifle owners looking for performance will notice when its sitting in parallel with high performance AR brands like BCM, Daniel Defense, and SOLGW.
From the company that brought to market the Masada, it’s just a fine 9mm, this rifle inhabits the spiritual succession of the Magpul Masada rifle concept. Fully featured and competitively priced.
I have no word on non-5.56 calibers at this time, we could potentially see .300BLK and SBR variants of the gun if the 5.56 does well. I suspect it isn’t going to be too difficult to turn into a ~14.5″ with a barrel chop and gas system tune-up either, a popular SCAR mod.
At the end of the day it’s just another 5.56x45mm offering, but we’re a 5.56x45mm hungry market and the Carmel hits so many of the quality and feature marks at just the right market price.
Just in time for Range Day at SHOT Show, Creepy Uncle Joe opened his mouth again on Martin Luther King Day. Typically, what fell out was more dementia-riddled gibberish.
Speaking at a King Day breakfast in DC, the geriatric document storage expert stated regarding so-called “assault weapons”,
“There’s no social redeeming value, deer aren’t wearing Kevlar vests out there. What the hell you need a assault, no I’m serious. And ban the number of bullets that go in a magazine. There’s no, no need for any of that.”
He continued to say,
“I love my right-wing friends who talk about the tree of liberty is water of the blood of patriots. [sic] If you need to work about taking on the Federal government, you need some F-15’s. You don’t need an AR-15” … “Think about the rationale for this. It’s about money. Money, money, money.”
Letting alone the basic incoherence of these sentences, remember that the child-sniffer-in-chief previously gave us such 2A-related gems as “you couldn’t buy a cannon”, “get a double barrel shotgun”, and “fire two blasts outside the house.”
This hilarious little ditty is worth the listen
The continued ignorance is astonishing. Perhaps Mr Sniffy follows the mantra that if you repeat a lie often enough, people will eventually believe you.
Sure, I’ll buy [another] shotgun, Mr President. And I’ll store it right next to my AR-15’s and my STANDARD capacity magazines, thanks.
Gemtech®, a leader in cutting-edge innovation and visionary designs within the suppressor industry, is proud to introduce the mid-length GVACTM Upper Receiver Group. The Gemtech GVAC is a complete upper assembly optimized for suppressed shooting. With its patented design, the GVAC barrel and gas system significantly reduces gas blowback and mitigates recoil in order to enhance the shooting experience and maximize performance. Its newly designed 16.1-inch barrel profile transfers weight back toward the chamber to improve control and is fitted for Gemtech’s proprietary flash hider, the ETMTM (Elite Taper Mount), which provides precise alignment and helps resist carbon lock.
The GVAC has a self-regulating Direct-Impingement system that includes an additional chamber to collect and counter the gases that can add recoil when shooting suppressed. The assembly is protected inside a 15-inch lightweight handguard that features a Picatinny top rail and 7-sided M-LOK® channels for the use of compatible accessories.
Redefine suppressed shooting with the Gemtech® GVACTM.
MSRP: $839.00 To stay up to date on products and news, visit the newly designed Gemtech website: GEMTECH Suppressors
What’s the trick?
It looks like, and I have no confirmation, but it looks like they’re using a take on the trick that high velocity tank cannons use to avoid gassing their crew. The gas trap is a really ingenious trick of physics that just generally hasn’t been applied on the micro scale of the rifle.
Costa Mesa, Calif. (Jan. 16, 2023) – 5.11 Tactical, the global innovator of purpose-built apparel, footwear, and gear, will unveil new products for 2023 exclusively this week in Las Vegas, Nev. at the Venetian Convention Center during the SHOT (Shooting, Hunting, Outdoor, Tactical) Trade Show in Booth #10334. Multiple product categories, including men’s and women’s apparel, load-bearing gear, footwear, and accessories, will be expanded to offer customers an extensive lineup of items for everyday use, outdoor adventure, fitness training, on-duty hours and more.
“We are excited to be back at SHOT in person this year after a couple year hiatus,” said 5.11’s Chief Marketing Officer, Debra Radcliff. “Getting the industry back together in person – media, dealers, and consumers – and presenting a collection we are incredibly proud of, will surely make for a great week ahead.”
“Our product team’s design and development process is always centered around innovation and serving those who serve,” said 5.11’s Vice President, Global Product, Matt Page. “Utilizing operator feedback throughout the line, we are excited to be launching this new 2023 collection to solve the problem-sets presented by our consumers so they can Always Be Ready to live a life bigger than themselves.”
Load Bearing
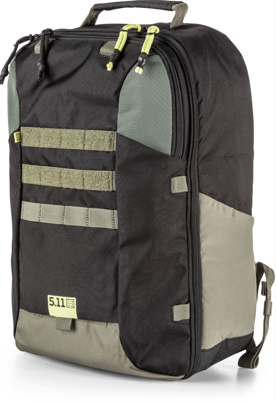
Lightweight enthusiasts and outdoor adventurers will be sure to love the new Skyweight Pack Collection. The Skyweight 36L Pack ($200) and Skyweight 24L Pack ($150) will both feature lightweight but durable construction with 330-denier ripstop nylon. Comfort will be ensured by lumbar pads with removable load bearing MOLLE hip belts, padded shoulder harnesses and cushioned back panels with airflow channels. Each pack will also offer hydration sleeves, integrated rain covers, compression straps, external stretch water bottle pockets, gear loops and MOLLE webbing for added storage options. Additional features of the Skyweight 36L include a front shove-it compartment, a secondary compartment, a clamshell opening for the main compartment and an internal frame.
Sky Lightweight 36L
The Skyweight Utility Chest Pack ($60) and Skyweight Survival Chest Pack ($45) will provide lightweight, compact and versatile load-bearing options that include removable chest harnesses and rear pass-through ports to allow for use as waist packs if desired. The harnesses will be adjustable and breathable with a quick-release system for easy use and hot pulls for quick access to concealed carry compartments. The 330-denier ripstop nylon construction will provide durability. Additional features of the Skyweight Utility Chest Pack will include a main compartment with a gusseted opening and internal organization, a front zippered pocket, front stretch-woven pockets, bottom webbing loops and gear loops for additional storage.
One of the most unique and distinguishing aspects of the Skyweight collection, is the cross-functionality and versatility across products. The detachable Skyweight hip belt can be utilized as a waist belt when attaching to the Skyweight Utility Chest Pack or Skyweight Survival Chest Pack, converting the chest packs to waist packs.
An all-new plate carrier is being added to the Load Bearing category with the QR Plate Carrier ($220). It will feature the brand’s patented Sierra Bravo™ Slide quick-release buckles for quick don and doff along with their proprietary high strength TAC-LAM™ laminate laser-cut MOLLE for patch, pouch and placard custom organization. Low-profile Hypalon® shoulder straps and padded body panels will provide comfort, minimalist Hypalon® + loop laminate cummerbunds and internal plate retention straps will create a secure fit for a lightweight carrier with maximum mobility.
QR Plate Carrier
The new 28” Single Rifle Case ($75) will be fully padded and built with 600-denier polyester construction for durability and protection while external MOLLE webbing and Gear Set™ compatibility offer additional storage. Internal retention straps and padded muzzle/butt-stock sleeves will ensure secure storage and transport
The new MOLLE Packable Pack ($60) and MOLLE Packable Sling Pack ($50) will take lightweight load bearing to another level with designs that allow them to be packed into integrated self-pockets. Once packed, both packs can be attached to any MOLLE platform for seamless storage when not in use. Both packs are constructed with recycled 70-denier nylon ripstop and will offer clamshell openings to main compartments, external stretch-woven water bottle pockets when unpacked, external stretch-woven pockets when packed, hydration compatibility, MOLLE straps systems and gear loops.
For outdoor adventures and customers on the go, the MOLLE Packable Poncho ($85) will offer packable protection in a versatile design that can be both worn or used as a shelter. It’s built with 40-denier ripstop nylon and a waterproof silicone ultra-tensile strength coating in addition to taped seams and an adjustable drawstring hood to provide durability and protection from the elements. The one-size-fits-all design fits over the body and backpacks while corner and edge webbing loops allow it to be tied down for use as a shelter.
For fitness enthusiasts, a PT-R Gym Backpack ($150) will offer a purpose-built design that allows users to conveniently and comfortably transport workout accessories and personal belongings. A ventilated shoe pocket provides a clean and sanitary option for hauling shoes and/or dirty workout apparel while a separate main compartment with a clamshell opening houses additional items. Removable front compression straps can be attached horizontally or vertically to secure accessories such as yoga mats or weight vests and padded construction in the shoulder pads, back panels and laptop compartment round out the durable and functional design.
PT-R Gym Backpack
Men’s and Women’s Apparel
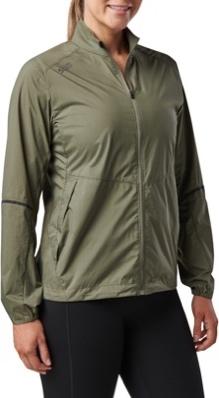
Customers in search of training apparel will enjoy new additions to the brand’s Physical Training-Ready (PT-R) lineup. The PT-R Women’s Packable Jacket ($65) provides all the functional performance and comfort customers have come to expect from 5.11. Its 100-percent nylon ripstop with PU coating provides a durable, water-resistant shell, while the venting at the upper back yoke helps prevent overheating. For ultimate versatility, it stows inside its internal pocket, allowing for easy access and storage no matter where the day ends up.
PT-R Women’s Packable Jacket
Another new item to the PT-R collection is the PT-R Women’s Max Effort Tight ($58), which utilizes a nylon/elastane blend with moisture-wicking and anti-odor finishes to keep women comfortable and focused through any workout. A contoured waistband offers extra support while also offering key and phone pockets, and the internal stretch draw cord creates an adjustable fit.
The Hog Hunter S/S ($60) is a camp-style short-sleeve shirt constructed from 100% polyester for durability to be ready for anything. Vent-Tac properties, side vents and a wicking finish maintain comfort when things heat up. A center-front RAPIDraw placket with faux button snaps provides fast access to EDC gear while chest patch pockets with button closures offer room for additional carry. The left chest pocket also features a pen guide that’s perfect for a tactical pen.
Hog Hunter S/S Shirt
For outdoor adventurers, the Trail Pant ($85) will offer a solution for backcountry hiking, overlanding and everything in between. The polyester/elastane blended construction, with Enduro-Flex™ properties and a built-in running gusset, prevents troublesome binding while a comfort waistband creates the right combination of support and flex. The style features 100% tricot mesh pocketing for breathability and knife reinforcement at the hand pocket openings offer uncompromising strength. Eight pockets keep EDC gear close at hand while a water-resistant finish helps shed moisture to keep users and their belongings dry.
Professional Apparel
XTU Long Sleeve Shirt & XTU Pants
New tops and bottoms with feature-rich designs will also be offered for public safety professionals, including the exciting introduction of the new V.XI Collection. Created to provide best-in-class performance for top-tier professionals, the V.XI Collection will be constructed with superior fabrics and materials integrated into highly strategic and purpose-built designs.
The initial offering of the V.XI Collection will include the XTU Line highlighted by the XTU Pant ($200) and the XTU Rapid L/S Shirt ($140). The XTU Pant will be feature-packed to maximize performance, function and versatility. It’s constructed with Ortholite® foam support in the strategically offset comfort waistband, a gusseted crotch and seat, large cargo pockets and no-melt/no-drip fabric to make it withstand the rigors of professional use. It also features a patented 3-in-1 kneepad design with a color-matching and removable external knee protection piece, sewn-in padding for a mid-layer and an internal pocket that houses a removable kneepad insert. An internal vertical adjustment and horizontal external adjustment allow users to create a custom and secure kneepad fit. A dual-directional zippered fly closure rounds out the versatility and utility of this feature-rich pant.
The XTU Rapid L/S Shirt will offer moisture-wicking and anti-odor performance, a Teflon finish and no-melt/no-drip fabrics for added functionality and protection. Dual pocket sleeves, adjustable cuffs, articulated pits, reinforced elbows and bar-tacking at key stress points will ensure the functionality needed by elite team units. Strategic body-mapping of the fabrics will offer comfortable layering with plate carriers and additional gear.
The Stryke PDU Twill Collection, available in both men’s and women’s sizing, continues to be the brand’s most popular new uniform line and will add new items in the Stryke PDU Twill Class B S/S Shirt ($84) and Stryke PDU Twill Class A Plus Pant ($84). The Stryke PDU Twill Class B S/S Shirt will deliver reliable performance and professional styling with Flex-Tac® mechanical stretch twill fabric, a Teflon™ finish, melamine buttons, integrated collar stays, 100% nylon taffeta collar stands, standard military sewn creases and a shirttail hem. Additional features include scalloped chest pocket flaps with pen slots, epaulettes, a camera/radio loop, a badge tag and a badge support strip.
Also crafted with Flex-Tac® mechanical stretch twill fabric and a Teflon™ finish, the Stryke PDU Twill Class A Plus Pant will offer a professional flat-front design paired with gusseted construction for unrestricted movement. A tunnel waistband with an internal ban roll will create comfort and stability while an elastic grip lining ensures shirts remain tucked in. A total of 6 pockets will also ensure gear is always within reach.
Footwear
A/T Mid Waterproof, EVO 2.0 8” AR 670-1, McClane Sneaker
Fans of 5.11’s A/T Series of footwear will be pleased to see a new A/T Mid Waterproof Boot ($170). This expansion of a customer-favorite will introduce waterproof protection to go with the brand’s A.T.L.A.S. technology to distribute weight, improve stability and return energy to offer all-day support, performance and comfort. Additional features include a 3D molded TPR toe and heel for protection, a welded-mesh upper for breathability and a high traction outsole.
Another exciting addition to the A/T Series will be the A/T Trainer 2.0 ($120). An amazing choice for fitness training, hiking, or even as a duty shoe for bicycle police and other high-milage positions, it features a new, highly durable TPU exoskeleton as well as 5.11’s A.T.L.A.S plate for maximum support. Newly integrated mesh construction in strategic locations adds a nice touch of breathability and comfort to this durable and comfortable option.
Fitnes enthusiasts will also find another great footwear option in the Max Grip Trainer ($110) that’s built for breathability, durability, and stability. It features a protective TPU cage, a mesh upper to prevent overheating, and a new MaxGrip outsole designed to create a stable platform and reliable traction for any workout while also supplying comfort and cushioning from the midsole. The TPU heel reinforcement creates added durability to withstand the most intense training sessions.
Both new for 2023, the EVO 2.0 AR 670-1 and Speed 4.0 8” AR 670-1 Boots are the first boots 5.11 has produced that have been approved to be in compliance with AR 670-1 requirements.
The EVO 2.0 8” AR 670-1 ($160) is designed to be AR 670-1 compliant and will come equipped with Force Foam® cushioning and an Ortholite® footbed for comfort and support that endures. Stitched slip-, oil-, and heat-resistant full rubber outsoles will protect feet in all conditions while a hidden knife pocket offers a special Always Be Ready touch.
Another AR 670-1 compliant option will be offered in the Speed 4.0 8” AR 670-1 ($120). These lightweight boots will provide outstanding features and value. Crafted with suede leather and 1200D nylon, Force Foam® heel cushioning, an Ortholite® footbed, and a high-abrasion mesh tongue, they will make sure feet are feeling good no matter the job. Additionally, the ASTM slip- and oil-resistant outsole is stitched for hard use and the brand’s heat deflect material helps shield feet from radiant heat from the ground.
The Foley Mid ($80) and Foley Low ($75) are new additions to the brand’s everyday ready family. A new updated Vibram outsole will allow them to provide better traction in all environments. Both versions also include increased cushioning and comfort with the addition of a drop in X-40 Ortholite® footbed and a nylon upper for added durability.
Through utilizing operator feedback, the McClane Mid ($110) will be introduced as the next generation of the Norris Sneaker family. The McClane features a new breathable tongue for all-day comfort and an updated Vibram outsole with better traction in all environments. The new drop-in X-40 Ortholite® footbed provides for more cushioning and comfort while the ASTM puncture-resistant board has also been added and certified to US standards.
Accessories
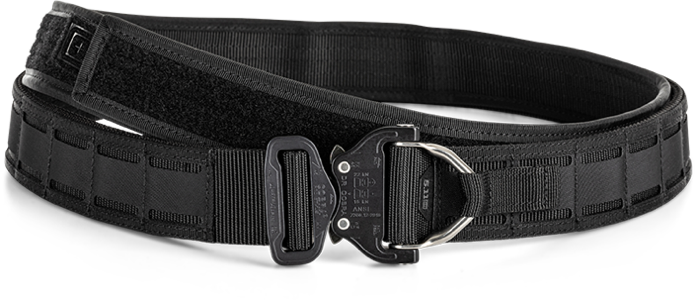
Competition Shooting Glove 2.0Maverick Battle Belt D Ring
In accessories, several popular product lines will be expanded or receive updates, including the Competition Shooting Glove and the Maverick belt collection.
The Competition Shooting Glove 2.0 ($35) will be enhanced with updated durability, an improved fit and a ring-cut index finger to the original design of the breathable and flexible gloves that maximize dexterity. Full functionality is provided by additional features such as a vented synthetic suede palm, touchscreen compatibility, padded knuckles, sweat wipe panels and adjustable closures.
The Maverick Battle Belt D Ring ($180) will build from the strategic design of the Maverick Battle Belt, which includes an inner/outer belt system, and add an integrated D ring for extra versatility. The inner nylon belt ensures support while also tightly securing the outer belt with a loop face. The outer belt is built with a proprietary TAC-LAM™ high-strength laminate on top of a dual nylon webbing and offers both top and bottom weaving for the convenient arrangement of gear. The hook backing and Austri Alpin COBRA® buckle allow quick attachment and removal without sacrificing security.
The Maverick EDC 1.5 Belt ($95) will expand the Maverick belt line to the everyday carry category with a clean style to match functionality. It will feature a pre-curved ergonomic design for maximum comfort and stability along with an Austri Alpin COBRA® buckle for easy use and a double-layer nylon webbing for durability.
“We’re constantly striving to provide our customers with durable and dependable products that they can rely on to live the mantra of Always Be Ready,” said Francisco J. Morales, CEO of 5.11 Tactical. “Whether they’re on duty, on a trail, or anywhere in between, we want to offer products they can count on during all aspects of life. We believe these new items enhance our existing product offering to do exactly that, and we’re excited to make them available this year.”
For more information about 5.11 Tactical and its product offering, or to find a 5.11 Tactical store near you, visit www.511tactical.com.
About 5.11, Inc.
With offices around the globe, 5.11 works directly with end users to create purpose-built apparel, footwear and gear designed specifically to enhance the safety, accuracy, speed, and performance of tactical professionals and technical enthusiasts worldwide. 5.11 products exceed rigorous standards, which have allowed the brand to establish a reputation for innovation and authenticity, and become the premier choice for those who always have to be ready. 5.11 products can be purchased online, through authorized dealers and retailers, as well as at 5.11 company-owned retail stores.
The boys are all here and we’re talking SHOT Show again! This time it’s predictions for the show, what’s going to happen and if there’s going to be anything interesting.
Taurus didn’t end it on the T.O.R.O wheel guns, out come the big bore revolvers now.
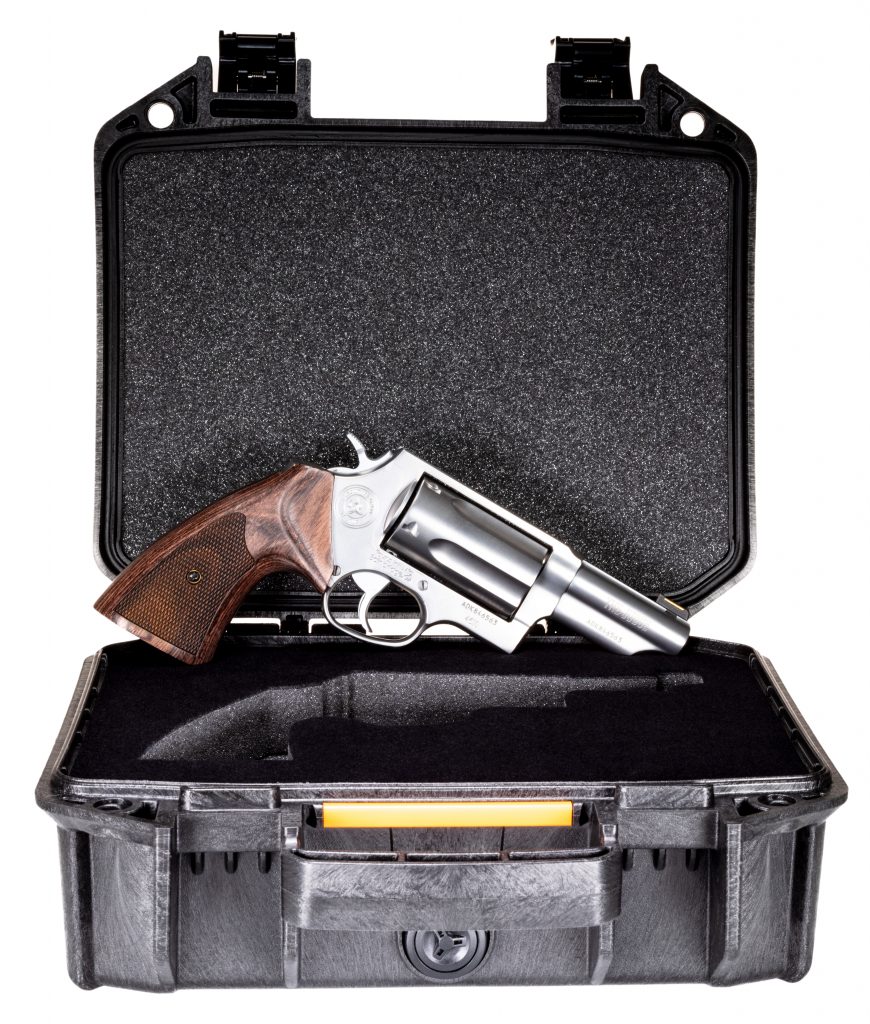
First up is the Taurus Judge, Executive Grade… Yes, you read that correctly and the picture is what you think it is.
January 2023, Bainbridge GA – In 2022 Taurus raised the revolver game with their first launch in the Executive Grade line. Taking their best-selling 38 Special 856 revolver, Taurus added custom touches that include a presentation grade grips, a hand fitted action, and practical enhancements for everyday carry.
Now the legendary Judge is next to receive the Executive Grade upgrades. The new Taurus Judge Executive Grade features the same hand fitted action as the previous 856 but is capable of firing the potent .410 bore shotgun shell as well as the beloved .45 Colt round. Accuracy with .45 Colt rounds is enhanced, as well. During testing, the new Judge Executive Grade successfully engaged targets out to 100 yards. This means that the Judge is now the perfect close in defense gun…that can also reach out and touch dangerous game at long range.
The Executive Grade treatment on the Judge also includes a first of its kind brass bar front sight. This sight provides unrivalled contrast while maintaining the ability for rapid target engagement.
If you’re in need of a backcountry EDC that can literally do it all, the Executive Grade Judge is here.
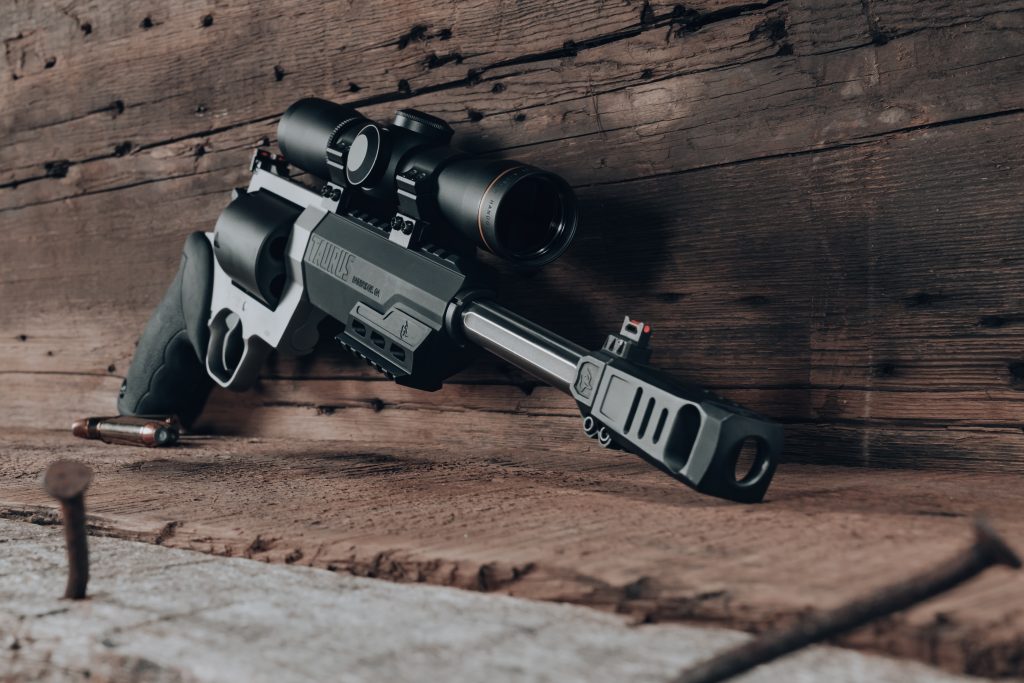
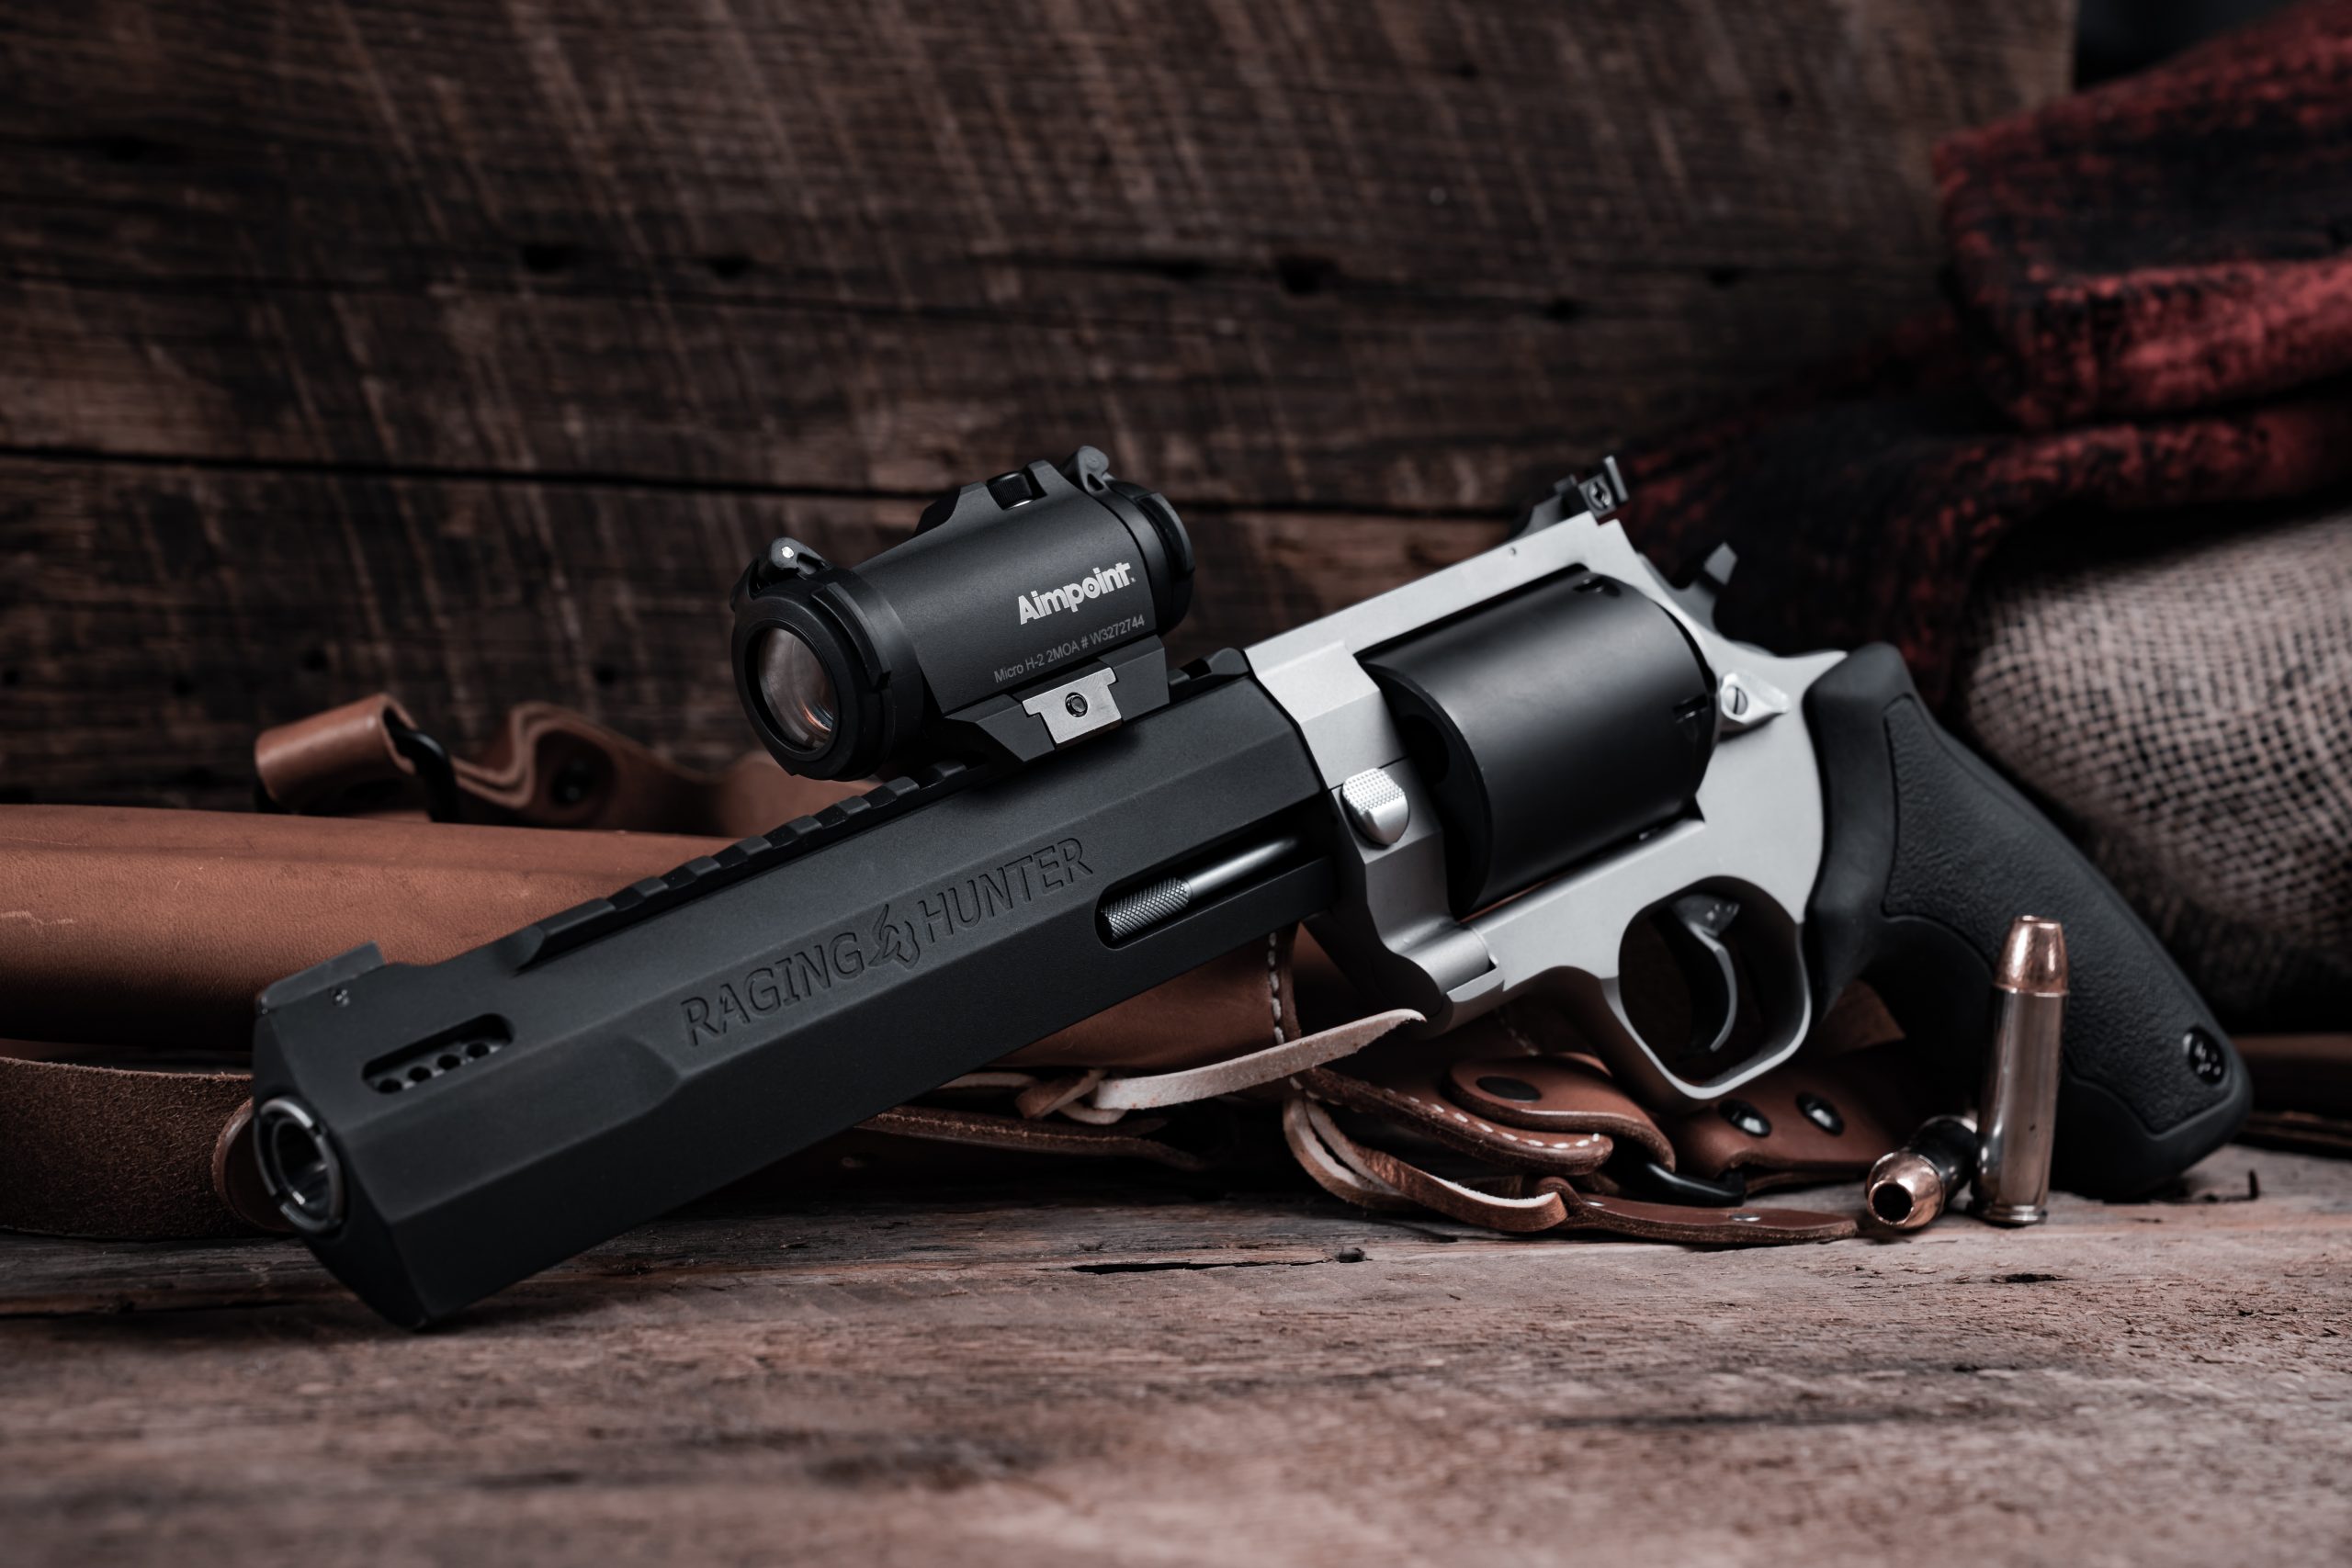
Next, Bigger Yet with the 10″ 460 and the 500 Raging Hunters
As if being the most popular, and award winning hunting revolver wasn’t enough, the Taurus Raging Hunter line is expanding. First, we’re adding the new Raging Hunter 500 Magnum, officially chambering the toughest double action hunting revolver in the world in the world’s most powerful production handgun cartridge. But, as they said, wait there’s more! Because we’re also adding a 10.5 inch barrel model to the 460 Magnum Raging Hunter lineup, which features a proprietary compensator that effectively tames the 460 Magnum recoil.
First up, there’s the all new 10.5 inch barrel Raging Hunter in 460 Magnum. The prominent features on this gun start with the custom compensator. This first of a kind muzzle brake tames the felt recoil of 460 Magnum for the shooter, which legitimately allows rapid follow up shots. Up next there are the top and bottom picatinny rails. The top rail is perfect for optics, whether they’re magnified handgun scopes or wide field-of-view red dot sights. The bottom rail allows shooters to easily attach bipods, shooting sticks, or even a weapon mounted light if you wanted to.
Then of course there’s the new 500 Magnum Raging Hunter. Dirty Harry may be a little dated as a reference, but if he was packing a revolver in 2023, it would be a Taurus Raging Hunter 500 Magnum, because it’s the most powerful handgun in the world. Like all Raging Hunters, it features the Taurus double lock system, which ensures reliability when dealing with super high pressure magnum rounds. Additionally, it’s available in a range of barrel lengths, which means its perfectly suited to duties as a dangerous game backup gun, or a primary hunting gun.
The Raging Hunter 500 Magnum and 10.5 inch 460 Magnum launches coincide with the launch of Taurus HUNT. This brand within Taurus coincides with our longstanding presence in the world of handgun hunting, and showcases our commitment to hunters, sportsmen, and outdoorsmen going forward.
About Taurus:
Taurus Holdings, Inc. (“Taurus”) and its subsidiaries continues to evolve and produce revolutionary new products. In addition, new standards for quality and efficiency help deliver reliable and affordable guns to the market. Taurus is based in Bainbridge, Georgia. Taurus is owned by Taurus Armas, S.A. which is a publicly traded company based in Brazil. Taurus Armas S.A. manufactures a wide variety of consumer and industrial products that are distributed worldwide.
The boys are all here and we’re talking SHOT Show again! This time it’s predictions for the show, what’s going to happen and if there’s going to be anything interesting
Let me iterate a couple points here. This rule is not “published” yet. It won’t be official until it is posted on Regulations.gov. This is only the final text so we know what is within.
The Good News.
Free Tax Stamps.
Yes, the $200 NFA tax for SBRs and SBSs is being waved for braced firearms going onto the NFA registry. I intend to hit that button like its my primary attack in Diablo III until I’m out of things to hit.
It also doesn’t ban braces. It grades firearms with braces on them.
The Bad News.
This thing is convoluted. Even the 5 paragraph summary is vexing.
It uses the ‘points‘ system that we wrote about way back when to evaluate whether a firearm is Title I or Title II.
The Hilarious.
In the text, the ATF claims that the ‘affected’ are about 1.4 million people. Just… just think about how wrong that is and laugh. Try 10 times that many and I’d believe you’re in the ballpark.
Also, if this rule gets the big smackdown like the bumpstock rule did in 5th Circuit all it accomplished was giving away millions of free tax stamps. I’m okay with that outcome because that’s potentially $2.8 Billion the ATF doesn’t get out of us.
The Ugly.
This rule, once it hits the registry, will have a 120 period to submit your guns into the NFA before they become subject to grading and potentially a felony charge. How many people won’t get the notice? How many people won’t know the perfectly legal gun they got a few years back is now a felony? Who’s going to get swept up and charged under this law, and we can only call it a law because none of this actually exists in the NFA or GCA texts. That is also the most likely reason this gets the big ban hammer in court like 5th did for bumpstocks, this whole novel is a big stretch on ATFs authority. But the administration demanded this of the ATF instead of Congress whose job this actually is.
But who gets run through in the meantime?
Keep an eye on the Registry. The clock will officially start when it hits print there.
The Unknown.
I don’t know for certain, but it sounds like eForms will accept amnesty applications starting today. That would’ve been the smart play. But I DON’T KNOW that it is. I would wait, personally, until the final rule is published in registry so that the dates all line up and they can’t get you on a technicality and charge the $200 instead of the waived amount.
You might be fine, but timelines matching is a thing. Especially in legal documents.
In a baffling subversion of the phrase ‘Better late than never’, Colt and CZ put out a press release this morning that they will be attending SHOT Show 2023.
West Hartford, CONN. (January 13, 2023) – The 44th SHOT Show is just around the corner, and Colt is delivering multiple new product releases. The Shooting, Hunting, and Outdoor Trade Show will take place on January 17 – 20, 2023, at the Venetian Expo and Convention Center in Las Vegas, expanding into the new Caesars Forum and adding more exhibit space totaling over 800,000 net square feet. It is a significant event for the shooting sports industry, with everyone present, from optics to tactical gear and hunting manufacturers.
Colt manufactures quality firearms for the military, law enforcement, and civilian markets. Since Samuel Colt’s first firearms patent in 1836, Colt is “Still Making History!” Colt will present its complete product line, including the newest CBX Bolt-Rifle, at booth 12857. Dealers, distributors, and media are welcome to visit while discussing and getting hands on new products being released for the first time at the show.
In addition to showcasing the newest products and talking with factory experts, the booth will have appearances from Colt Pro Shooter team including, Mark Redl, Jalise Williams and Justine Williams, and Outdoor Channel TV Stars, Gregg Ritz from Hunt Masters and Louie Tuminaro from The Gunfather: Restorations.
This is really late to say that. Like, people are flying there right now, and most others have long since decided whether they were going or not and purchased accordingly. Therefore this is a really weird time to say that you’re doing the thing that people expected you to do since there was no indication otherwise. We’re long past the window where people on the fence about the show are going to be able to easily book attendance and schedule it, and everyone else already assumed you were going to be there. Because why wouldn’t you be?
So who was this for?
It’s not even a good tease of anything. Taurus made a movie trailer to hype the return of their revolvers in the Rossi line and dropped optic ready carry revolvers today. Magpul’s usual creativity is on display for this week. IWI is going with their tried and true method of absolute silence until Tuesday, when people actually walk into the booth. It’s bizarre, but it works in a contrarian way to do a similar thing to the full court media press.
Colt and CZ are just like, “Oh yeah, hi! See ya next week like we already were going to.” It’s like your cousin saying, “Hey, I’m going on vacation with you next week.” when its the annual big family vacation, they’re always there at it, there was no indication they wouldn’t be there this year too, and its far too late to change plans if they weren’t going, but they are going so… yeah. Neat.
The mad lads a Taurus are out in force for 2023, led by our very own revolver hobbit Caleb Giddings.
Taurus, without too much fanfare, put together a team in 2022 with a simple goal in mind. Make Taurus the serious firearms company their market space deserves. They have the customer base, and that customer base shouldn’t be the perpetual butt of all industry jokes with the manufacturing power Taurus commands.
So they’ve done something about that.
This is one of the wilder variations on that something and so far the product I’m most looking forward to running this year. I bought ammo months ago for this.
T.O.R.O. Revolvers
January 2023, Bainbridge GA–In October of 2023 we asked consumers what innovation they wanted to see on the heels of the 856 Executive Grade. The answer was swift and unanimous: a small frame optics ready revolver.
You asked, we answered. Introducing the first ever optics ready small frame revolvers, the Taurus 856 T.O.R.O. and the Taurus 605 T.O.R.O. Both revolvers are milled at the factory to accept the optics plate designed specifically for this application. The plate itself accepts compact red dots designed for the Holosun K footprint. For example, you could take the new856 T.O.R.O. and mount the Holosun EPS Carry on it and be ready to roll.
The advantages to a red dot on a revolver are significant. Obviously, red dot sights are easier for many people to shoot. Additionally, a red dot can be zeroed to a specific grain weight or type of ammo, which wasn’t an option with a traditional fixed sight revolver.
Both the 856 and 605 T.O.R.O. are based on the incredibly popular Defender series from Taurus. These revolvers feature all steel construction, three-inch barrels, and a replaceable front sight. The triggers are Taurus’ excellent double-action/single-action trigger, which provides a smooth but fast pull in double action for serious defensive shooting.
Most importantly, we’ve partnered with industry leading brands in the concealment space so that when you get your T.O.R.O. revolver, you won’t have to wait six months for a holster. And of course, we’ve maintained our commitment to making reliable, affordable firearms. This means that the new 856 and 605 T.O.R.O. revolvers will have MSRPs that range from under $450 to $470 depending on whether you select the 6-shot .38 Special 856, or the 5-shot .357Magnum 605 in black or stainless.
Some companies talk about how “innovative” they are. We didn’t talk. We just did it.
About Taurus:
Taurus Holdings, Inc. (“Taurus”) and its subsidiaries continues to evolve and produce revolutionary new products. In addition, new standards for quality and efficiency help deliver reliable and affordable guns to the market. Taurus is based in Bainbridge, Georgia. Taurus is owned by Taurus Armas, S.A. which is a publicly traded company based in Brazil. Taurus Armas S.A. manufactures a wide variety of consumer and industrial products that are distributed worldwide.
“We want them to be strong, we want them to find confidence and independence, and this is my way of helping”.-Lena Miculek about new firearms users and ROSE.
SIG Sauer recently released photos of videos of a SIG P365 with pink controls. A pink trigger, pink slide lock and release, and pink takedown lever. What most didn’t do though, was to look past the gun. SIG Sauer ROSE is not a pink gun, it is a program started by Lena Miculek to support those who need to be looked at more, the female firearm user.
ROSE is Lena’s dream to help give firearms users the support and confidence that they need to move through the often overwhelming firearms world. Photo: Sig Sauer
The Program
This program is directly dreamed up by Lena Miculek. Dream meaning dream. In the video below (that was rudely privatized by Sig Sauer but can still be accessed by clicking below) Lena talks about how she is ready to use her knowledge and skills to help others. This time being women especially. ROSE is not a product, but a program.
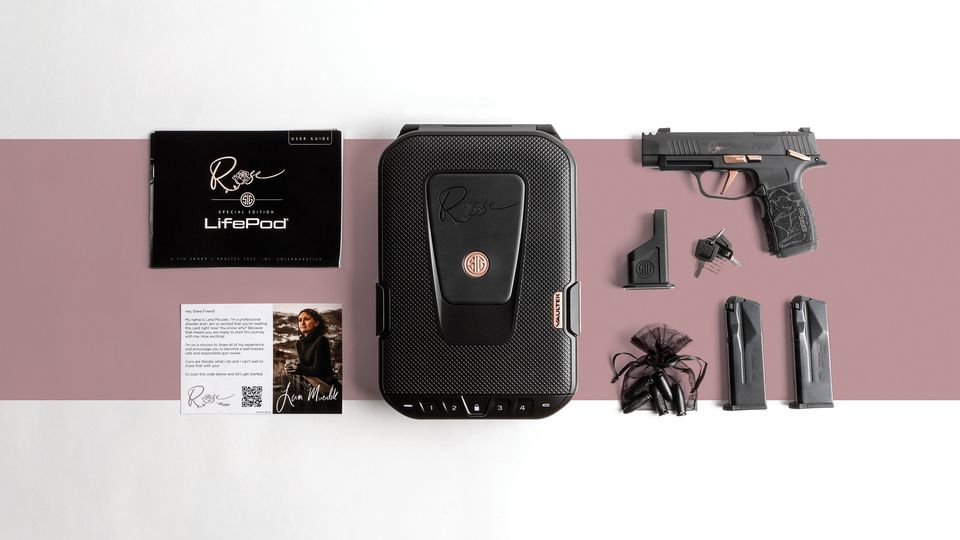
The Kit
The SIG SAUER ROSE kit includes either a custom P365-XL COMP ROSE in 9MM or a P365-380 ROSE with:
two magazines,
a signature ROSE Vaultek Lifepod™ pistol safe with built-in lock system and TSA approved,
five polymer dummy rounds for safe dry-fire practice,
a magazine loader,
and a personal note from Team SIG professional shooter Lena Miculek, which includes access to the QuickStart guide and online training series.
What really sets this kit apart from others are the dummy rounds and the pistol safe.
Good dummy rounds are often hard to find which can lead to unsafe dry fire, especially with novice shooters. The fact that this kit which is truly not just a gun but a way to support new female shooters thought about that shows what they truly care about, the shooter.
As far as the Vaultek Lifepod, this is essential for women who are new shooters. One of the first questions that caring firearms owners will have is “how do I keep the handgun away from my kids”. It is an important question that needs a good answer. Sadly, many gun owners don’t really find a good answer quick enough to own a safe locking case the day that they pick up their carry gun. This changes that with a lockable and TSA approved pistol safe. Safe and able to travel from day one.
From left to right, a training program by Lena Miculek, handwritten note from Lena, Vaultek Lifepod, custom SIG P-365XL Comp, ammo loader, vault keys, dummy rounds, and two magazines, Photo: SIG Sauer
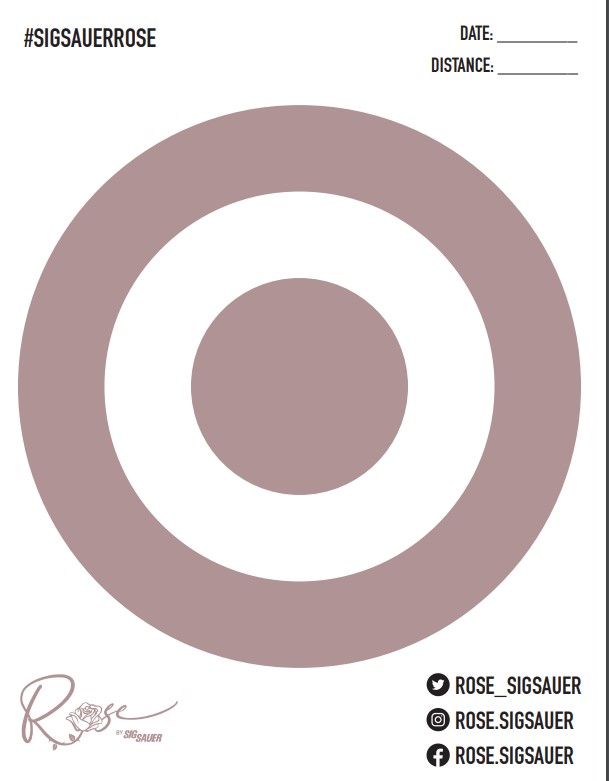
There is also a new target released that can be downloaded here.
Download at SigSauer.com/Rose
The Gun
The SIG P365 has already been noticed and adorned by females and males alike. It is the perfect carry pistol due to shooting like a full size but being small enough to carry comfortably with no worry. The 365 has gotten even better with the release of the P365-XL Comp. A larger carry sized gun with integral compensator, which is available in the ROSE Kit. (which is a good deal in itself)
When it comes to ROSE most will first notice the custom firearm which actually is pretty sharp. The custom P365 can be chosen as the P365-XL Compensated or the P365 in .380. There is a custom stippled grip with a rose like pattern, and all controls are in rose included the slide lock, takedown lever, trigger, and safety. yes, there is a safety on this custom 365.
Valentines Day present anyone???
More Information
Edited to add 20:30 on 12 Jan: There have been a couple of purchases today of the kit that I read about in the ROSE Community. Looks like only local dealers are selling them right now and the price tag was $1065 at that specific dealer.
Information as far as purchasing has not been released yet. Everything was just released on 12 January 2023, so be patient.
If you are a female and want to join the online Facebook community click here
To see more information publicly please follow/like ROSE’s Instagram and Facebook.
So maybe next time due to this program, we can look past just the “pink gun”.
The Leupold Mark 4 MR/T 2.5-8x was the DMR optic of choice for the Mk12 MOD1s we were fielding. It was a peerless piece of glass at the time and allowed those 12’s to reach 600 with ease. It blew our ACOGs away on clarity and distance.
But we’re more than a decade passed the time when that optic was the cutting edge of the precision tactical melding that DMRs like the Mk12 were giving to troops. Optics have evolved but the role, that capability range is now able to be filled by an increasingly competent field of glass.
Leupold is back to stake their claim to the space they owned once again. the Mark 5HD line has multiple places in the precision distance world already, melding it into the precision tactical space where their Mark 4 line performed so well is a logical place to excel.
Here’s the release.
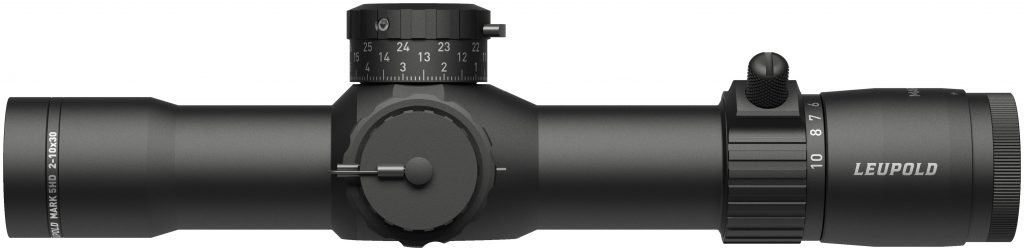
BEAVERTON, Ore. — Leupold & Stevens, Inc., provider of the world’s most rugged, lightweight, and clear sport optics, is pleased to announce the introduction of the new Mark 5HD 2-10×30 riflescope.
The 2-10×30 further expands Leupold’s award-winning Mark 5HD family. The Mark 5HD redefines accuracy, precision, and optical performance for shooters–and does so in a package that embodies rugged reliability. The 2-10×30 delivers on those same traits, but in a shorter, lighter scope that’s ideal for carbines and designated marksman rifles.
“The 2-10×30 is still the same game-changing scope that shooters across the country have adopted,” said John Snodgrass, Tactical Product Line Manager for Leupold & Stevens, Inc. “It has the unparalleled optical performance, it has the Three-Turn ZeroLock adjustments, and rare for a 2-10x, it has side focus. It’s got it all. We’re excited to announce that, going forward, the Mark 5HD’s industry-leading feature set will be compatible with even more rifle builds and platforms.”
The Mark 5HD redefines accuracy, precision, and optical performance for long-range shooters. Get behind one and you’ll see the difference, from its superior edge-to-edge clarity to its extreme low-light performance. With three revolutions of elevation adjustment, the Mark 5HD was made to max out the performance of the latest long-range rifles and ammunition. It features Leupold’s Professional-Grade Optical System, which offers unmatched light transmission that’s designed to outperform in the most challenging lighting conditions, industry-leading glare reduction for a clear image in harsh, direct light, and the resolution and clarity that professional guides and shooters demand in the field.
The Mark 5HD 2-10sx30 itself is 11 inches long and weighs 24 ounces. Three models will be available at launch, all in FFP: One with a TMR reticle and milliradian adjustments, one with an Illuminated TMR reticle and milliradian adjustments, and one with a PR1-MOA reticle and MOA adjustments.
The Mark 5HD is designed, machined, and assembled in the USA, and is covered by Leupold’s Full Lifetime Guarantee.
Founded in Oregon more than a century ago, Leupold & Stevens, Inc. is a fifth-generation, family-owned company that designs, machines, and assembles its riflescopes, mounting systems, tactical/Gold Ring spotting scopes, and performance eyewear in the USA. The product lines include rifle, handgun, and spotting scopes; binoculars; rangefinders; mounting systems; and optical tools, accessories, and pro gear.
J.B. Pritzker signed the useless law into existence and have added themselves to the pile of pending states facing lawsuits from firearms rights organization.
“No Illinoisan, no matter their zip code, should have to go through life fearing their loved one could be the next in an ever-growing list of victims of mass shootings. However, for too long, people have lived in fear of being gunned down in schools, while worshipping, at celebrations or in their own front yards,” Pritzker said in a statement. “This legislation will stop the spread of assault weapons, high-capacity magazines, and switches and make our state a safer place for all.”
It won’t, but it will give you some political points if you want to chase a presidential nomination in the future on team Democrat. Indiana didn’t ban ‘assault weapons’ and the constant line is that it isn’t guns in Illinois they’re coming from Indiana.
There are currently 5 states whose AWB are on the chopping block and if any one of them fall all state bans will follow. The Bruen decision with shall issue concealed carry will have a sequel with similar fallout in similar states.
If any state has wasted their time, unlike California’s AWB or New York’s SAFE Act this one is likely to suffer a far quicker demise with the state of cases.
This is probably an empty gesture that will screw with Illinois residents and businesses that sell to them, and the Illinois government will be clear of all the costs to those businesses. They unfortunately just have to take the beating until it the dust settles.
The AR selector is the first one since their collaboration with Noveske on the STS (probably my favorite selector series), the cable organizers are going to be popular (especially priced as I believe they will be), and the barrier stops will find homes on rifles too I am certain.
They opened the week by kicking the case industry in the junk, however.
The the junk pluck foam that never ends up being quite right or having to cut foam with a knife all got put on notice with the DAKA Grid Organizer
That was complimented by Magpul getting into the case game themselves.
The polymer wizards having stayed out of this obvious market space this long is probably the most surprising thing, but cases are still not glutted by any stretch. Pelican or Plano are basically the ‘on brand’ options and, having one of each, I could easily add two more cases, especially ones I can set up for a trip, and make the life of travel and adventure a little easier.