Have you ever run into a situation where you brought boots designed for situation A, but now you are facing situation B? When I deployed to Afghanistan, I assumed I’d be dealing with deserts and some farmland. I certainly did, but I also dealt with 17th-century irrigation methods, mud fields, and the Helmand river. We were wet a lot, all the time, and more than I ever planned. Sometimes it was waist-high and unavoidable. Other times it was just enough to get my foot wet for the rest of the patrol. You learn things in these situations, and this one taught me how to waterproof your boots with nothing more than a candle and a little heat.
I learned this in Afghanistan but have since used it to go hunting, hiking, and more. Hell, I use it when I cut my grass in the morning to avoid my feet getting soaking wet from the gathered dew. It works for boots and for most shoes. Lightweight running shoes or cross-trainers often benign the type of shoe that doesn’t work. This works with your Vans, Doc Martens, Bates Jungle boots, and more.
Waterproofing Your Footwear – What You’ll Need
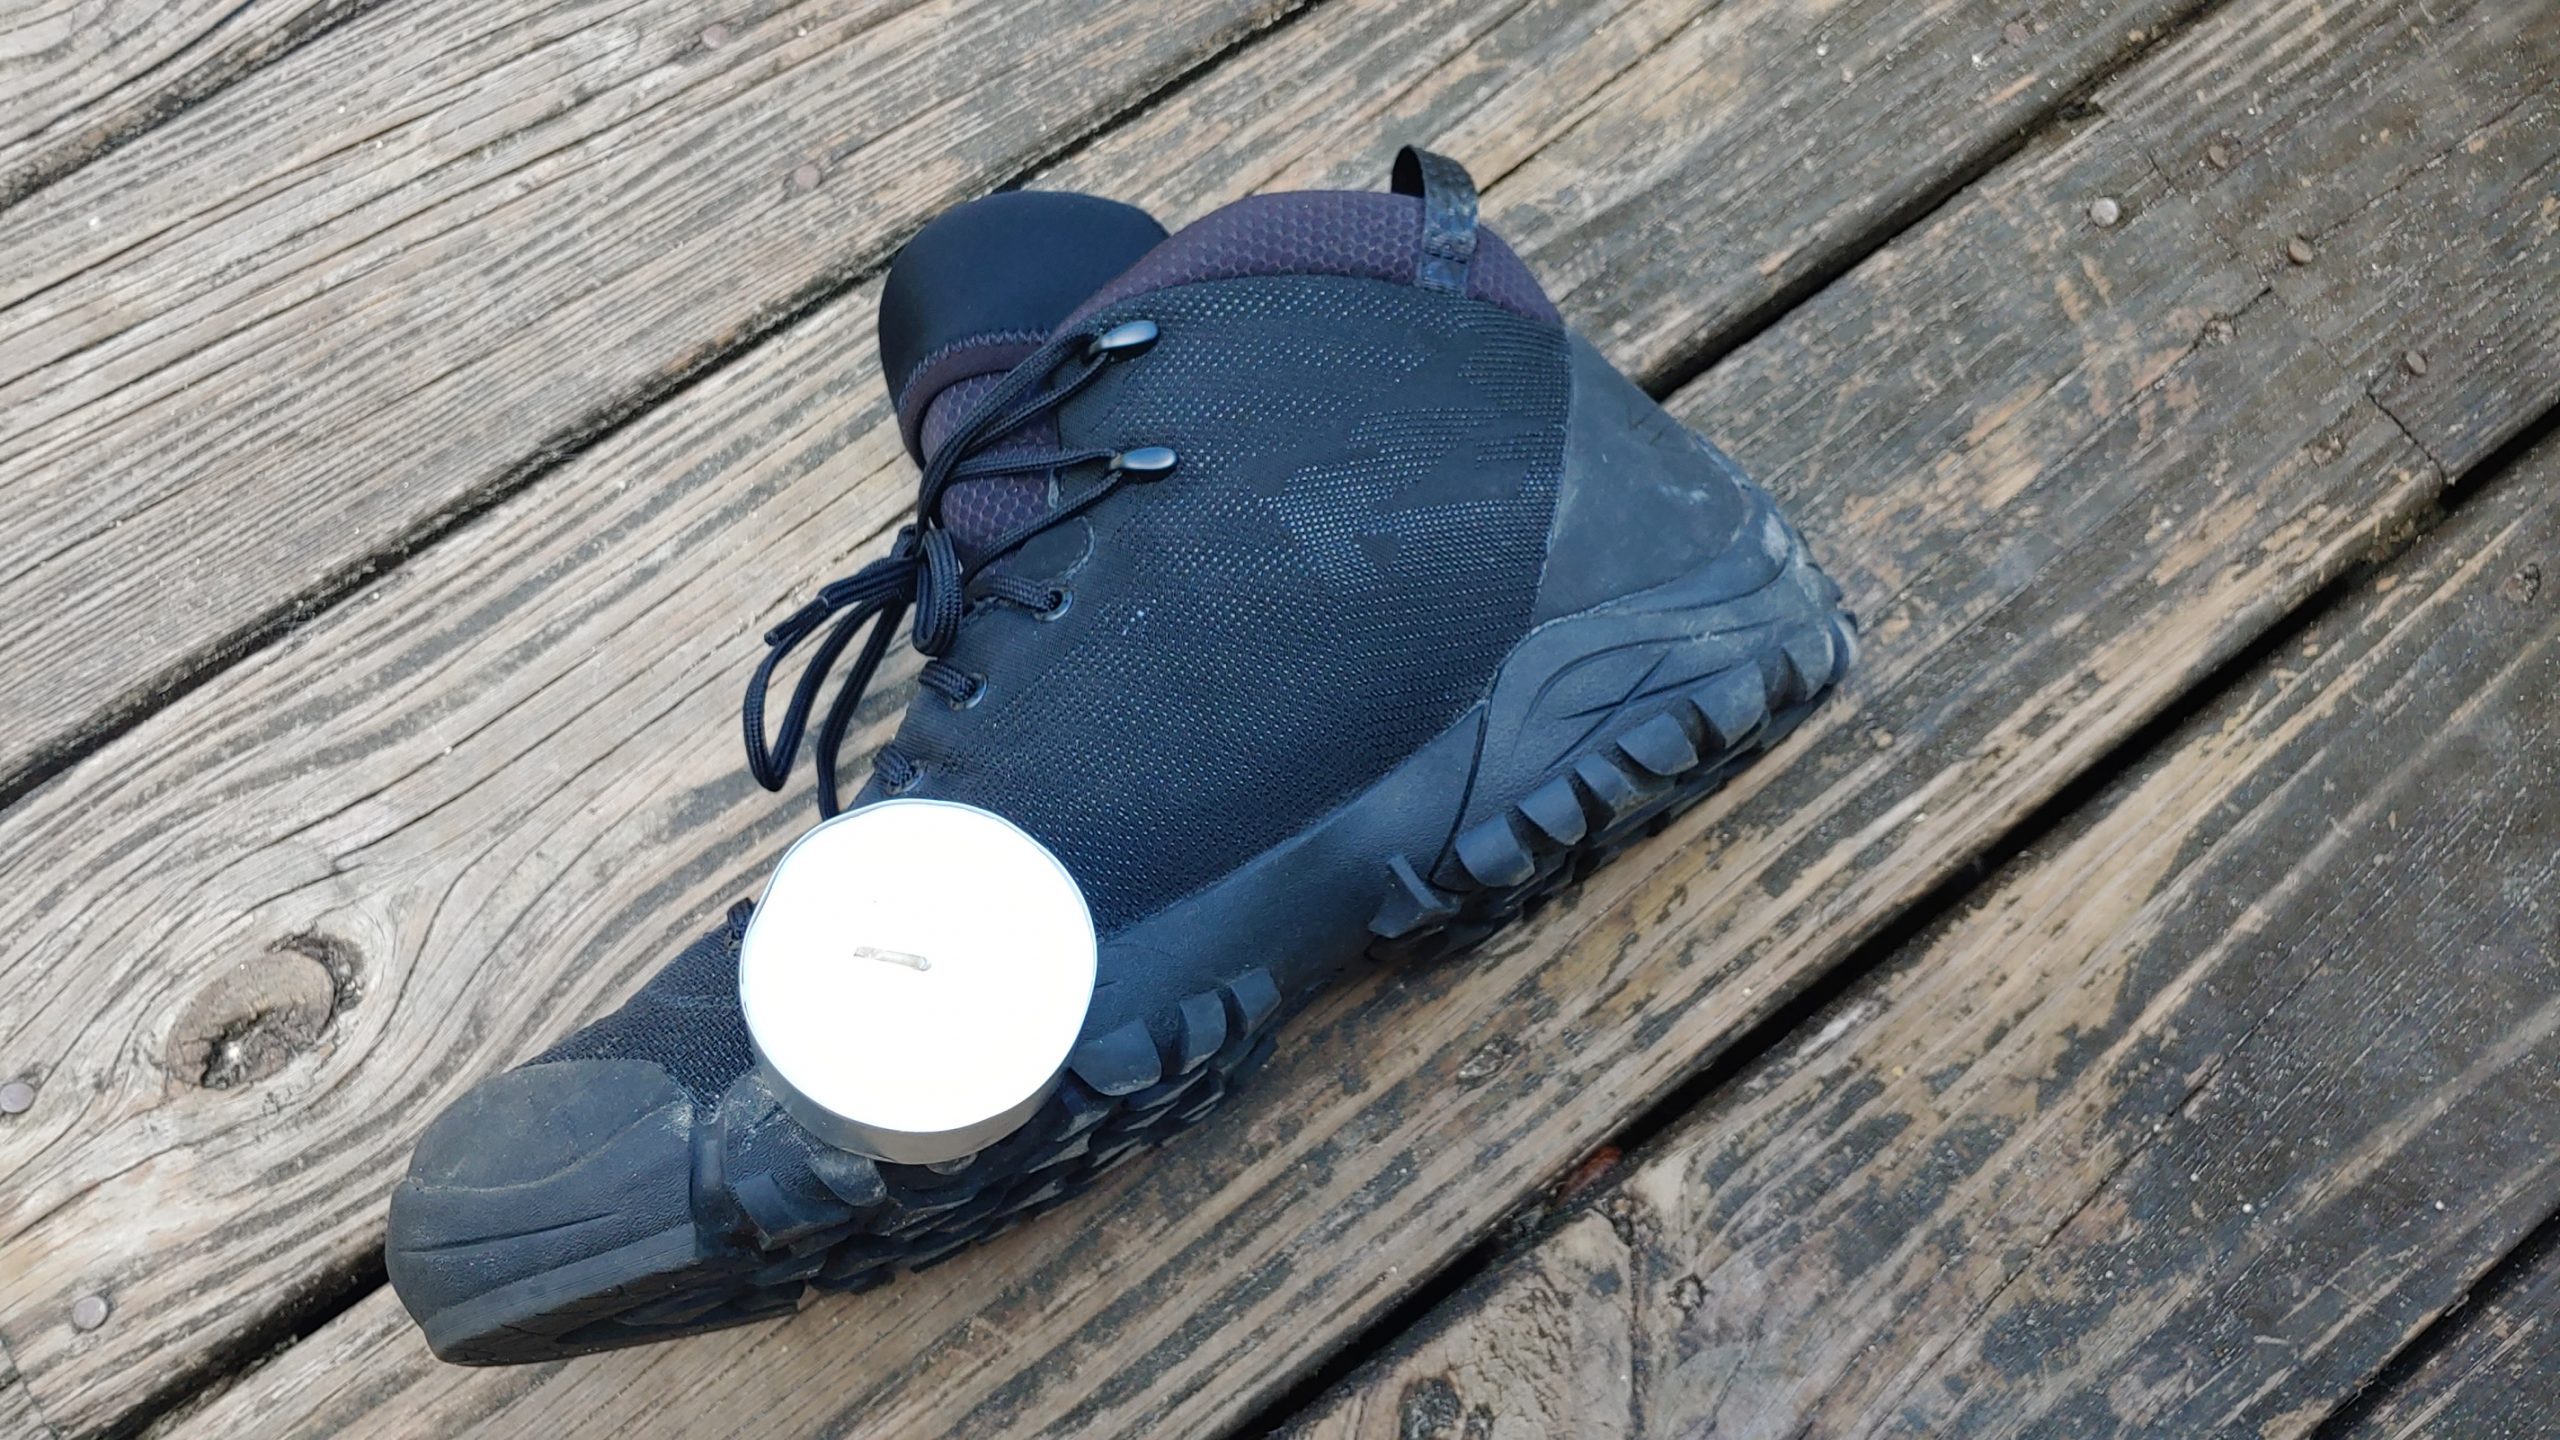
- Candle
- Shoes
- Some Form of Heat (Lighter, campfire, blow dryer, etc.)
You don’t need much to get your footwear waterproof. In fact, you need more time than anything else. You can use basically any candle, but you likely want to be selective. If we are deep in the woods, then maybe a sugar cookie-scented candle isn’t a great choice for your boots. It won’t draw that big buck in.
Advertisement — Continue Reading Below
Those cheap tea candles are just about perfect. From a survival or disaster or even camping scenario, these are always just handy to have. I have a junk drawer full since I’m a Florida man, and hurricanes are inconvenient visitors. Use what you have, but these candles are scentless, dye-free, and work perfectly.
Get Your Waterproof On
Make sure your footwear is somewhat clean. Just give it a good brush down to remove any dirt or garbage from your shoes. Take the candle and rub the portion you want to waterproof. Rub it nice and hard and cover the portions in wax. If necessary, slightly warm the candle.

Advertisement — Continue Reading Below
This makes it a bit easier to spread the candle across the surface you are attempting to waterproof. Go from front to rear, and leave a good layer of wax across the entire thing. It likely looks like your footwear has a ghostly white shine to it. This is no good for those stealthy operations, and certainly, it’s not stylish.
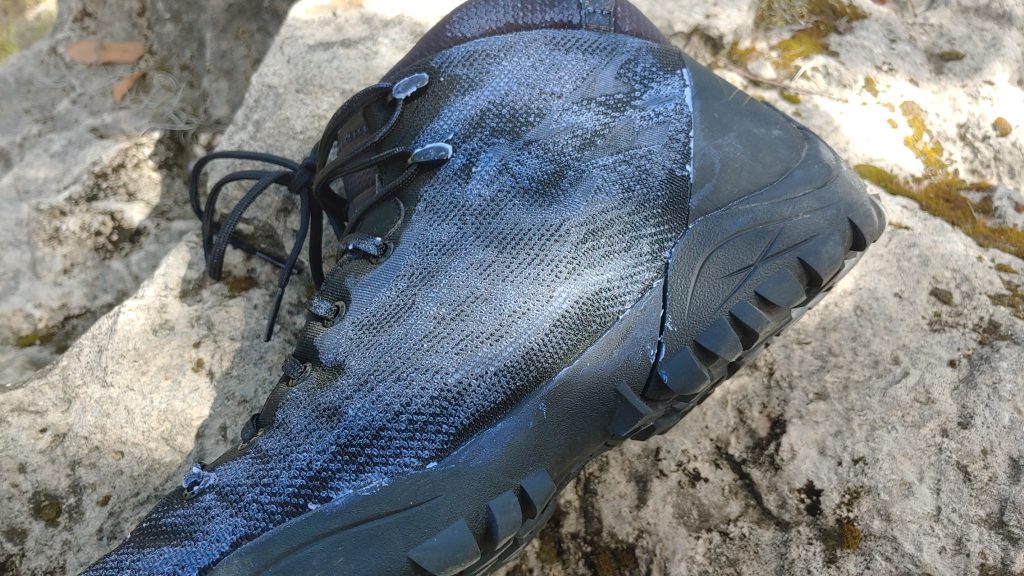
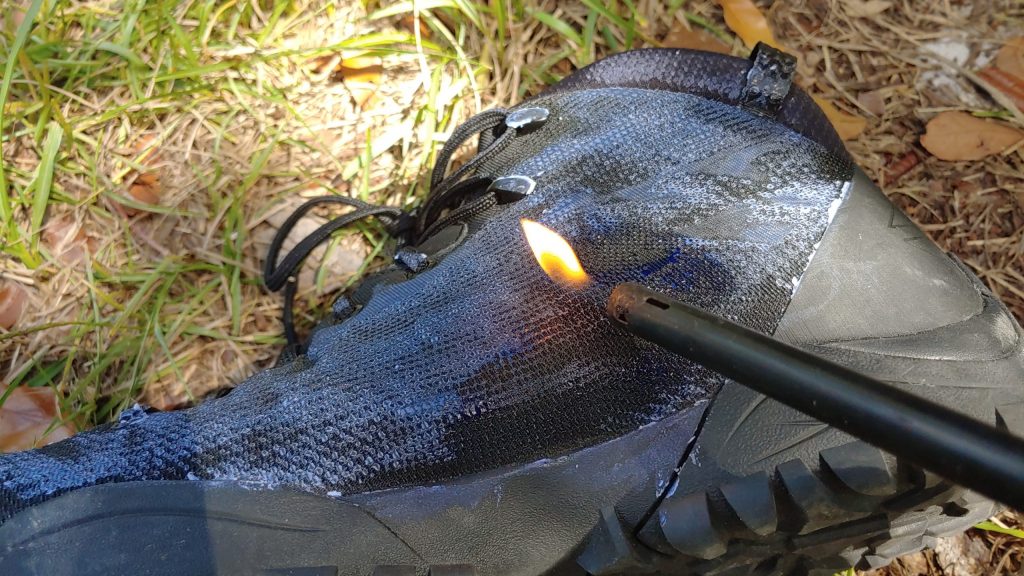
On top of that, it’s not exactly waterproof just yet. Next, you need to apply heat to the wax to melt it and allow it to really soak in, and this creates a nice waterproof layer. Waterproofers can use your campfire, a lighter, or a blow dryer to do this. You can tell the boots are waterproof once the white from the wax disappears. You know it’s nice and set in once the white disappears.
Advertisement — Continue Reading Below
Test It
Totally waterproofing any piece of footwear is nearly impossible. It has to essentially be a rubber boot to do that. Shoes and boots have plenty of entry points that simply can’t be 100% waterproof. This wax layer can’t prevent 100% of ingress but should help limit the method water makes entry. You should be able to splash and lightly dunk your footwear in some water without penetration.

Advertisement — Continue Reading Below
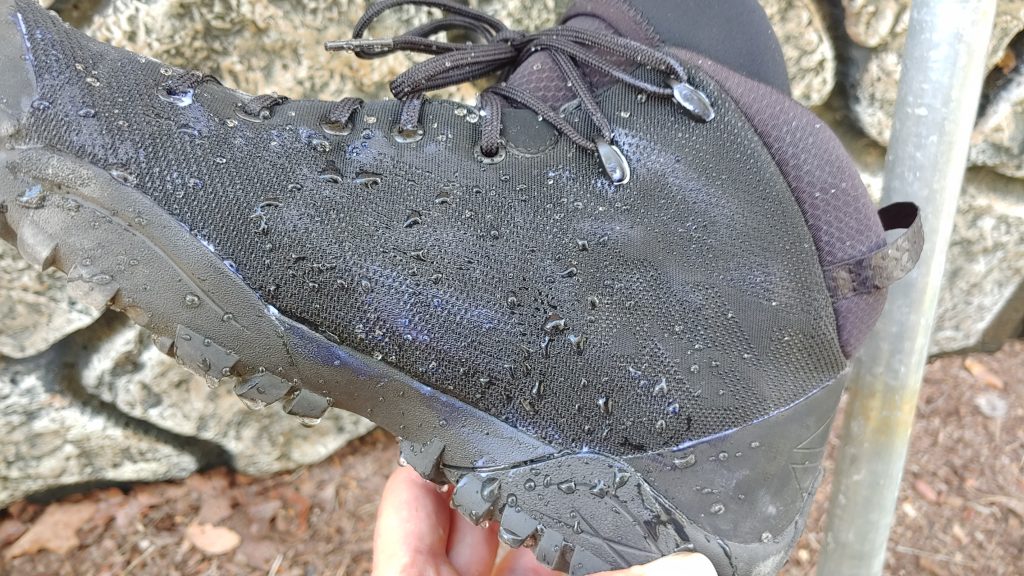
The water should bead across the wax and not make entry. Testing is fairly important and requires you to check every area you waterproof. If you find a weak spot in your coating, wait for the boot to dry and apply a layer of wax to that area.
Hopefully, you can apply this knowledge across your spectrum of outdoor adventuring, and you’ve learned how to apply a field expedient waterproof layer to your footwear. When the shelves are bare, you certainly won’t find Scotchguard.
Advertisement — Continue Reading Below
