Advertisement

Easy Preps – Simple Things Anyone Can Do

Easy Preps

Prepping can feel overwhelming, especially when you’re just starting the journey. It seems like there are so many skills to learn, so many supplies to purchase, and so little time to do it all. Instead of throwing in the towel, consider adding some of these easy preps to your plans.

Water Storage

This is an easy prep anyone can do. Save 2L soda bottles, juice bottles, and the like. Wash and rinse them well, then fill them with clean water. Leave about two inches of headspace at the top, then close them up. Use them to fill empty space in your freezer. The headspace in the bottles will prevent them from bursting as the water freezes.

Storing bottles this way accomplishes several things. It helps your freezer run more efficiently, as it won’t need to cool empty space. If the power goes out, the ice in those bottles will help keep the contents cold longer. In an extended situation, as the ice melts, you’ll have clean water to drink and use for food prep, without requiring you to find extra space somewhere to store it.

Stop Doomscrolling and Start Learning

Easy Preps - stop doomscrolling
Most of us spend far more time than is healthy surfing social media, comparing our lives to someone else’s greatest hits.

Most of us spend far too much time mindlessly surfing through social media. Instead, commit to being more intentional with at least some of that time. Check out informative videos or articles, or, *gasp*, read a book.

What works for some people is to devote 15-30 minutes each morning to personal education. My wife likes to listen to podcasts or YouTube videos while she does her morning stretches. I’ll often have a book, magazine, or blog in front of me while I’m eating breakfast. We both read before bed, too.

Here are a few YouTube channels you should check out:

Outdoor Boys 

Nature Reliance 

The Prepared Wanderer 

The Urban Prepper 

Go for a Walk

Physical fitness is important. The healthier you are, the better able you are to handle stressful situations. Listen, we all have limitations, impairments, and other things that we feel hold us back. The important thing is to learn ways to adapt.

You might not be able to walk five miles. Hell, maybe a mile isn’t doable. Maybe the best you can do is to the mailbox and back. You’re still lapping the guy who hasn’t gotten off the couch. Remember this – last place is still a place.
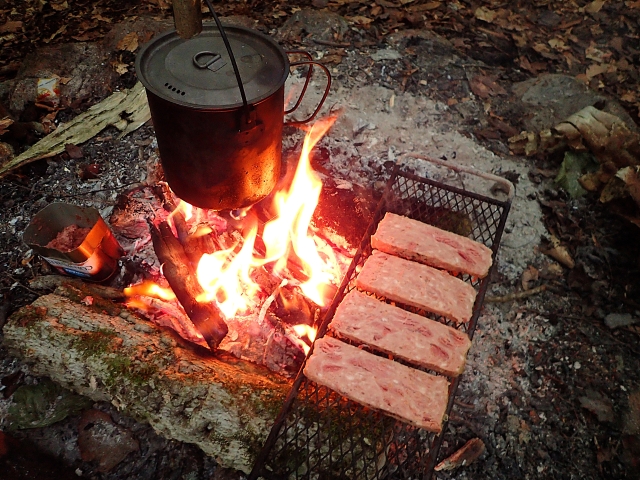
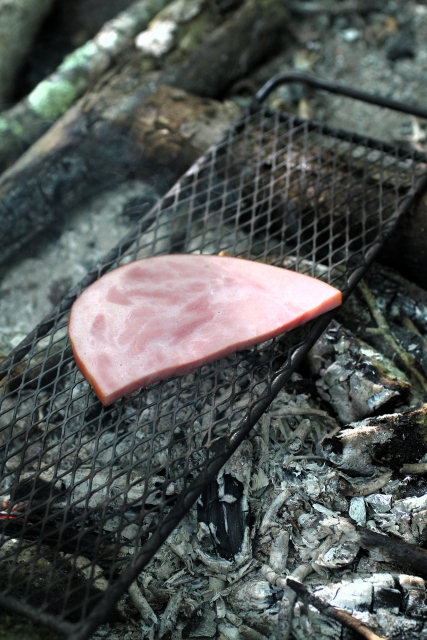
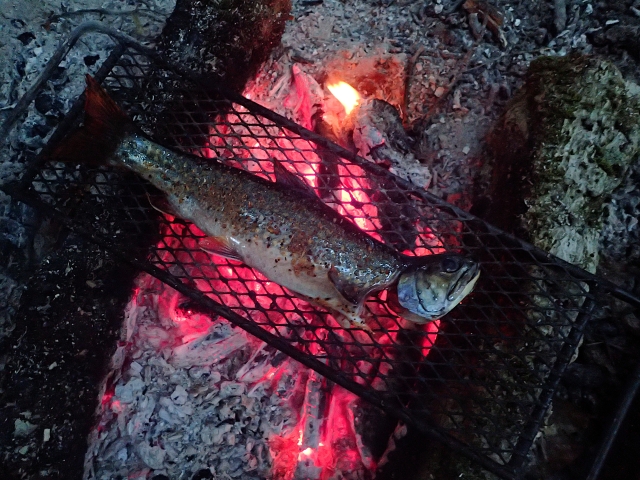
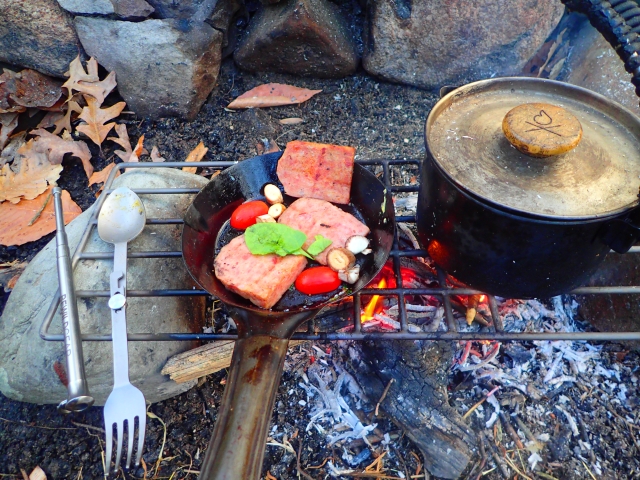
Cook More Often

Easy Preps - scratch cooking
Cooking nourishes the body, mind, and soul. It’s a privilege to prepare food for your loved ones.

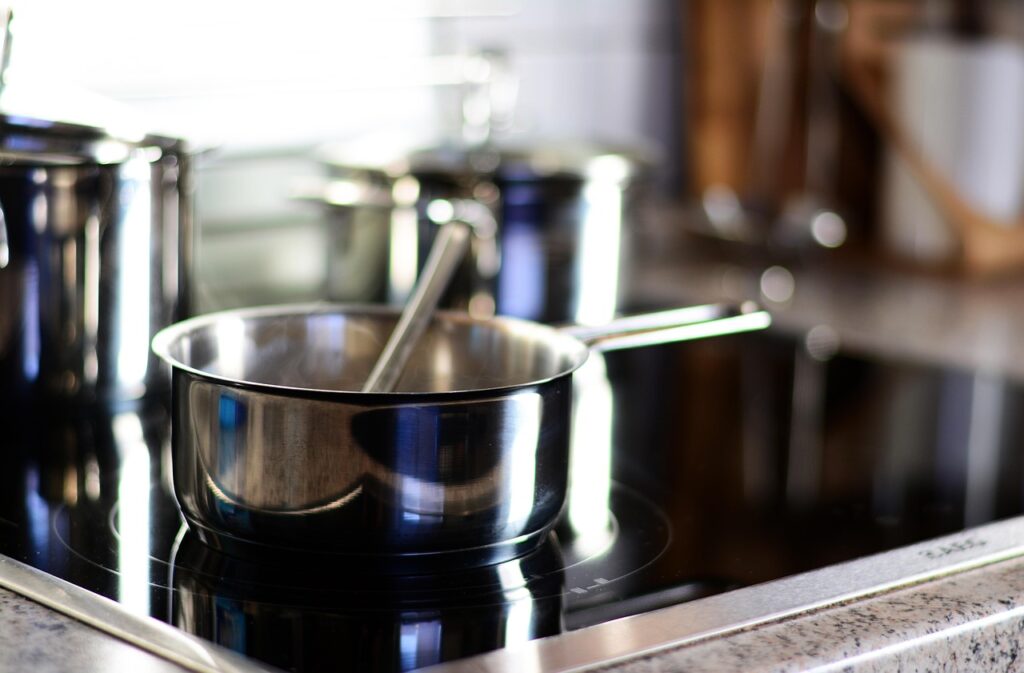
This is an easy prep that has multiple benefits. When was the last time you cooked a full meal? I don’t mean dumping a box of something into the air fryer while you’re heating up frozen veggies on the stove. I mean actually cooking from scratch. For some of you, this is probably routine. For many others, though, it’s almost a foreign concept.

The more skill and experience you have with scratch cooking, the better you’ll be able to make use of foods you have socked away for emergencies. Pick out a few favorite foods and look up recipes on how to make them, then get to it. The best part is you’ll likely end up saving money in the long run, as cooking from scratch tends to be cheaper than eating out.

3 Ways to Save When Buying Guns, Ammo, and More

Guns are expensive, ammo is expensive, optics are expensive—everything is expensive! Hell, a Subway sub cost me like 15 bucks today! It’s ridiculous, but I have a dopamine addiction to feed and a lot of shooting to do. How do I do it affordably? I might not be the best shooter, but I know how to stretch a dollar when it comes to shooting. I’d be broke if I didn’t.

With that in mind, I want to share with you the three tips I rely on most to save some cold, hard cash when shopping for guns, ammo, and the like.

Memberships Save Money

I’m using the term “membership” a little loosely here, as it encompasses a wide variety of things you could consider a membership. First, I have a dedicated email for promotional offers from websites I like and trust. I get Daily Deals from Palmetto State Armory, updates from Bucking Horse Outpost, and more. These deals get a quick look and sometimes a quick purchase.

Another “membership” I believe in is store credit cards when they are worth it. I’m also a responsible credit card user and never use credit cards as a temporary loan. For example, I use the Academy Credit Card to get 5% off my purchases, and that’s where I get most of my 9mm ammo.

Combine that with a website membership, and I get random coupons and alerts for discounts. Recently, I got 15% off a thousand rounds of 9mm because of the credit card bonus and a temporary vets discount.

Other memberships include signing up for stuff like GovX if you qualify, or Expert Voice, or similar websites. It’s not always a great discount, but there are hidden treats and great sales. Military members and veterans should also sign up for the Exchange; sometimes, they do random ammo sales.

Police Trade-Ins

When you hear the term “police trade-in,” you likely picture old Gen 3 S&Ws, beat-up 870s, and carry-handle AR-15s. That’s not the case right now. Currently, there is a huge shift to optics-ready guns amongst police forces and a slight sales slump. What we are seeing are Glock Gen 5 17s for $349.99, and Gen 3 and Gen 4 models for even less.

Police trade-in guns can be fantastic, especially right now. I’m seeing a ton of 870 Police Magnums, which are in fantastic shape because, for the last two decades, the AR has taken over as the dominant police long gun. These are barely used, and kept-in-the-armory type guns.

Additionally, police trade-in ammo is a thing. I got 500 rounds of .38 Special for 99 bucks because it was a mixed police trade-in. I got a ton of Federal Tactical slugs for an excellent price I can’t recall, also police trade-ins. Bucking Horse Outpost is great for police trade-in ammo.

Estate Sales

My hidden secret to getting cheap guns and cheap ammo is estate sales and auctions. When I go to these sales, I’m often the only one interested in guns and ammo. I don’t meet much resistance, and I can score insane deals. I got a beautiful M1 Garand made in the 1950s for $700; I got 500 rounds of .45 ACP for 60 bucks once.

One time, a gentleman who was a reloader passed away, and he had a ton of ammo for sale. Reloads can be iffy, but I was able to look through the notes and details of the man’s work, and he was detail-oriented. Every load had a card with load data and even performance details. I was able to get piles of .44 Special, .45 ACP, .38 Special, .32 ACP, and more for pennies on the dollar.

Auctions can be trickier, but also fantastic due to federal law. A lot of resellers attend auctions, but resellers don’t have FFLs, so those who are legally smart stay away from guns. That eliminates most firearm competition. Not always, and rural areas tend to be a little harder to bid in, but discounts and bargains can be found!

My Tricks to Save

Saving money isn’t always easy in the gun world, especially with ammo. However, with a little planning and preparation, you can save a lot. It takes effort, and you have to judge what your time is worth. As a gun writer and all-around gun nerd, I’m willing to put in the work, but it might not be for everyone. At the very least, I can share my tricks with you.

What’s Cooking?: Titanium Camp Grills That Rock!

The grill has enough room for a kettle and kabobs. There is enough room for a frying pan and a kettle on the Granite Grill.

Summer grilling on a portable grill is where simplicity meets flavor—and it doesn’t get much better than that. Whether you’re camping, cooking over a bonfire, or day hiking, here are two titanium camp grills that rock!

We had four hungry guys on the Adirondacks trip, and the Streamside Travelers Grill delivered.

Purcell Trench Titanium Camp Grills

Handmade in the USA, these ultralight grills are TIG-welded from stainless steel or titanium. Models like the Packers Grill or Travelers Grill are compact, stable, and built for direct fire cooking. They’re legless for better fire control and pack down fast.

The Streamside Travelers Grill is a minimalist’s dream with just enough grit to handle real campfire cooking. It utilizes the same 17-inch x 5.5-inch tapered frame as the standard Travelers Grill. However, it replaces the tubular stays with a full sheet of expanded stainless steel. That mesh surface makes it ideal for grilling smaller items, such as fish, vegetables, or even polenta cakes, without losing them to the flames.

Purcell Trench considers this the weakest of their titanium camp grills. Yet, it supports a 10-inch Lodge cast iron Dutch oven full of liquid.

The Streamside Travelers Grill cooked ham steak on a multi-day trip in the woods.

At just 5 oz (142 g), it’s light enough to disappear in your pack. However, it is strong enough to support all but the largest pots and pans. It’s TIG-welded from American-made stainless steel tubing. The frame has smooth edges and rapid cooling for quick pack-up. The expanded metal may warp slightly when subjected to high heat. Nonetheless, it generally returns to its original shape as it cools.

If you appreciate fire control and the versatility of direct heat, this grill is calling your name. It’s like Purcell Trench crafted the grill for someone who knows their way around a coal bed!

MSRP: $84

Titanium Grilling in the Adirondacks

I spent the last week of June in a remote part of the Adirondacks with three good friends. They were all seasoned outdoorsmen, one of whom was recently featured here on GAT Daily, Lt. Mike Lychock. It was his grill that we used on this camp trip. It was that hidden gem you didn’t know you needed, but it stood out. 

We were in the presence of great, persistent fishermen on this trip who kept us well fed. The Streamside Travelers Grill was perfect for grilling trout.

We used the grill to cook directly over a low flame and coals. It seemed natural to prop it between two logs that were about bicep-thick. We used it with frying pans, pots, ham steak, SPAM-ish meat, and fresh trout. However, titanium camp grills pull double duty. They also handle the role of hot coal raking and scooting hot logs in the fire. 

Gear for the Wild

At first glance, Rewild Gear had me scratching my head about what exactly they were all about. They offer a lineup that includes a 4-inch fixed blade knife, a grill, telescopic pocket bellows, a ferrocerium rod, and a food utensil. Additionally, they feature a stylish trucker’s cap and pyro balls!

It didn’t take long to realize that this outdoor gear company is all about adventure. I quickly contacted David to get the scoop, and he painted a vibrant picture of the brand and its mission. They provide gear that not only works together but also covers all the essential camp must-haves. Then came the moment of truth—the packages arrived, and I was ready for action!

The titanium Granite Grill is compact and ultralight, offering a durable cooking surface for meals over a fire in the wilderness, with warp-free grilling and a lifetime warranty.

Granite Titanium Camp Grill 

Introducing the Granite Grill: your new go-to campfire companion that’s as light as a feather—just under 12 oz and only 0.2 inches thick! This titanium marvel measures 18 inches in length and 7 inches in width. It boasts a clever, patent-pending flat design that features two cooking sections tailored to your culinary needs. 

The center section features cross tubing spaced ½ inch apart. This area is ideal for delicate vegetables and smaller cuts of meat that require a little extra care. Meanwhile, Rewild Gear made the outer tubing sections spaced 1 inch apart. These sections provide ample room for larger items, such as brats or fish fillets, to sizzle to perfection.

And don’t worry about carrying it around—the Granite Grill comes with a handy canvas sheath that not only keeps your gear clean from grill debris but also adds a mere 4.5 ounces to your load. This brings the total weight to a mere 16.5 ounces. Now that’s what we call a grilling game-changer. This gem is truly one of the better titanium camp grills that rocks!

MSRP: $99

Granite Grill Cookout

I tested this bad boy in the cooler autumn months. I used two large rocks to hold up the Granite Grill for boiling water and frying in a carbon steel skillet. Naturally, Filipino chicken BBQ was one of the first meals I made on the grill. There was ample room to cook four kabobs. I was also able to heat the Uberleben kettle for a warm drink in the brisk autumn air. 

The Granite Grill is a superb 3-in-1 marvel! It’s sturdy and resists warping, cools down quickly, and even helps you move coals. Those tight squares are tailor-made for dedicating food to the fire gods. Meanwhile, the outer spaces perfectly accommodate your pots, pans, and anything else that needs a little breathing room. 

The grill has enough room for a kettle and kabobs. There is enough room for a frying pan and a kettle on the Granite Grill.

Check out these two stellar titanium camp grills—you can’t go wrong with either! 

What’s the Difference Between a Good Gun and a Bad Gun?

I’ve been reviewing firearms for a few years, and for a long time, I’ve tried to come up with what makes a “bad” gun versus a “good” gun. That’s a tough question to answer, with an absolute ton of variables. A gun designed for competition might not be good for concealed carry. Bird hunters aren’t using long-range rifles for quail. If we isolate guns based on the task they are designed to achieve, it gets easier to say what’s good and what’s bad.

We could say a good gun is ergonomic, accurate, controllable, and appropriate for the task it’s trying to accomplish. A bad gun would be the opposite: unreliable, not ergonomic, hard to control, etc. That’s the way I looked at it for years, but I’ve walked back on that. A bad gun is easy to define, but I think I was too lenient on what constituted a good gun. That’s the question I’ve been asking, and I’m trying to answer today.

Is There a Difference Between a Good Gun and a Bad Gun?

A gun meeting baseline expectations shouldn’t be considered good or exceptional. It doesn’t need to be, and some just aren’t. Some guns are just fine. I will say there are other factors than a gun’s performance that can make it a good gun. Let’s look at the Taurus G3 series.

The G3 is fine. It’s accurate, reliable, ergonomic, and easy to shoot. Compared to a lot of guns, it would be considered fine. Fine isn’t bad, but it’s not exceptional. The G3 becomes a good gun when we look at its price point. It’s a $250-ish gun that’s optics-ready. We can be more specific and say it’s a good budget gun, but the point stands: it’s a good gun.

On the flip side, a good gun can lose its status due to an absurd price point. Christensen Arms makes great guns. I’d argue most of their catalog is expensive but still good. Then you get to the CA9mm, a direct blowback PCC that takes Glock mags. I’m sure it’s reliable, accurate, and ergonomic, but holy hell, it’s $1,700.

Sometimes, a gun can be a good gun because it excels in a specific category. Let’s look at something like Glock. The Glock 17, 19, or any Glock hits the good gun market because it’s accurate, ergonomic, controllable, but also exceptionally reliable and simple. Glocks work—that’s what they do, and that’s why they are good guns.

What Makes a Fine Gun?

The perfect definition of a fine gun to me is the S&W 3rd Gen guns. People like them, but I don’t think they are good guns, nor are they bad guns. They have some problems: they are heavy, those heavy slides create snappy recoil, the magazine safety is stupid, and the slide-mounted safety is not very ergonomic.

In addition, they were also expensive guns in their era and are only getting pricier now. They are fine, but even when produced, they lagged behind other guns. S&W’s 3rd Gen guns never did anything exceptionally well and fall into that “fine” paradigm.

I can say the same about the Beretta 9000. It’s fine; it’s odd ergonomically, but it has the Beretta reliability, low recoil, and accuracy you expect. However, it’s not a good gun. It’s just fine.

What’s a Bad Gun?

That’s easy: anything that seriously sucks in all the categories a gun performs in. The Remington R51 is a bad gun. The Zip 22LR is a bad gun. Anything that can’t at least get “Cs” in class is a bad gun. Typically, bad guns seem few and far between, but that’s because they aren’t produced for very long. Plenty of bad guns exist, but they tend to fade out of our collective memory.

Why Is This Important?

I’ve editorialized a variety of guns I think are good, fine, and bad. Why does this matter? From a consumer perspective, I feel like the gun community can be all or nothing. It’s either the next coming of John Moses Browning, or it fires out of battery and should be thrown in the ocean to make reefs. (Side note: let’s not arm the sharks.)

Our culture of “it can only be good or bad” is not serving people well, and is a part of the culture we should get rid of. Some guns can be fine; some can be exceptional. As gun writers, we shouldn’t call guns that are fine “good.” With that in mind, the greater gun culture should be more comfortable with calling something fine, be it a gun, an optic, a weapon light, or beyond.

As a gun writer, I like a bad gun. It’s a cheap and short review. I like a good gun because I enjoy shooting it, but a fine gun is just boring. Most good guns are good guns, but some are just fine, and we should embrace that.

Gen 2 Bravo-6 – The Latest from Bark River Knives

Gen 2 Bravo-6
Photo credit: Bark River Knives.

The Bravo 1 is the most popular knife in the Bark River Knives lineup. And for good reason. It’s hard-working, dependable, comfortable, and tough as hell. It spawned an entire series of knives, including the Bravo 1.25, Bravo 1.5, Bravo 2, Bravo III, and Bravo EDC, along with others. All share the same DNA, as well as the same dedication to the craft of knife making. The Gen 2 Bravo-6 is the newest iteration. It’s a brand-new model, and definitely worthy of the Bravo name.

The Bark River Knives Gen 2 Bravo-6

Bravo-6 Development

Mike Stewart, head honcho at Bark River Knives, had this to say about the creation of the Gen 2 Bravo-6:

“The Bravo Series of knives has been a backbone of our line for decades. It is also one of the most copied patterns in the Specialty Knife industry. Lots of custom makers and now even the Russians and the Chinese have made and are actively selling these patterns. It is time for a second generation of the Bravos.”

He and his team worked for over a year on the design. The goal was to create something that was even more secure and comfortable in the hand. At the same time, they wanted a more rugged feel, look, and function.

It’s important to note that while they are introducing a new look and feel to the Bravo line, there are no plans to discontinue anything in the existing lineup. This is strictly an addition, not a replacement.

For comparison, here is the Bravo 1 on top and the Bravo-6 on bottom.

Bravo 1
Photo credit: Bark River Knives.
Gen 2 Bravo-6 in crimson burlap micarta.
Photo credit: Bark River Knives.

Bravo-6 Specs

The Gen 2 Bravo-6 is 11.25 inches from end to end, with a 6.25-inch blade. The CPM 3V steel is 0.187-inch thick and hardened to 60 Rockwell. The knife has the Bark River standard convex edge and arrives keen as a razor.

As with all knives that come from the Bark River shop, there is a huge range in handle materials available, including numerous colors of micarta and G-10. This model marks the first time Bark River has used stainless steel flared tubes in their handles.

On this, Stewart said, “The flared tubes in the handles are 304 stainless steel. I wanted the look of those tubes to be a bit different than other companies that we see on the market. There is a countersink in the handle that they flair into.”

Photo credit: Jim Cobb.

The base weight of the Gen 2 Bravo-6 is 10.54 ounces, but this can change slightly with different handle materials.

Each Gen 2 Bravo-6 comes with a leather belt sheath equipped with a snap and strap retention. The strap fits perfectly the first time, no stretching or breaking in required.

Photo credit: Jim Cobb.

Bravo-6 Performance

I’ve only played around a bit with it thus far, but I’m suitably impressed. It has a great balance and feels outstanding in hand. At nearly a foot overall, this isn’t a small knife, and most people probably won’t consider it for EDC. However, if you’re on the hunt for a good field knife, one that will help you clear a shooting lane as well as process what you harvest, the Gen 2 Bravo-6 just might be your huckleberry.

Gen 2 Bravo-6 in blue canvas micarta
Photo credit: Bark River Knives.

Find the Gen 2 Bravo-6 at DLT Trading and KnivesShipFree. The MSRP varies based on the handle material, but expect to see prices around $320 for base models in black canvas micarta, then going up from there for the higher-end materials.

The Pop Of Suppressor Use

Pop goes the weasel…and the suppressed gun. When you suppress a gun, you are likely to run into one or two distinct types of pops. We have port pop and first-round pop. Both can be noticeable to the suppressed user and be downright annoying as a suppressed shooter. As someone who has recently gotten into suppressed shooting, I can’t help but be annoyed by the various pops.

“Pop” Goes the Suppressor

I wanted to know what they were, what causes them, and whether they could be prevented. Since I went on this “pop journey,” I figured I could share my journey with you. Let’s look at first-round pop and port pop and see if we can get it popping.

Port Pop

The easiest way to prevent port pop is to just shoot a manually activated gun. Single shots, bolt-actions, and lever-actions are examples of guns that won’t have port pop. The port that pops is the ejection port. It’s most noticeable on firearms with enclosed ejection ports. Rifles, in particular, are loud and annoying, and can even ring your ears.

I’ve run into this with my ARs in 5.56, which I expect, but also in the diminutive .22LR CP33. Port pop is the sound of gas exiting the ejection port as you shoot. Suppressors can increase this noise due to additional backpressure, and they make it more noticeable since they’ve cut the noise from your muzzle.

Port pop is tough to fix in most guns. The AR can be tuned to reduce it, but that’s solely due to the AR’s popularity and its modularity. According to silencer expert Jay from Pew Science, there are a few ways to manage port pop. He suggests an adjustable gas block, a heavier buffer, or even lengthened cam paths like the LMT-E.

With other guns, like the CP33, it’s a bit tougher since the gun isn’t as modular. Anything you can do to delay the bolt from opening can help, but the ability to do so might be rare.

First Round Pop

The other pop you have to deal with is first-round pop. This noise originates at the end of your barrel, and hearing it will depend a lot on your caliber and cartridge. If you’re shooting some massive magnum round, you aren’t likely to notice first-round pop. You’re more likely to hear it if you’re shooting a .22LR or other subsonic, quiet cartridge.

This pop annoys me a lot less than port pop because it only happens once. What’s happening is that your suppressor is full of air. When you shoot your gun, that air, which is cold, meets hot unburnt powder and gas. These gases meet and move, creating a noise. After the first round, it’s not really a problem.

Discreet Ballistics has released something called the PopStop. This connects between your gun and suppressor and allows you to flush your can with carbon dioxide via mini containers. I don’t care too much about first-shot pop, but it’s great to have a solution for any problem.

The Pop

Pops are a normal part of suppressor use. It’s annoying, but it’s understandable. Some pops are easier to solve than others, depending on the platform. With a little effort, you can reduce the pop, but like the music, you’ll probably just learn to live with it.

Gear that Tags Along For the Ride!

We pack emergency kits and bugout bags and load our homes with survival gear. However, the odds are good that you may not have access to any of them if an unexpected crisis comes. In fact, you may have only what you’re physically carrying if you’re forced to flee. This could be a significant problem for you…unless you’re well-prepared ahead of time. On the market are numerous tools, mini pieces of gear, and survival items that can be carried on your body. The wearable gear varieties are both diverse and extensive, so now’s the time to create your own, on-the-go, emergency ensemble.

Wazoo Gear Viking Spark Necklace

This Viking Spark necklace is both aesthetically pleasing and highly practical, making it a must-wear for nearly every occasion. Utilizing antiqued mahogany leather, a uniquely patterned Novaculite stone, and a ceramic striker ten times harder than steel, you’ll have both a fire-starter and knife sharpener always within arm’s reach.

No two stones are exactly alike, offering you a one-of-a-kind piece of wearable gear that goes everywhere you do. Additionally, the integrated ferro rod can create flammable shaving or, when scraped quickly, throw sparks for optimal flame production. Best of all, Made-in-the-USA quality backs up this practical piece of neckwear.

MSRP: $65.00

Grim Workshop Dog Tag Necklace

No matter your field, interest, or emergency need, most likely, Grim Workshop will have a wearable gear dog tag for you. These tags offer heavy-duty reusable and re-attachable mini tools and gear that easily stack and travel on any style of necklace cordage or chain. Additionally, you can choose from fishing lures to lockpicks, from first aid to sewing, files, and signalers. The variety is great, and the quality is top tier.

Also, other incredible tools include a glow-in-the-dark tag for a nighttime light source, a fire-starter tag, and an arrowhead for in-the-field arrow construction. Finally, ball bearing chains and stackable silencers are available to complement the tags to create an instant go-anywhere tool cache.

MSRP: Starting at $9.50

Titan Survival Paracord Keychains (3-Pack)

You bring your keys just about everywhere, so why not include some needed survival gear? This keychain assortment offers a combination of multi-use paracord, an integrated ferro-rod, and a large belt hook for easy attachment to your belt loop or gear bag.

The interior strands of cordage include a twenty-five-pound test fishing line, waterproof waxed Jute fire-tinder, and 30 AWG utility wire. When in need of a fire, just scrape and strike the ferro-rod for a shower of 3,000-degree sparks that ignite awaiting tinder. Lastly, Titan shows how a simple keychain can be a whole lot more!

MSRP: $25.98

Wazoo Gear Cache Cap

Comfort, sun protection, and outdoor durability are only the tip of the iceberg when naming this cap’s ingenious features. Unseen by prying eyes, this Cache Cap offers six integrated “secret” pockets that can hold your small valuables, gear, and cards of all types. It offers four hook-and-loop closure pockets along with two narrow slot pockets that are virtually invisible to anyone around you.

Additionally, this wearable gear cap is designed to be both aesthetically pleasing and highly practical, with a cooling mesh interior, an anti-glare underbill, and an ultra-comfortable buttonless top. From hiding personal items to all-day wear comfort, the Cache cap has you covered!

MSRP: $36.00

Wazoo Gear Firecard Fire-Starter (3-Pack)  

If you carry your wallet, then you can carry these indispensable fire-starting cards. Designed to mimic the size and shape of a typical credit card, you can store multiple cards easily for on-the-spot fire creation, no matter where you are in the world. The cards are constructed of a highly flammable modified polymer and can be scraped into a pile as tinder or burned as a whole for a large flame on demand. Best of all, you can use the Firecards when wet in harsh outdoor conditions.

MSRP: $10.00

CRKT Pryma Tool

You won’t remember you’re carrying the Pryma until you need it! This keychain addition is ultra-lightweight and unobtrusive, yet provides for a plethora of necessary, everyday tasks. Use it for prying nails or scraping, breaking glass windows in emergencies, unscrewing or tightening fasteners, and finally cracking open that bottle of suds at the end of a hard day. This mini wonder offers so much in such a small footprint. Lightweight, highly durable, and versatile…what more do you need?

MSRP: $12.00

Wazoo Cache Belt

Need to carry an extra item or two, or ten? Now you can with the Wazoo Cache Belt. This incredible discreet pants-holder-upper offers a large storage area inside its durable folded webbing. A no-fail hook and loop closure secures your items, while the 300 Series stainless steel buckle keeps the belt securely in place around your waist.

Use this belt to hide money and valuables, needed survival gear, small photos, flash drives, or any small personal items. This useful piece of wearable gear is available in various sizes and colors. Best of all, the belt is hand-cut and sewn proudly in the USA.

MSRP: $70.00

CRKT Eat’ N Tool

Don’t underestimate your needs when it comes to eating on the go, as you may need some basic utensils to enjoy a quick meal. This amalgamation, named the Eat’ N Tool, offers a unique fork and spoon utensil, along with some traditional tools for projects along the way.

The “spork” design on one end is balanced by metric hex wrenches, twin flathead screwdrivers, and a convenient bottle opener for a fast drink when time is not on your side. The ultra-lightweight unit includes a carabiner for quick attachment to your belt loop or accompanying gear bag or pack.

MSRP: $9.99

The Lever-Action In World War I

Most martial use of lever-action rifles occurred around the American Civil War. The rifles were controversial in that era, but were beloved by troops, but seemingly disliked by Generals. Admittedly, lever-action rifles had a lot less range than your standard infantry rifle, but offered a much faster rate of fire.

Beyond the American Civil War, the lever-action served with the French in the Franco-Prussian War of 1870 and the Ottomans in the Russo-Turkish War of 1877.

You’d be right to assume that most martial use of lever actions stopped at the turn of the century when cartridge firearms and bolt actions became the norm. You’re mostly right, but judging by the title of this article, it’s clear they served well into the 20th century.

When the entire world goes to war, it’s not tough to assume there would be a shortage in arms, and lever actions were readily available as a stop-gap to fill roles and free up battle rifles. Let’s take a trip to the trenches to see how and which lever-actions served in WWI.

Winchester 1886

By 1914, the Winchester 1886 seemed ancient. We discovered and weaponized flight between 1886 and 1914! With that in mind, the 1886 was picked for a very specific role. The British purchased 50 of these rifles chambered in .45-90 Sharps and were fielded with incendiary ammunition.

The Brits fielded these rifles to shoot down German airships. The incendiary ammo would ignite the hydrogen gas and send the German airships to the ground in a fiery fashion. It was a fairly cheap and effective idea that wasn’t resource-intensive. These rifles were a stopgap until better anti-airship weapons could be developed.

Winchester 1892

Alongside those limited numbers of Winchester Model 1886s, the British government purchased 20,000 Winchester 1892 rifles in .44-40. These rifles were purchased for the Royal Navy to free up Lee-Enfield rifles for infantry forces. Predictably, the rifles were used to guard ships and to clear mines. The .44-40 should certainly be enough to detonate a mine, right?

Winchester 1894

Of all the lever-action rifles on this list, the Winchester 1894 was the most widely used during warfare. The British purchased 5,000 of these rifles in .30-30 to serve alongside the Win 1892s for Royal Navy use. They guarded ships and detonated mines alongside the 1892s.

The French purchased 15,100 Winchester 1894 rifles for military use. The lever-action rifles required the No.44A rear sight and sling swivels on the left side of the buttstock and barrel band so troops could carry them across their backs. These rifles were issued to motorcycle couriers, artillery troops, truck drivers, and balloon units.

The United States purchased 5,000 Winchester 1894s and 50,000 .30-30 rounds. These never left the United States and were issued to the United States Army Signal Corps to help protect the timber used to produce aircraft of the era.

Winchester 1895

The Russians were responsible for the largest military sale of lever-action rifles in the modern era. The Russians purchased 300,000 models of the 1895 for their military forces. The 1895 rifles were a bit different than your standard lever gun. They were designed to use standard Spitzer-style cartridges and used internal magazines instead of tubular magazines.

The Russian variants chambered the 7.62x54R cartridge, and the contract rifles were designed to accept Mosin-Nagant stripper clips and used Russian arshins for the rear sight. These rifles had long handguards and bayonet lugs to be modern military rifles. The rifle was extensively used during World War I, more so than any other lever-action rifle.

Savage Model 99

This article would have been called “The Winchesters of World War I” if it weren’t for the Savage Model 99. Like the Winchester Model 1895, the Model 99 was designed to use spitzer-style rounds. The Savage Model 99 used a rotary-type magazine, and they varied between internal and detachable depending on when the gun was produced.

To free up rifles for the war effort, the Montreal Home Guard adopted the Savage Model 99. This particular model was referred to as a musket. It was rifled, but “musket” was just the terminology used to describe the weapon due to its full military-style stock and handguard, along with a bayonet lug. They ordered 2,500, but seemingly only took delivery of 803. These were chambered in .303 Savage.

The Lever Actions Of World War I

World War I introduced the widespread use of tanks, machine guns, chemical weapons, bombers, and more. It’s an interesting contrast to see so many lever guns serving in industrialized warfare. While most were never on the front lines, it’s fascinating to know they were fielded.

The Duty KelTec KSG

Like it or not, the KelTec KSG started the current trend of bullpup shotguns. Sure, they existed before, but no one really cared. These days, companies like S&W are producing bullpup shotguns. The idea has gone mainstream, with the concept of increased capacity via multiple tubes. The KSG, the S&W M&P 12, the IWI TS-12, and more use dual tubes to provide more ammo without the bulkiness of magazines.

KelTec is not a company you’ll see with big military and police contracts. Their weapons are focused on the civilian market. George Kellgren designs guns he wants to shoot. Without trying, the little company has secured numerous police contracts, and the KSG in particular has seen use by numerous police and military forces around the world.

This fascinates me. KelTec isn’t Remington or Benelli; they aren’t a name that gets tossed around in the duty shotgun world. Yet, they’ve found themselves in the hands of professional shooters around the world, and we are going to talk about who exactly is using the KSG professionally.

Who is Not Using the KSG?

The Federal Bureau of Prisons is not using the KSG. The KSG often gets attached to the U.S. prison system due to this bizarre company that called itself US CSOG, which stood for United States Corrections Special Operations Group. While that sounds like a government agency, it was a private company.

What exactly they did has always been a mystery to me. They are gone now, but they used to show up at SHOT Show Range day and do a demo for KelTec and the KSG. Doing a little research shows they offered some training to corrections departments. They changed their name to C-SAU.

Who Is Kind Of Using the KSG?

One user of the KSG is the Ukrainian military. It doesn’t seem to be used in large numbers. As I doomscroll open-source intelligence sources on Twitter posting Ukrainian photos, I’ve seen it a time or two. KelTec weapons are popular in Ukraine, and the SUB 2000 has been seen in action over there.

If I had to guess, these were personally owned or donated guns, rather than contract guns. Shotguns in Ukraine are used for drone control, and I wouldn’t be surprised if that’s the role they are serving now. When you’re in their situation, you use what you have, and for drone control, the dual-tube design of the KSG is quite handy.

Australian Critical Incident Response Team

The police forces in Victoria, Australia, have put together a Critical Incident Response Team to deal with violent criminals and dangerous situations. Things like hostage situations, barricaded suspects, and what I assume is the eventual 3rd Emu War.

This Critical Incident Response Team is a bit like a SWAT team. They often carry a variety of long guns, including the KelTec KSG. Images and video from a training exercise make it appear that the KSG is being used as a less-lethal option.

South Korean 707th Special Mission Group

The 707th Special Mission Group is the only military force I can find evidence of using the KSG. Several photos of their operators clearing buildings, taking doors, and riding in helicopters are rocking and rolling with the KSG. The 707th Special Mission Group is South Korea’s premier counterterrorism force.

I’m not an expert in Korean military forces, but the 707th seems to be focused on both internal work and external combat. How and why they use the KSG is unknown to me. As a bullpup gun, it could be a decent breaching option due to the gun’s short overall length. It’s also capable as a less-lethal option, or even an offensive weapon.

French RAID

RAID is an elite French police force. It’s an acronym, or more likely a backronym. It stands for Recherche, Assistance, Intervention, Dissuasion or, in American English, Search, Assistance, Intervention, Deterrence. The RAID guys have a history of weird weapons, like the CZ BREN 2 in 7.62×39, or the MOLOT VEPR shotgun, so it’s not a surprise they wield the KelTec.

Since they already have quite a few semi-auto shotguns, I can’t help but wonder if the KSG is for less-lethal or breaching. Those cartridges require a pump-action design to cycle. That might be the reason why we see the KSG. It’s not entirely clear, but it’s another elite force wielding KelTec’s beefy shotgun.

The Duty KSG

The KelTec KSG is a weird gun. Weird guns are KelTec’s bread and butter. Weird guns rarely make their way to the duty world, but somehow the KSG has managed to do just that. I’m not positive, but I’d hazard a guess this is the first KelTec to see such acceptance.

Silky Pocket and BigBoy Saws

The Silky Pocketboy 170 mm Medium Teeth (bottom) and BigBoy 2000 360mm are a wood cutter's dream.

Silky Saws has established a reputation as a leading precision toolmaker, ideal for those seeking top-notch backwoods blades. Their iconic models, such as the Silky Pocket and BigBoy Saws, deliver high performance and unparalleled quality for outdoor enthusiasts.

Silky Saws

Originating from Japan, Silky crafts saws like fine cutlery, using high-carbon steel for sharpness and sleek design. Models including BigBoy and Silky Pocket saws feature ultra-sharp, impulse-hardened teeth and tapered blades. These features allow them to easily glide through wood, making them feel more like instruments than tools. While the Bahco Laplander is a reliable choice for bushcrafters, Silky offers an edge that brings added joy to the task.

The lock and adjustment buttons are smooth and firm, allowing you to control your cutting angle precisely.

Pocketboy 170

The Silky Pocketboy 170mm Medium Teeth is proof that size isn’t everything—unless you’re slicing through limbs like a forest surgeon. Nicknamed the “Little Giant,” this folding saw punches well above its weight class. It features a 6.75-inch rust-resistant blade that’s tapered, chrome-plated, and ready to make short work of your trimming, pruning, and camp-craft chores.

Its secret weapon? Silky’s MIRAI-ME tooth design is a razor-sharp, impulse-hardened pattern that chews through softwoods with smooth precision. At 8.5 teeth per inch, the medium-tooth configuration hits the sweet spot for balanced speed and finish.

The author cut finger-to-wrist-thick rounds of wood with the Pocketboy.

The blade locks in two positions—one straight, one flush—so you can work at awkward angles without torquing your wrist. Thanks to its rubberized, non-slip handle, it stays put even when your hands are cold, wet, or coated in sap.

Toss in a slick flip-lock carrying case with a belt clip, and you’ve got a saw that travels like a gentleman but works like a lumberjack. It folds down small enough for glove boxes, backpacks, or that side pocket on your cargo pants you always forget about.

Made in Japan. Born to cut. Built to last.

MSRP: $49.99 – $57.99.

BigBoy 2000

The Pocketboy is a nimble scalpel. In contrast, the BigBoy 2000 360mm is like a full-sized chainsaw’s clever cousin, that folds up and rides in your pack. Its design is similar to the other Silky Pocket and BigBoy saws, with impressive features like a 14.2-inch blade and aggressive XL teeth (6.5 TPI).

Crafted by Silky in Japan, the BigBoy 2000 features a taper-ground, impulse-hardened blade designed for fast, clean pull cuts. The non-set tooth design slices through green and dry wood alike with minimal resistance. The longer stroke means fewer strokes. Translation: You spend less time sawing and more time admiring your handiwork.

Its lightweight aluminum handle feels solid but won’t weigh you down. The rubberized grip keeps it planted, even when your palms are slick with effort (or sap). It locks open securely, so no unexpected folding mid-cut—a feature your fingers will appreciate.

Here’s the largest comfortable cutting size log for the large Silky BigBoy.

At just over 16 inches closed, it rides comfortably in a pack. Yet, it unfolds into a serious piece of kit that’s become a go-to for arborists, trail crews, and anyone who believes “overkill” is just another word for “prepared.”

MSRP: $74.99 – $104.99

Silky Pocket and BigBoy Saws in Camp

Back from a camping trip in the hardwood forest, we tested the Silky Saws. It was apparent that the Pocketboy was easier to use on more minor cuts of wood, ranging from finger-broomstick thickness. Crafting pot hooks, fire poking sticks, and tarp stakes were easily handled by the smaller of the Silky Pocket and BigBoy Saws.

However, you can easily use it on larger pieces by sawing halfway through and breaking them over a rock. The  Silky Pocketboy lives up to its name. You can effortlessly tote it around in your pocket until the need arises. 

Two Silky saws, one for the pocket (Pocketboy) and one for the pack (BigBoy).

A tool doesn’t get a name like a BigBoy unless it can do substantial work. That’s precisely why the Silky BigBoy is made for significant tasks. My camp buddies and I sawed large, seasoned hardwood lumber for cooking and ambiance. We cut the rounds to be about 3 inches to 4 inches in diameter.

It wasn’t easy, but not because of the Silky Pocket and BigBoy Saws themselves. It’s hard to cut that much thick, hardwood regardless of the tool. However, the BigBoy did an outstanding job and proved why it remains the champion of the BigBoy saws! 

Rattlesnake Tactical Enters the Glock Game

I’ve never heard of Rattlesnake Tactical, but I have heard of Ammunition Depot. Ammunition Depot tends to sell ammo, but now they’ve partnered with Rattlesnake Tactical to sell magazines. Specifically, Glock magazines. As a company known for selling ammo, they put their own spin on selling magazines and are selling them pre-loaded.

Admittedly, that’s optional, and you can purchase them empty, but that’s hardly any fun. Rattlesnake Tactical jumped into the Glock magazine market with 34-round, Made-In-America magazines. Interestingly enough, the company sent me the magazines with a booklet that went over the independent testing Rattlesnake Tactical put the magazines through.

They compared their magazines with competitors in the Glock aftermarket magazine world. The test was a 510-round stress test with a variety of impact trials that showed the Rattlesnake magazines outperformed the competition in reliability and durability.

Rattlesnake Tactical – Loaded Up

I got two of the Rattlesnake Tactical 34-round magazines, and I went with the loaded option. The magazines come loaded with 34 rounds of CCI Blazer 115-grain ammunition. Pre-loaded magazines are just downright convenient when it comes to range time. I happened to be testing the BC-9 from Bear Creek Arsenal, so a bit of synergy occurred. I was able to test the magazines and gun together, which was a nice way to double-dip for reviews.

I grabbed the magazines and noticed how slick the top half of the magazines were. The material is extremely smooth, and that could be a good thing. Polymer magazines don’t always drop free from polymer guns. Sometimes you have to do a little shake to get them to slide out freely. Maybe they’ve fixed that with these magazines?

Don’t worry, the whole thing isn’t slick. The bottom half has a snakeskin-like texture combined with a wide baseplate. The combination would make them easy to grab from a pouch and shove into the guts of your gun.

You might ask, why 34 rounds? Glock’s OEM extendo goes to 33 rounds, so maybe they are trying to take it to 11? If I had to really guess, it’s just designed to be double the capacity of a Glock 17-round magazine. You can monitor your ammo consumption via witness holes placed every five rounds except the last, which is placed at the 34-round mark.

To The Range With Rattlesnake Tactical

With a pair of magazines, a new gun, and a pile of ammo, I went to the range and started lighting it off. The Rattlesnake Tactical magazines slid in and out of the BC-9’s magwell with ease. Press the release button, and it drops out with ease. Magazine swaps weren’t a problem, and the texture of the magazines makes it easy to grip, grab, and put them in place.

When drawing from a magazine pouch, the stiff snakeskin texture grips your hand well. It’s Florida in the summer, so it’s 98 degrees and 80% humidity. My hands sweat a lot at the range. I’m pouring sweat and dying in the heat, but I can grab my magazines and get them where they need to be.

I practiced reload drills with the BC-9 quite a bit, and I let the magazine dive into the sand. Sand is a world-killer when it comes to gun parts and pieces. Even after taking plenty of dives into fine white sands, the Rattlesnake Tactical magazines kept feeding the BC-9 without a problem. I could shoot fast, I could shoot slow. I could hold the magazines like it was a TEC-9 and I was a bad guy in Miami Vice, and they worked without a problem.

The Many Platforms

Most of my shooting was done with the BC-9, but Glock magazines are used in a wide variety of guns, so I wanted to test the Rattlesnake Tactical magazines in a wide variety of guns. This includes a stock Glock, a KelTec Sub 2000, a KP-9 AR-9, and a CMMG Resolute carbine. The only platform that choked was the KelTec Sub 2000.

I got several failures to eject, which led to double feeds. I’m not sure if that’s gun or magazine-based, but I haven’t had this problem with magazines before. I’m not exactly sure what the problem is, because these mags also work in every other gun I put them through. Is it a combination of gun, magazine, and ammo? I’m not totally sure.

Rattlesnake Tactical also says they don’t work well with the Ruger PC Charger, so keep that in mind as well.

Overall, I think Rattlesnake Tactical can be a serious competitor in the Glock magazine market. Their affordable nature will make them a great go-to for PCC enthusiasts not looking to spend 30 bucks on a Glock OEM option. Competition is king, and I hope Rattlesnake Tactical dives wholeheartedly into the magazine game with options for 10mm, .45 ACP, and beyond.

Going Hands-Free – Streamlight’s New SL-SideSaddle

SL-SideSaddle
Photo credit: Streamlight.

Streamlight has long been my preferred brand of portable illumination products. There are others out there that are just as good, no doubt. But I tend to be brand-loyal with my gear. I find one I like and stick with it. They recently came out with a new hands-free light called the SideSaddle that looks all sorts of awesome.

The Streamlight SideSaddle

Most headlamps today are mounted such that the light is at the center of your forehead. This one, as the name suggests, sits on the side of your head. It’s designed to easily fit on baseball hats and bump caps, as well as safety helmets.

In addition to outdoor recreation at night, headlamps are a great tool in the prepping world. They allow you to complete chores after dark during a power outage, such as cleaning dishes or bringing in firewood. While a flashlight or lantern can suffice for those jobs, it’s nice to be able to keep both hands free while you work.

Two Versions

The SL-SideSaddle comes in two models. One is powered by a 2000 mAh lithium polymer cell with USB-C rechargeability and the other uses three AAA alkaline batteries. They differ slightly in size. Both are three inches long and 1.14 inches high. But the USB model is 1.72 inches wide, and the alkaline battery version is slightly larger, at 2.25 inches wide. It’s a hair heavier, too, at 3.4 ounces compared to 3.1 ounces for the USB model.

The USB version of the SL-SideSaddle offers a maximum output of 400 lumens for five hours or 100 lumens for about 12 hours. The alkaline model gives you 300 lumens for five hours or 60 lumens for 16 hours.

Both models are available in either black or yellow colorways.

Photo credit: Streamlight.

Features

“The SL-SideSaddle series is setting a new standard in hands-free lighting,” said Michael F. Dineen, Streamlight President. “Designed for outdoor enthusiasts who demand versatility and high performance, the SL-SideSaddle offers reliable illumination without interfering with your gear. Whether mounted on athletic helmets or clipped to a baseball cap, it’s the perfect companion for all of your outdoor adventures.”

SL-SideSaddle - light unit
Photo credit: Streamlight.

Both models of the SL-SideSaddle allow for a high-output spot, flood, and spot/flood combined beam, along with a rear-facing bright blue safety light. The push-button tail switch remembers the last mode used. The same button also cycles through the different modes.

The SL-SideSaddle comes complete with everything you need to mount it to your cap or helmet.  Once attached to the mounting hardware, the light can be rotated up and down as needed for personalized beam placement. This is particularly nice so you don’t blind those around you when you look at them. The mount can be positioned just about anywhere, so it won’t interfere with hearing protection, visors, or other accessories.

Photo credit: Streamlight.

The unit has a tough polycarbonate thermoplastic construction that’s rugged and dependable. The unbreakable polycarbonate lens has been drop-tested to withstand a 2-meter impact.

The SL-SideSaddle USB has an MSRP of $94.34, and the alkaline version has an MSRP of $62.54. Both are backed by Streamlight’s Limited Lifetime Warranty.

The Shotgun Red Dot : More Than Just a Bead

Shotguns are natural hosts for red dots. There are tons of people who will tell you that shotgun red dots are silly and all you need is the bead. Beads are fine, but red dots give you the speed of the bead, with the precision of a ghost ring sight, and they work in all lighting conditions. What red dot works best with your shotgun? I could give you my favorites, and I might in the future, but I’d rather help you learn how to pick the shotgun red dot that is best for you.

It seems easy: just grab a red dot and toss it on your gun. It’s not that complicated, right? No, it’s not complicated, but we want the best combination of optic and shotgun, right? We don’t throw Aimpoint T1s on handguns anymore, right? There are optimum options, and that’s the point of this article.

A lot of optics are just too big and sit too high. Optics like the EoTech series are made for AR carbines, so they sit quite high to work with an inline stock. On most shotguns, they sit too high. This might not be true if your shotgun uses an inline stock, like the Mossberg 590R, the Genesis 12-gauge guns, and all those Turkish abominations out there.

Those guns have their own parameters for red dots. This article focuses on your traditional shotgun with a traditional stock, or a non-inline stock design. This makes up the majority of the shotguns on the market.

Shotgun Red Dot Design

Shotguns work within the same ranges that handguns work in. With that in mind, a handgun red dot works pretty well on a shotgun. Pretty much all of my shotguns are wearing handgun dots. Their small size works exceptionally well on a shotgun. These little optics don’t get in the way as my hand goes over the top of the optic to port load, or to retrieve shells from a side saddle.

Aimpoint Minis work well too, and so do their clones. These types of optics do require the right mount to work well, but we’ll cover that in the next section.

Enclosed or open emitters are common discussions amongst handgun users, and those same points come up here. I use both, but I’m a home defender. As a home defender, I don’t think an enclosed emitter is necessary. I’m not going to be fighting in the rain. If I’m going outdoors and I’m a cop or planning to survive the end of the world, then I want the extra reliability of an enclosed optic.

I generally want to be able to access the battery compartment without moving the optic. I also prefer my buttons to be large and easy to press. Those are little things, but I value them on a shotgun.

Mounting Systems

A big reason why I like handgun optics is how they mount. Directly mounting the optic to the gun is possible. Mossberg has wisely embraced this design with the RMSc footprint carved directly into their receivers, and I hope it’s the future of shotgun red dots.

Outside of direct mounting, there are shotgun-specific optic mounts that are designed to keep the optic as low as possible. Mounts like the Scalarworks SYNC and the Aridus CROM are excellent examples of low mounts. The CROM is a great Aimpoint T-1 option. Not to toot my own horn, but I helped design the CoSight from Defender Tactical, and I’m partial to it on Mossbergs.

Picatinny rails and Picatinny adapters are fine. They do introduce a layer of stacked tolerances, but they work fine. It’s just not the optimum solution. Ultimately, I want to be able to mount the optic as low as possible. This means I’m going to review mounting options and take a look at the optic footprints they support.

Reticles

Don’t overthink the reticle too much. Big reticles are fine, and so are small reticles. You can use a 6 MOA, 2 MOA, or some variation of a 3 MOA dot. They all work fine. As long as you can quickly see it, acquire it, and put it on target, you’ll be fine.

If you want to get somewhat fancy, you can go with a circle-dot reticle. Holosun offers a ton of them. The new Vortex Vipers offer multiple circle-dot reticles, and the circle-dot has become very common on pistol red dots. The benefit of the circle-dot allows you to measure your patterns in coordination with the circle.

When you pattern your buckshot and zero your shotgun red dot, you can use your circle to know how far the buckshot spreads. For example, on my Benelli M4 with a Holosun 507C, I know that my choice of eight-pellet Federal Flitecontrol will remain inside that 32 MOA circle at 12 yards and closer.

For home defense, that’s perfect. I’m not taking a shot beyond 12 yards. Within twelve yards, I know every pellet will remain inside that circle. It gives me a nice, huge reticle that’s easy to see, and I have total pellet accountability.

The Shotgun Red Dot

Shotgun red dots aren’t tough. Get a small red dot that mounts low and provides a bright and clear reticle. Everything else is secondary, and you can pick and choose from there. If you can do that, you’ll succeed.

Mec-Gar’s 18rd Steel Glock Magazine

I imagine that everyone is familiar with Glock’s polymer mags with the metal lining. They work great, but some folks put their trust in steel. If you’re one of them, you may want to check out Mec-Gar’s new 18-round Glock magazines.

Mec-Gar Glock 17 18rd Magazine

The Italian firm of Mec-Gar has been making magazines since 1965. In fact they make a lot of the OEM magazines for major gun companies. Many folks only advise using factory mags for reliability. Well, Mec-Gar is the company that makes many of those “factory” mags. They also supply military magazines to a number of countries.

Point being, if you’re hesitant about buying aftermarket magazines, Mec-Gar isn’t exactly aftermarket.

Mec-Gar is making three different versions of their Glock mag. Currently, they’re available in 9mm and based on a Glock 17-length body. They’re made from heat-treated carbon steel, with an anti-friction black coating. They use a high-visibility bright green high-impact polymer follower and a high-tensile music wire spring. The baseplate is also made from high-impact polymer.

They are not compatible with standard Glock floor plates. The Mec-Gar mags will work with most guns that accept Glock mags, although they do note that they will not work with a Glock 19X.

Capacity is 18 rounds for the Glock 17 and Glock 19 models, and there’s also a 10-round version for ban states. With the standard capacity magazine, you pick up one extra round over a factory Glock magazine, and they still fit plush with the grip. The Glock 19 version is the same length as the other mags but features a high-impact polymer shroud to match the shorter Glock 19 grip.

The Mec-Gar mags feature dual magazine cutouts so that they’re compatible with any generation Glock. Another unique feature of this magazine is that, unlike other steel Glock mags, you don’t have to replace your factory magazine release. Other steel mags have sharp edges that wear down the polymer mag releases that Glocks come standard with. Generally, you need to replace those with aluminum ones if you want to use a steel mag. Mec-Gar has managed to make a mag cutout that works with the factory mag release.

Field Testing

I had two of the Glock 17 18-round models for testing. Like all of the Mec-Gar mags I’ve used, they were solidly built with excellent fit and finish. There are no sharp edges like you sometimes get on cheap magazines.

The dual-side mag release cutout was interesting. Rather than an actual cut, it’s an indentation with rounded edges. That allows it to lock into whatever generation Glock you’re using, and with the right side mag release button. The rounded edges prevent the factory plastic mag release from wearing down.

I tried the mags in my Gen 3 Glock 17 in pistol mode as well as in the FAB Defense AMP carbine conversion kit. My Glock is SBR’d. I also used it with a Glock 45, which is my current duty gun. For some variety, I also tried it in an SCT Glock 17 and 19 frame, a similar old Strike Industries 80% frame, two Polymer 80 full-sized frames, and an 80% Arms GST-9 frame.

Reliability

Reliability was 100% with a variety of ball and hollow point ammunition. That didn’t surprise me because I’ve been using Mec-Gar mags in my Beretta M9 for years, and have them for a few other guns as well. I’ve always had good luck with them. The mags locked in solid and dropped free in all of the guns, with two exceptions.

On my Gen 3 gun, one mag locked in fine, the other would lock in but could be pulled free, or would pop loose under recoil. I was initially concerned about this until I tested the mag in my other guns. This is the only one that it happens with.

In fairness, that’s my oldest Glock, and the mag release was likely already worn before I ever started using the Mec-Gar mags. I think it’s worn just enough that it isn’t grabbing the rounded edge of the Mec-Gar mag cutout. There must be some slight variation between the two mags because the other one works fine in that gun.

The other problem I had was with one of my Polymer 80 frames that has a flared magazine well. The base plate is just big enough that it keeps the mag from fully seating, as it interferes with the flare on the aftermarket mag well. I suspect this may be why Mec-Gar says that the mags aren’t compatible with the 19X as well. Not all aftermarket mag wells are alike, though, so your mileage may differ.

Wrap Up

If you’re a fan of steel mags, the new Mec-Gar Glock mags are right up your alley. They’re solid, well-built, and reliable. The fact that they give you one more round than a factory mag while still being flush fit doesn’t hurt either. MSRP is $29.00, which is pretty competitive with factory mags. Even better, though, is that I’m seeing street prices under $20 online. That’s a downright steal.

Currently, I carry a factory mag with a +3 extension for a 20+1 capacity in my Glock 45 for work. I carry two 17-round mags in my mag pouches for a total of 55 rounds. That’s a bunch of ammo. If I swapped out to the ec-Gars, I would still have the same 55-round ammo capacity but with a flush-fit mag in the grip instead of the extended one. Looks like I may need to buy a third Mec-Gar Glock mag now.

For more information on Mec-Gar’s Glock mags or other products, check out their website at Mec-Gar.com.

The Shot Timer: Beyond the Beep

Most folks who brand themselves “serious shooters” have a shot timer. We’ve shelled out what seems like a pocketful of cash for a piece of plastic with a Gameboy-era screen, and we’re proud of it! Shot timers are brilliant tools and are one of the few things, outside of ammunition and training, that can truly make you a better shooter.

Most of us use shot timers in a fairly simple way: shoot the drill, examine the time, and try to be faster next time. For many things, that’s fine. However, you aren’t getting the most out of your shot timer just by doing that. In fact, to truly maximize its utility, you might need to grab a notebook and pen, or at least a notes app on your phone.

To give credit where credit is due, the idea of a shooting journal was first introduced to me by Rick Hogg of War Hogg Tactical. He provided a shooting journal at the class I took with him. He introduced me to the concept, and it’s been a must-have for most of my training. If I’m seriously trying to improve, I’m breaking out the shooting journal and the shot timer.

How I Used to Use a Shot Timer

Years ago, when I first purchased a shot timer, I used it fairly simply. The timer went “beep,” I shot my drill, looked at the timer, and tried to go faster. I typically had a good idea of how fast I could shoot a Bill Drill, a Failure To Stop drill, or my draw to first shot, and I just tried to be a little quicker.

When shooting a Bill Drill, I might check my draw-to-first-shot time alongside my total time, but that was it. If you shoot competitively, you often only get to see the end time because, at a match, that’s all that really matters. For a lot of people, that end time has become the number we all pay attention to.

When you only pay attention to that number, you’re leaving a lot on the table. A lot of what exactly? Data. Shot timers and targets provide data that can be used to diagnose shooting issues and to generally improve your shooting skills. The timer isn’t everything, but it does provide a ton of data that correlates with your target.

The Better Way to Use a Shot Timer

Targets and shot timers provide data, but if you don’t record your data, then it’s somewhat useless. Maybe you have a steel trap of a mind, but I don’t. Unless it’s a weird fact about a caliber that hasn’t existed since the 1960s, I’m not likely to keep track of it.

Recording data provides you with the ability to go back and review your previous performance and keep a track record of improvements, or observe if your performance is declining. The first step in getting the most out of your shot timer is to get a shooting journal and use it.

I tend to write out the drill I’m shooting. I approach my training with a plan, or at the very least, I try to. My journal will have something like:

Bill Drill

Shot 1 – Shot 2 – Shot 3 – Shot 4 – Shot 5 – Shot 6 –

Record It

I’m recording every shot fired. I’m using the timer to review each shot, and each shot gets its own split time. The reason for this is that I can use this time to diagnose or notice trends. One trend I personally notice is that I always speed up the more I shoot. Shots 4, 5, and 6 are considerably faster than shots 1, 2, and 3.

I know the first shot comes after a draw, so it’s slower. However, if I can capture that same speed and control for shots 2 and 3, I can cut my time down drastically. Without using the shot timer to its full advantage, I wouldn’t know this. My “caveman mind” would just be saying, “Just go faster!”

I do this for various drills, and I make sure to break them down by target. If I’m shooting a FAST drill, I’m recording the shots a bit differently to accommodate the two different targets used. If I’m doing a multi-target engagement, I’m doing the same. This way, I can observe if my transitions to the right or left are faster or slower.

The shot timer is one aspect of data. As mentioned, the target matters too. If I have a miss, or let’s say my group is wider than average on my Bill Drill, I notate it. This way, I’m not leaving any data on the table.

Watching the Time

Use your shot timer to its full advantage. Shooting and skill improvement can be data-driven and should be data-driven. Record, observe, and learn from the data your shot timer provides, and you’ll get a bit better every range trip.