

[Editor’s Note: Readers, this article is primarily to help users of the M2A1 on the M205, for everyone else it will be technical entertainment. Enjoy or employ as relevant.]
The Army is all about lightening the load these days. Making ammo lighter, making equipment lighter, and trying to make Soldiers lighter (ACFT: Hint Hint)
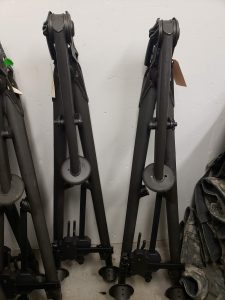
In this case though, the M205 is the latest in making a piece of equipment lighter. This tripod replaces the M3 Tripod. It is now considered a Basic Issued Item (BII) for the M2A1, which means that it currently cannot have a separate work order created for it (for civilians reading, these are rules of repairing and maintaining it). It will be also be a one for one swap with your M3 Tripod.
This tripod comes with a built in Traverse and Elevation (T&E) mechanism and pintle. This tripod is 16 lbs. lighter than its predecessor. While all of these are great changes, it comes with some cons as well.
Soldiers need to know how to maintain the tripod before putting it into operation, how to properly employ it and use it to its full potential, and how to properly set up and takedown the tripod. My coworker recently worked on 15 of these tripods back to back, due to this exposure, he learned tips and tricks to pass on. Some of these tricks are also mentioned in the Technical Manual and Heavy Machine Gun Training Circular which can be found on Army Pubs.
Maintenance
When receiving your tripod it will be covered in cosmoline. It’s recommended that you job order it to your shop to properly inspect and clean it. Inspection is key as there have been mistakes found with new equipment. Also, if it is not properly cleaned it won’t lock and function correctly.
To clean, use dry cleaning solvent on the entire tripod to first strip off all cosmoline. After the solvent dries, so as not to mix different lubricants, thoroughly put a layer of Cleaning, Lubricant, and Preservative (CLP) on. If this is not done, the pintle will not rotate when locked in entirely. This is a cleanliness issue, not an equipment issue.
Deploying
Set up is pretty self-explanatory for this mount but there are some interesting things to know.
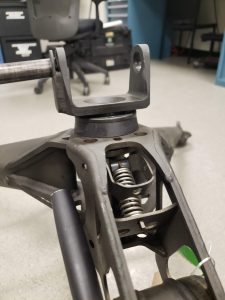
First, you will lift up on the locking lever letting the front leg go forward, and then locking it in again. You will take the T&E out of the notch; make sure not to adjust it because it will already be ready to roll into the slot on the right leg. Roll the traverse bar down into the notch. It shouldn’t need to be pounded in, as it should roll in, but it can be tight.
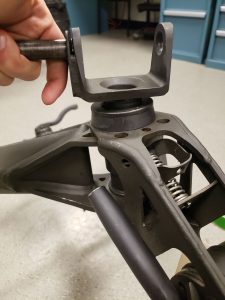
Next is the pintle. IMPORTANT, an older pintle that went with the M3 tripod will fit into this mount, however it has been known to become stuck and damage the tripod Make sure that the correct pintle is installed. Be sure that the pintle is locked in all the way, meaning no space at the bottom. It should turn 360 degrees. If it is only partially locked in, it will bounce when firing. Shooting past 1000m, I don’t want my M2A1 bouncing.
The key to making your setup really work for you is to mount the gun and then mount the tripod to know where you want your legs to be locked in, shorter or taller, and terrain dependent.
Stowing
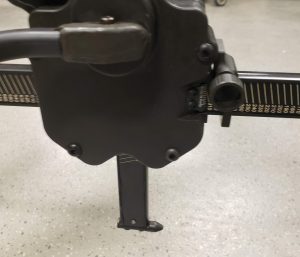
Take down for this tripod can be a pain if you just try to “wing it”. Both traverse and elevation bars need to line up perfectly to fit into the slots to takedown the tripod. To do this, it’s really easy, if you actually do it.
Bring your traverse mechanism all of the way to the left, and elevation all of the way up. Close the legs of the tripod and it should line up directly in both slots. Remember to stow the pintle in the proper spot on the front leg. Make sure to lock the front leg handle when stowing the tripod.
Operation
With lighter weight, there is more recoil. The weight will be to the rear of the tripod due to the receiver and components of the weapon.
When firing, due to that weight distribution, the front leg will pop up. Putting more sandbags and digging the legs in, can help that recoil management. When firing, try lifting up and forward as well to put that pressure into the front leg.
To adjust the traverse limiter knob there is another trick.
There are two ways to loosen the knob. You can either use the mechanism to slap the knob. Release both elevation and traverse handles and freely hit the mechanism against the knob, this will allow you to loosen it and move it to where you want it. The second way is to move the mechanism all the way against the knob and click over twice until it contacts the knob with enough pressure to allow you to loosen the knob.
If you are using a tool, such as a wrench or hammer, you are wrong.
There are always pros and cons when it comes to any piece of new equipment. The trick is just to learn how to properly maintain it and employ it. Take some time to read the manual first, and let the mount work for you.


