There are three surefire ways to pitch a tarp for success, whether it be a picnic in the woods or a hunker-down shelter. This article will teach you to master three tarp pitches for success—A-Frame, Lean-To, and Plow point tarp configurations.
Tarps For the Win
Tarps are a popular choice for shelter due to their portability and lightweight design, making them ideal for camping, hiking, and outdoor activities. Made from materials like nylon or polyester, they easily fold for transport, though heavier options like canvas are available.
A reliable tarp can protect you and your gear from wind, rain, and sun. To set up a tarp, find two trees or poles and stretch it over a ridgeline. Despite their lightness, tarps provide adequate protection, proving essential for outdoor enthusiasts. You can create a comfortable refuge from the elements with a bit of planning.
Advertisement — Continue Reading Below
Backpacking Years
As a kid, growing up car camping, my family used tents. They were heavy and complicated. Even worse, they were terrible to put away when muddy and wet. Tents were the main reason we were cold throughout the night. They were too high and had too much airspace for us to warm.
I knew I wanted a more straightforward way to camp when I got older. That’s why these tarp pitches are so important to my style of travel and camping.
Lean-To Tarp Pitch
A lean-to offers the ultimate visibility when there’s a strange sound in the middle of the night. This open shelter allows you to identify what it is quickly with a flashlight and return to sleep.
Advertisement — Continue Reading Below
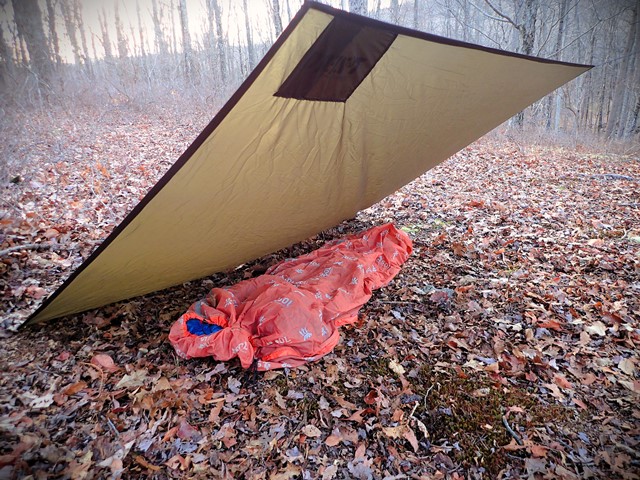
Pitching a lean-to tarp shelter is a simple way to protect yourself from the elements. You need two to four stakes and some cordage for the ridgeline.
Start by finding two sturdy anchor points, like trees, and string a line between them at shoulder height. Drape the tarp over the line, ensuring one end is lower for a sloped roof—aim for about a 45-degree angle. Secure the corners with stakes or rocks and adjust the tension as needed. If your tarp is large, leave a foot of overhang for an awning, which requires extra cordage and stakes.
Advertisement — Continue Reading Below
Alternatively, use a thick pole as a ridgepole for better stability and to save cordage. With the proper setup, you’ll stay dry and enjoy your surroundings without worry.
A-Frame Tarp Pitch
The A-frame configuration is the most popular tarp setup for hammock camping. It allows you to set the tarp high in hot and humid conditions, providing better visibility and airflow while keeping you dry.
Upgrade from the traditional ridgeline to a sturdy, wrist-thick pole as your ridge pole. This solid alternative will make your camping adventures much more exciting!
Advertisement — Continue Reading Below
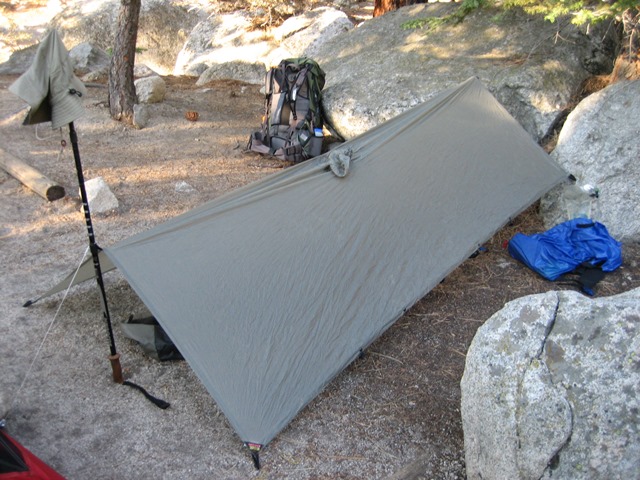
Setting up an A-frame tarp shelter is straightforward and involves just a few simple steps. First, find two trees or poles spaced 8-10 feet apart in a flat area without overhanging branches. Next, tie a ridgeline between the two points at a height that offers the best coverage.
Drape the tarp over the ridgeline, ensuring it hangs evenly on both sides. Secure the tarp’s corners to the ground using stakes, rocks, logs, or coral. Finally, adjust the tension of the tarp by tightening or loosening the ridgeline and corner stakes until the shelter feels taut and secure. Pitch the tarp down flush with the ground for added coverage and use debris to create a seal.
Advertisement — Continue Reading Below
Remember to choose a tarp with adequate coverage and pack extra lines and stakes in case of unexpected weather. With some practice, you can pitch an A-frame tarp shelter quickly, providing a secure and waterproof camping shelter.
Flying Diamond Tarp Pitch
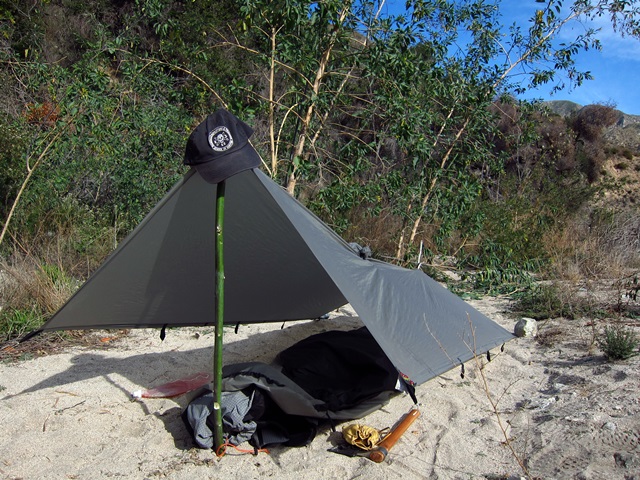
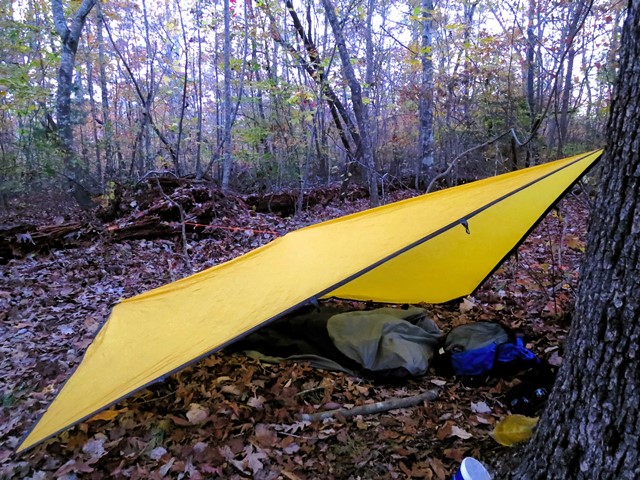
Also referred to as a plow point, this efficient and straightforward setup allows you to create a rainproof shelter in just minutes. Begin by securing one corner of the tarp to a stable object—such as a tree, pole, vehicle, or boulder—at about waist to mid-torso height. Then, pull back the opposite diagonal corner of the tarp and stake it down tightly to create a diagonal shape. Next, stake down the remaining three corners. This setup results in a shelter that is quick and easy to assemble.
Advertisement — Continue Reading Below
One side will provide greater coverage when using a rectangular tarp, while a square tarp offers equal coverage but less overall space. Position the extra-covered side facing the prevailing wind to block blown rain and snow effectively.
Depending on the number of grommets and tie-outs on your tarp, you can add additional stakes for a more secure seal. Similar to the A-frame configuration, you can pile debris against the tarp base for added stability.
This setup delivers more coverage than a lean-to configuration while maintaining reduced visibility. It’s the ideal choice when facing imminent wind-blown rain and snow.
Advertisement — Continue Reading Below
Practice Your Tarp Pitches to Ensure Success
Use tarps to experience unparalleled ease and significant weight savings on your camping trips. Whether in your backyard or exploring local parks and trails, these versatile tools are your ultimate solution for rapidly setting up camp. Don’t hesitate; give tarps a try and see for yourself. You might just become a dedicated tarp enthusiast and elevate your camping experience!
Familiarize yourself with setting up a tarp shelter before you head out into the field—it’s essential.
