Advertisement

Snick! – Advantages and Disadvantages of Automatic Knives

Automatic knives
Top to bottom: ZT 0512, Benchmade Auto Fact, Kershaw Knives Launch 17.

I have to admit that my fondness for automatic knives at least partially stems from my youth. Growing up, autos weren’t legal where I lived, so it was rare to see one in person. At best, you might run across someone’s older brother who had picked one up cheap from Mexico or some such. It was dull as a spoon, and the action was slow, but you still pined for it.

Times have changed, and automatic knives are now legal in most parts of the United States. There are still some restrictions here and there as to blade length and other aspects. By and large, though, the days of hiding your switchblade from Johnny Law are gone.

But is an automatic knife right for you? Let’s run through the pros and cons.

Pro: Automatic Knives are Fast

If speed is a factor when it comes to knife selection, automatic knives score highly. There is no fumbling around trying to flick the blade open with your thumb or index finger. Push a switch or button, and the blade deploys in the blink of an eye. At least, that’s what is supposed to happen.

Con: Automatic Knives Can Fail

If you don’t properly maintain your knife, which includes cleaning the inner workings, you might be surprised when nothing happens after hitting the switch. Pocket lint, dirt, and other debris can work their way inside and foul the mechanism. The cleaning procedure differs by model and construction. But most often, the application of canned air will clear up many issues.

Pro: Automatic Knives are Convenient

If you’re in the middle of a project, being able to deploy your blade with one hand can be very convenient. Sometimes, you just don’t have both hands free. You can easily hit the switch and cut what needs to be cut while you’re holding parts together with the other hand. If you have an out-the-front (OTF) model, you can also close the knife via the switch.

Automatic Knives - Kershaw Livewire
The Kershaw Livewire is an out the front (OTF) knife that’s snappy and fun.

Con: Automatic Knives Are Expensive

Ounce for ounce, an automatic knife is going to have a higher price tag than a manual knife that’s similar in size and features. This stands to reason, as manufacturing one is going to be more involved than building a flipper or slip joint folding knife. But if you shop around, you might find a good sale price on something that’s definitely worth the price of admission.

Two Favorite Automatic Knives

I own several autos that I’ve picked up over the course of the last decade or so. If I had to pick two, they would be the Kershaw Livewire and the Buck 110 Auto.

The Kershaw Livewire is the first OTF I’ve had, and it’s a lot of fun. The knife is well-made and comfortable to hold and use. The blade snaps into position fast and cycles back into the handle just as quickly.

Automatic knives - Buck 110 Auto
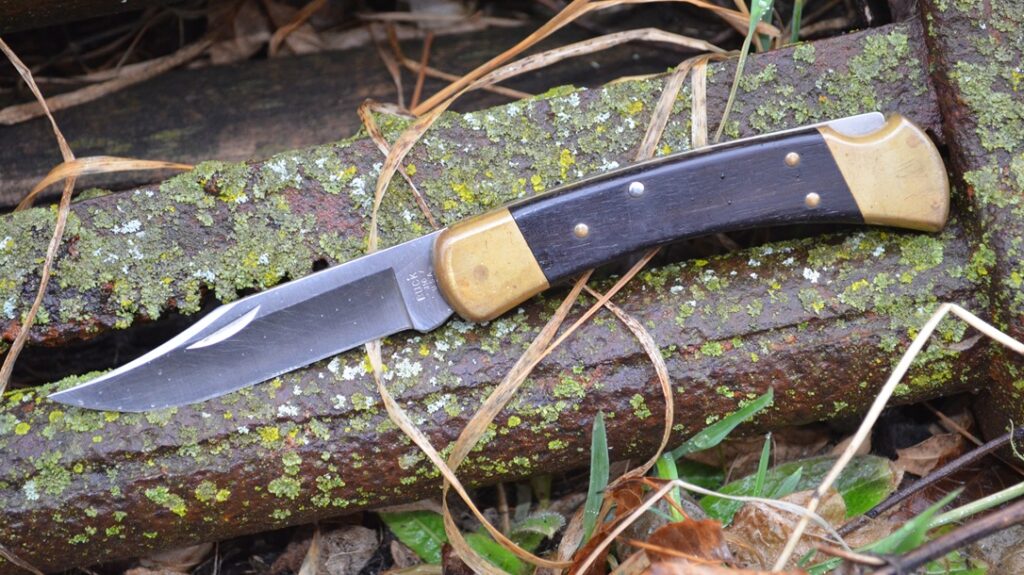
The 110 Auto from Buck Knives is an excellent addition to the collection.

The Buck 110 Auto is sort of nostalgic for me. I’ve owned and carried a traditional 110 for ages. Like many other knife nuts, it was one of my first blades. As a kid, I’d heard rumors about 110s that had been modified into automatics. But I never actually saw one. So, when Buck came out with the real deal, I had to get one. And I’ve never regretted that decision.

Hawke Vantage 30 WA 2.5-10X50

Have you ever heard of Hawke Optics? I hadn’t, but I’ve recently decided to try and create the best possible hunting rifle combination for $750 or a little less. My goal is to come in drastically under budget, but I’m also interested in seeing how close I can get to $750 while getting a good rifle and good optics. My rifle ended up being a Mossberg in 6.5, but today, we are talking about Hawke Vantage 30 2.5-10×50 optics. 

I know nothing about Hawke, but I’ve always liked the 2.5-10X magnification setting. I had an old Nikon ProStaff in 2.5-10X, but Nikon has since discontinued that optic. I wanted to find a replacement for that optic, and a big part of that old ProStaff was the low price point combined with the magnification range I enjoyed. 

That’s where Hawke came in. Finding a budget optic that’s not crap tier and offers that magnification setting wasn’t that easy. I just landed on the Hawke Vantage 30 by luck and hit that buy now button with a little hope in my heart. For less than $300, I had a 2.5-10X scope on the way, and I hoped it wouldn’t let me down. 

Who The Hell Is Hawke? 

Admittedly, before I hit the buy it now button, I did a little research into the optic and the company. Hawke seems to be a popular air gun optics brand, especially in Europe. That’s where most of the reviews originate and are tied to. They also have a fairly big name in the binocular world for affordable binos with decent glass quality. 

Hawke also makes centerfire rifle scopes with what appears to be a focus on hunting optics. You’re not going to see some ultra-tactical stuff here. That’s apparent with the Vantage 30. It’s a fairly basic design. It’s got a fixed parallax at 100 yards, and is a second focal plane scope.

I’m hunting within 150 yards, so I don’t need an FFP optic. In fact, I’d prefer an SFP option for those times when I’m only using a portion of the magnification. I want the reticle to be highly visible even at 2.5X. The reticle in the Vantage 30 isn’t complicated, which was another thing I wanted. 

The L4A reticle consists of three thick stadia at the bottom and sides and one thin stadia at the top. In the center sits an illuminated 2 MOA dot. You can switch from red to green illumination, and you have five illumination settings. It all works out for what I need, so in a jiff, I got my optic mounted and hit the range. 

The Hawke Vantage 30 – The Good 

First, the glass clarity is surprisingly nice for a sub $300 optic. It’s clear enough to easily see the varying colors in front of and around me. I can pick up the fine lines of the target at 100 yards. I can see the red center easily. My berm is mostly white sand, and I’m aiming at a white target and can see it in detail without issue. 

I like the reticle. The 2 MOA dot is easy to see and makes an excellent aiming point. It doesn’t obscure much of the target and allows you to dial in the optic nicely. Illumination is fine, but it likely won’t be necessary for my hunting type. 

My rifle shoots 6.5 Creedmoor, so it’s not a magnum shoulder thumper, but I still appreciate the 3.5-inch eye relief. It’s comfy and allows you to snap behind the gun. The field of view isn’t bad, with 12.6 feet visible at 100 yards with the magnification set to 10X. 

The weight and size aren’t bad. It’s 12.9 inches long and weighs 21.2 ounces. For a budget optic that’s acceptable to me. The ¼ MOA clicks are enough adjustments for hunting and allow a nice tight zero. The zero stuck around and never drifted during testing. 

The Bad 

While the glass is mostly clear, the optic suffers from chromatic aberration. This is most apparent when aiming at white targets, like the target I zeroed the gun for. It’s much less of an issue in low light or when aiming at darker targets. 

The reticle illumination doesn’t work in full sunlight. It’s too dim. That’s not a huge concern since most of my hunting is right before dark and as the sun rises. 

The turrets are a bit soft, and I’d prefer good audible and tactile clicks. Luckily, once the optics are zeroed, they stay zeroed. 

Behind the Optic 

The Hawke Vantage 30 does what you expect from a budget brand optic. It’s clear enough, has a decent field of view, and works well. I wouldn’t hunt bad guys in Fallujah with it, but I’d hunt deer and hogs in Florida. For the money, you are getting a decent optic with a particular magnification setting I tend to prefer. It’s not a mind-blowing value, but it’s not a bad alternative to the more affordable Vortex lineup or as a replacement for the Pro-Staff lineup. 

DIY Carabiner EDC Kits

The author uses a DIY Carabiner EDC Kit with items needed when walking the town and in the hotel room.

There’s a kit for everything. However, these DIY Carabiner EDC Kits are fun to make and convenient to carry. They’ll equip you for several scenarios and give you the tools to smash the day!

Carabiner EDC Kits

I hate Altoid Tin survival kits. Sure, they were fun to do 20 years ago. However, they force you to cram small, cheap, nearly useless pieces into a small space. Then, the snag factor comes into play when you need something. This usually results in several items ejected from the tin like Goose in TOP Gun. No good!

I’ll take a DIY Carabiner Kit any day and use substantial, quality items. These kits omit keys, as I usually keep them separate. However, personalize your kit accordingly. There’s no need to use climbing-rated or expensive carabiners for this DIY project. You need a simple carabiner to clip onto your belt loop or pack, not anything to repel a cliff with. Again, make it your own!

Travel EDC Kits 

I’m a world traveler and don’t carry essential house keys with me abroad. I use a DIY Carabiner EDC Kit with items I’ll need when walking around the town and in the hotel room. I love walking at night, and having a small, capable light gives me peace of mind. Plus, you can use it as a quick distracter/blinder in an altercation. The light is usually within reach on the nightstand in case of a power outage in developing countries, which is very common. 

Here’s a variant of the authors’ Woods Carabiner EDC Kit. It covers fire, cutting tool, signaling, navigation, and illumination.

Why a whistle for travel? Simple: In case of a natural disaster like an earthquake or another, if there’s a rescue party, you want to be heard. 

The Victorinox Waiter is my go-to knife for travel. It’s small and contains a blade for cutting string off clothing, limes, and drinks, and most often, night market chicken, squid, and pork. The VIC Waiter also has a corkscrew and multi-use can opener/cap lifter/flathead screwdriver. Naturally, the toothpick and tweezers are always in season!

A Griffin Adventure Tool is usually in all my kits, and it is an excellent bottle opener, prybar, and screwdriver set. 

Woods Carabiner EDC Kits

For wilderness adventures, I’m never without my carabiner kit. I have a cutting tool (Victorinox Camper), two ways of signaling (TOPS Dog tag Signal Mirror, Wazoo S.O.S. Whistle), Fire making device (Uberleben Hexa 3 Ferro Rod), and a general direction compass. These are the most essential pieces of valuable survival gear for me. They are not stand-alone pieces of kit. However, they are the key components that work with the rest of my gear. 

This is the author’s updated Woods Carabiner EDC Kit. It covers fire, cutting tool, signaling, and navigation.

The VIC Camper has a large main blade for carving feather sticks and all knife tasks. It has a corkscrew that houses a small eyeglass screwdriver and helps undo knots, besides the obvious wine cork popper. The Camper features an awl and wood saw, perfect for a plethora of wood crafting. The usual cap lifter/flathead and can opener/Phillips screwdriver come standard with the tweezers and toothpick. 

Signalling is paramount in a wilderness emergency. Keep at least two on you constantly. You can’t yell as loudly or for as long as you can blow a whistle. A small signal mirror helps you signal, enabling you to see yourself and check for facial abrasions or remove particles from your eye. This is essential in a carabiner kit.

A Ferro rod is a must-have piece of gear for the wilderness. Get a good one, and learn to use it. Practice it with various tinders and master it—your life may depend on this skill! 

I change it up often and recommend you do the same to find what you like best. 

This DIY Carabiner EDC Kit is what the author stashes in his camera bag. It covers the essentials and is low-key.

Kit Tips 

  • Keep it light and realistic
  • Use quality pieces
  • Cover the basics
  • Practice using the kit
  • Be creative and make it fun!

How I would Have Designed the M16A2

The M16A2 holds a special place in my heart. The rifle I used in boot camp makes me one of the last generations to say that. The M16A4 replaced the M16A2 not long after I left the island. Most of my USMC career was spent with an A4 or M4; the A2 remained this nostalgic rifle. I admittedly didn’t know much about rifles, and upon experiencing an M16A2 as part of the retro runs, I realized it had problems. 

How I’d Make the M16A2

As a guy who likes to do thought experiments, I wanted to think about what I would do if I were in charge of the M16 program. What would Travis do if he was allowed to design the M16A2 system? It’s easy to gamify this idea and attach a bunch of proto-modern stuff to the rifle. To avoid that, I’m sticking with what was common at the time and common amongst standard infantry forces. 

Burst Begone

The USMC and military wanted to eliminate the automatic function because they believed soldiers and Marines were just ripping full auto fire at the first sign of contact. To combat this supposed waste of ammo, they installed a three-round burst feature. They somehow concluded that this was the right combination of automatic fire and ammo consumption. 

To install the three-round burst design, they went with a cam mechanism. This greatly complicated the trigger and honestly made it suck. Plus, the system was more like a limiter. If you pulled the trigger to fire a burst and only fired two rounds, the next pull of the trigger on the burst setting would only fire one round. 

It’s silly. Honestly, if given the choice, I’d use a semi-auto system over a burst system. It’s smoother, simpler, and provides a much better trigger. 

Keep the A1 Length of Pull 

In creating the M16A2, the USMC essentially wanted to create a target rifle that would excel at the Known Distance range. They installed a stock that was ⅝ of an inch longer with a recoil pad that made it about 1 inch longer than the A1 stock. That’s great for building your body and establishing a position with a loop sling, but it’s long for modern combat. 

It worked poorly with armor and load-bearing gear and was difficult to manage for smaller shooters. The shorter A1 length is much better for actual fighting purposes. Shorter-length stocks are also easier to use for smaller shooters and while wearing gear. 

Uses a Mix of A1 Sights and A2 Sights

Keeping the target rifle motif, the M16A2 featured complicated sights. At least they were complicated for an assault rifle. The big exposed dial also made it prime time to adjust the sight accidentally while in the field. What the A2 did right was integrate a wider alternative aperture for close-range shooting. 

I’d combine the M16A2 aperture with the M16A1 sighting system, which would create a simpler, more versatile sighting system for the rifle. 

Shorten the Barrel (and Lighten it) 

First, I’d make the M16A2 a dissipator-style build or, at the very least, trim it to 18 inches. Short barrels are the rage now, but they existed in 1979 when the USMC started the M16A2 project. If they could reliably figure out dwell time and get the M16A2’s barrel to 16 inches while retaining the front sight position and rifle-length gas system, you’d have one helluva rifle. 

The silly reinforced portion of the barrel was done due to the belief that barrels were behind too easily. In reality, a bur near the gas port on M16s was throwing off the gauge. Removing the burr removed the problem. This would lighten the rifle and better balance it. 

What Would I keep? 

So that’s what I would ditch to create the M16A2. That’s my take, but you might wonder what I’d keep. It seems like I’m ditching a lot of the M16A2 upgrades. First, I’d keep the twist rate since we are stuck with the 62-grain projectile in this era. 

Second, the case defector made the rifle much easier for left-handed shooters. It’s remained a part of the AR-15 and M16 family since and doesn’t seem to cause issues. I’d also keep the muzzle device. The old A2 birdcage is a highly functional and very useful muzzle device.  

The new handguard is fine and made to simplify logistics. It worked fine—it got hot fairly quickly—but it worked. Finally, I’d keep the new polymer used to create the stock. It was way tougher and more durable. I guess the pistol grip is fine. I don’t need the finger groove thing, but it’s fine. 

That’s my take on the M16A2. Admittedly, I’m no expert. I’m just a retro rifle enjoyer. I might try to make my own Travis-Mod M16A2. The more I think about it, the more I want it. 

Five Rare ARs H&R Should Tackle Next

I’m not an ‘AR’ guy. I’m not passionate about the subject. I think they are the best all-around semi-auto rifles one can own, and I appreciate them, but they bore me. Mostly. Retro ARs entertain me, and H&R has been a big source of my entertainment. They recently released the H&R DOE SMG, a 9mm AR pistol that clones an incredibly rare variant of the Colt SMG. That got my motor running, and I got to thinking what rare ARs should H&R make next? 

The Five Rare ARs 

I came up with five rare ARs I’m hoping that H&R would choose to tackle. 

The Colt Automatic Rifle 

Of all the Rare ARs on this list, this one might make it. The Colt Automatic Rifle was aimed at being a squad support weapon in the grand tradition of guns like the BAR. Compared to belt-fed designs, the gun would be lighter and more maneuverable, while also sharing magazines with the rest of the squad. 

The design implemented an open bolt to reduce heating and cook-offs associated with automatic fire. It was also developed as a full-auto-only firearm. It features a 20-inch barrel and an extremely distinctive handguard. It’s boxy and squared off with a heat shield to protect it after long strings of fire. Over its life span, the gun was made with both a carry handle upper and flat top upper. Bipods and forward grips other commonly mounted accessories. 

Sadly, the full auto and even the open bolt design would have to be eliminated from the H&R offering. They’d be stuck with the distinct handguard, bipod, and even the neat little forward grip. Hell, include a D-60 with it to take things to the next level. 

The Colt 605 

The Colt 605 was the original attempt to create a short-barrel M16. They trimmed the 20-inch barrel to 15 inches, but they chopped the barrel off at the front sight block. Designs similar to the Colt 605 would be called Dissipators in the future. Dissipator was a reference to the handguard used by Bushmaster, but the name stuck. 

The Colt 605 didn’t work well. Colt never increased the size of the gas port to deal with the reduced dwell time. This created a reliability issue that has since been solved. My vision of the H&R version of these rare ARs would have the larger gas port but still wear the classic M16 style furniture. 

To avoid the NFA, the H&R 605 would need either a 16-inch barrel or a 15-inch barrel with a pinned and welded muzzle device. It would still be capable and fun to shoot. Rifle-length gas systems are bae. 

M231 Port Firing Weapon 

The M231 Port Firing weapon is another rare AR that comes in full auto only. The M231 Port Firing weapon was designed for American APCs, namely the M2 Bradley. I’ve heard the M231 was used for two purposes. First, when loaded with tracers, it could mark targets. Second, it acted as a PDW to protect the Bradley. 

These guns had an extremely high rate of fire, up to 1,200 rounds per minute. They had a 15.6-inch barrel and a unique set of handguards. They also had a carry handle and flip-up front sight, making them interesting-looking little guns. Initially, these guns were stockless, but a wire stock was later developed for using the gun out of the Bradley. 

This wouldn’t be a tricky conversion. It couldn’t be full auto or open bolt, but a wire-stocked AR with a 16-inch barrel would be neat. The retro look and design would certainly be something different. 

The Mk4 Mod 0 

This is one of the most obscure and rare ARs ever created. The Mk4 Mod 0 namesake tells you it comes from the Navy. Specifically the SEALs. There isn’t a lot of information out there about the Mk4 Mod 0. There are a few things we know for sure about it. First, it was made for ship-to-shore use and had holes drilled strategically to drain water from the gun. 

O-rings were locked into the buffer tube to help prevent water from getting into the receiver extension. The gun wore an extremely durable, corrosion-resistant finish inside and out to prevent rust. Additionally, the gun was designed from the ground up to use a suppressor, specifically the early HEL suppressors. Interestingly, the gun even featured a modified charging handle to help limit gas blowback through the gun. 

Making one of these would require an included suppressor or a faux suppressor. PSA has started selling cans, which seems like a natural extension of their business. Add in the MACVSOG-style camo furniture, and you’d have a slick Vietnam-era AR. 

The Colt 608 Survival Rifle 

Colt wanted to provide pilots with a compact but capable weapon, and thus, they designed the 608. The 608 was intended to be ultra small and light, and the AR series’ natural breakdown design made it incredibly compact. It featured a 10-inch barrel and was 29 inches long overall. Colt minimized absolutely everything they could. 

They chopped the grip in half, minimized the stock, and equipped the platform with 20-round mags, which made the rifle super small compared to other rifles of the era. The Colt 608 Survival Rifle didn’t win the contract and faded away. 

H&R could easily revive this design. It’s just a short AR. Chop the grip, make the stock into a minimalist brace, and boom, we have a Colt 608. The H&R Survival rifle might be a loud little beast, but it would be extremely fun to shoot. 

Rare ARs and You 

H&R has a fun opportunity to produce some awesome and rare ARs. The old AR platform has a huge history that’s chock full of rare and weird designs. I hope H&R sees nothing but success because I love the weird and rare ARs

The Prepper Kitchen – Off-Grid Food Prep

Off-Grid Food Prep

Food prep in the wake of a major event might look a little different than it does right now. If the grid is down, you won’t be using a microwave, Instant Pot, or air fryer. In many cases, it might just consist of heating water or canned foods.

The importance of being able to serve up a hot meal to your family cannot be overemphasized. Sure, survivalists are all about embracing the suck. And that’s absolutely crucial, being able to survive and thrive under adverse conditions. But y’know what? If you’re dealing with a stressful situation, it’d sure be nice if some things didn’t suck. And a hot meal can go a long way toward making people feel better about what’s happening around them.

On top of that, boiling water is one of the best ways to make it safe to drink. So, even if you decide to tough it out and decline the steaming bowl of chili for dinner, you’ll still want to be able to get water hot enough to kill any pathogens swimming around in it.

Let’s take a look at just a few different options. This isn’t meant to be an exhaustive list. Hopefully, it will get you thinking about the best ways you can tackle the problem in your own situation.

Off-Grid Food Prep – Grills

Off-Grid Food Prep - Grill
Your patio grill can cook more than just steaks and burgers.

Many people have gas or charcoal grills sitting on their patio or deck. Sure, they’re great for burgers and steaks, but they’ll do okay heating up other foods as well as water in a pinch. The best would be a grill that has a side burner, but not all of us are that fortunate. Charcoal grills aren’t that pricey. You can sometimes find them secondhand at rummage sales, too. If you run out of charcoal, you can use branches and sticks for fuel.

Off-Grid Food Prep – Patio Fire Pits

These have become very popular in the last several years. They come in a wide range of shapes and sizes. These fire pits consist of a large metal container on legs, inside which you burn firewood. They’re great for ambience as well as for providing a little warmth on a chilly late summer evening. You can also use them just like you would a campfire when it comes to heating food and water.

Off-Grid Food Prep – Camp Stoves

Off-Grid Food Prep - Camp stove
These come in different styles, including ones that have multiple burners.

This option is pretty obvious to anyone who has camping gear sitting in the garage. I mean, food prep and boiling water are precisely what a camp stove is supposed to be used for, right? Just be sure you’ve stocked up on fuel canisters.

Off-Grid Food Prep – Campfire

Off-grid food prep - campfire
If you have space in the backyard, a campfire can do the trick nicely.

While not everyone has a backyard, this is definitely an option for many people. Food cooked over an open campfire just tastes better. The downside is making sure you have plenty of wood on hand, as well as taking care that nothing gets out of control.

Off-Grid Food Prep — Helpful Hints

With the possible exception of the camp stove, these food prep options can take a little experimentation to get the hang of them. Cooking times are going to differ, given that you can’t precisely control the cooking temperature. My recommendation is to play around with these methods on a regular basis. Make dinner with them at least once a month, if not more often. Yes, I know many of us run our patio grills constantly when the weather is decent. But how often are you cooking the entire meal that way?

Also, bear in mind that most common kitchen cookware isn’t going to hold up well to the higher heat generated with these cooking methods. Cast iron? No problem. Thinner stock, not so much. Either pick up some cast-iron cookware or invest in a set that’s specifically intended for camp use. The family cook will thank you.

Burris Introduces the FastFire E

Burris Optics recently introduced the new Burris FastFire E. This is the company’s first fully enclosed emitter red dot in the popular FastFire series. It’s designed for use on pistols, shotguns, and carbines. The E has a pretty impressive set of features too, which will compete favorably with any other sights currently on the market.

The FastFire E

The FastFire E is crafted from monolithic machined aluminum. It’s waterproof, shockproof, and fogproof, which makes it rugged enough for EDC, tactical, or hunting applications. It’s 1.81 inches long and weighs just 2.45 ounces. That’s especially nice if you intend to mount it on a handgun. It comes with a black anodized finish.

The E uses a 3.5 MOA dot with an “always on” feature. It’s powered by a single CR2032 battery and has an impressive 60,000-hour battery life. That’s almost 7 years of constant on battery life, even with the shake awake feature. There are eight daylight and two night vision settings, and you can get either a red or green dot version. I’ve become a fan of the green dot, as I find it stands out better against most backgrounds, but it’s nice that Burris gives you choices.

The new enclosed FastFire E has a 22x17mm window and 1X magnification that allow for both eyes open shooting. It has aspherical lenses that provide a distortion-free, glare-resistant view. It’s also fully windage and elevation adjustable and has a 100 MOA adjustment range in 1 MOA click intervals.

The FastFire E uses the common Aimpoint ACRO footprint, making it easy to install on your favorite firearm. With the rugged construction and excellent battery life, Burris’s latest red dot should be a great option for outdoorsmen, or for competition or defense use. MSRP on the FastFire E is $420. For more information check out BurrisOptics.com.


5.11 A/T Mid Boots

5.11 A/T Mid Boots

The last time I reviewed footwear on GATDaily.com, I covered 5.11’s Chukka boots. Chukkas are best described as a pair of modern all-purpose, mid-ankle boots with a design heritage that’s strongly linked to both extreme ends of the African continent—from the Second World War desert campaigns fought in northern Africa to the bushland of southern Africa.

The Chukka style works quite well for a wide range of activities, from traveling to going out or even walking around light trails in city parks. However, when it comes to providing more support and rigidity, especially off pavement, there is only so much that the Chukka-style design can contribute. But no worries, because 5.11 didn’t simply stop with their adaptation of their classic Chukka.

5.11 also has an offering for those in search of a lightweight but more technical low-profile boot: the 5.11 A/T Mids:

Side profile view of the 5.11 A/T Mid, notice the welded mesh upper to the sole. Image Source

Enter The 5.11 A/T Mid Boot

The 5.11 A/T Mid Boot is another option from 5.11 that caters to wearers in search of a lightweight and breathable multi-purpose outdoor ankle-height boot, without being so “boot-like.” They’re available in coyote brown or black and are suitable for a wide variety of activities, including light backpacking, rucking, hiking, or walking off the pavement. 

Being part of 5.11’s “A/T” (All-Terrain) product line, the Mids are especially handy in any outdoor and off-pavement environment, thanks to their high-traction tread and sole patterns. Not to mention, the rubber compound is also ASTM slip and oil resistant. More importantly, the inside is extremely cushioned and comfortable. Ortholite insoles are standard for these boots.

The description of 5.11’s product on the A/T Mid boot’s official page mentions the implementation of the 5.11 ATLAS (All-Terrain Load Assistance System) within the boot. The use of high-impact absorbing foam materials within the boot is also listed. There’s evidence of modern construction techniques as the mesh upper is welded to the sole in a “seamless” fashion. Both the toebox and heel areas are 3-D molded and provide ample space for both ends of the foot.  

5.11 A/T Mid First Impressions 

By not seeming “boot-like,” I meant that it appears as if 5.11’s designers straddled the line between trail shoe and boot proper with the specific profile of the A/T Mids. One could be forgiven for assuming these were tactical trail shoes or aggressively-treaded high-top sneakers as opposed to actual mid-height ankle-supporting boots—what they actually really are. And the A/T Mids are also lighter than one would expect. 

Since I’ve gotten them, these have become my designated range shoes, given that I’m likely to encounter dirt or gravel in most venues where I shoot. The extra traction from the Mids’ aggressive sole is also handy, especially for movement. By this point in time, I’ve been wearing my mids to various competitions, training events, and nearly every range outing since the middle of last December.

Aside from range duty, I’ve also worn them plenty on regular trail walks with the dog while traversing rugged foothills full of rocks, gravel, and various types of soils. I’ve also worn them on light rucks around city park trails and sidewalks with no complaints. 

A view of the 5.11 A/T Mid boot outer sole. Image Source

With their easy-breathing mesh uppers, I’ve found that the 5.11 A/T Mid boots are suitable for a good portion of temperate ranges. I’ve shot in them, shooting with temperatures ranging from the low 30s to the mid-80s. We haven’t quite hit the Texas 100*F training or match summer sessions yet, but I suspect the A/T Mids will do fine.

I’ve done worse footwear-wise during July USPSA matches. Also, I already know I’ll likely be wearing these for dove season this year. One has to be comfortable while sitting over their dove bucket or folding stool, after all.  

Wearing The 5.11 A/T Mid Boot

I’ll be frank; my area of expertise lies in firearms, not so much advanced shoe engineering.

Whatever combination of impact-absorbing and support materials are used, I can attest that they’re very comfortable and easy on the soles of the foot, especially when standing around for prolonged periods of time. This was especially evident after wearing these during Gabe White’s 2-Day pistol class that I recently took in February.

Being on one’s feet all day long for two days back to back is part and parcel of intensive handgun training classes. One of the greatest feelings known to man is arguably when coming home to take your shoes off after a long day at the range (right before reaching for an adult beverage). The A/T Mids went a long way in making White’s class bearable for my feet.

It’s not just whatever specialized cushioning and impact-absorbing foam is used in the A/T Mids construction, but I also really like the way the upper and the tongue envelop the foot. They both do so without putting too much direct pressure on the foot. In essence, they feel like a very snug slipper.

The fact that they avoid putting such pressure and hotspots over the top side of the foot also contributes to their all-day wearability. The laces are a soft and tubular style found on many performance sneakers, and they also work great in this application. When tied, they stay put and keep the top half of the boot where it belongs.    

Front view. Image Source

The Takeaway 

Coming from a blue-collar working man’s background, I’ve never been one to skimp on footwear. I understand all too well how a shoe or boot will make or break someone as they’re the only thing that protects the feet from the ground beneath them. For this reason, I tend to stick to higher-end footwear brands such as Keen, Salomon, and La Sportiva.

Other than 5.11’s previously mentioned Chukkas, the A/T Mids are my first foray into the brand’s more technical outdoor boots. Unfortunately, this means that I can’t yet comment on the Mids’ long-term performance. However, so far, their fit and comfort have met or exceeded my expectations given my experience with higher-end footwear.

China’s Weird Guns – Five Guns That Defy Common Sense

China has always been an interesting part of the firearms discussion. Sometimes, it’s for their cheap reproductions; other times, it’s because they tried to sell guns to American gangs. But it’s always interesting. Today’s discussion will be all about China’s weird guns. 

QSB-11

Have you ever seen a knife and wished it had more guns on it? Maybe you’re heading to a fight, and you’re not sure if it’s a gun fight or a knife fight. China has you covered. The QSB-11, aka the Type 11 dagger pistol, is a knife pistol designed for special forces paratroopers and similar troops. 

It combines a 6.5-inch blade with four barrels firing the Chinese 5.8x21mm PDW cartridge. Each barrel holds one cartridge, and it works a bit like a COP derringer. It’s a double-action design that automatically transitions from one barrel to the other after pulling the trigger. Part of the handguard contains a simple front sight. 

Users push the trigger forward to fire the gun, and a safety is built in to hopefully protect the user from firing their gun while using their knife. The QSB-11 is reloaded through the bottom of the knife’s handle. As far as China’s weird guns go, this isn’t even their only knife gun, but I figured the use of a PDW cartridge makes it a bit weirder. 

Type 80 Pistol 

China has many Type 80s, but only one Type 80 pistol. In the United States, it would probably be considered a submachine gun. The Type 80 is defined as a close-combat machine pistol, and it looks a bit like the old German M712 machine pistol. It uses a similar short recoil-operated system like the M712. 

The Type 80 fires the 7.62x25mm Tokarev from a 10- or 20-round magazine at a rate of 850 rounds per minute. That’s a little weird, but what makes it even more hilarious is one of the stock options. One of the stock options combines a stock with a combat knife. It lets a knife that is sheathed inside the stock make up the majority of the stock. 

That’s a great idea because the Type 80 would famously overheat extremely quickly. After thirty rounds fired on full auto, your gun is a steaming pile of metal, and you’ll need to switch to the knife to save your life. Most of China’s weird guns are just poorly thought-out, but they entertain me. 

The HD66 

One of the best things about China’s weird guns is their creativity! Well, not really. They just copy a lot of other ideas. That’s true with the HD66. The HD66 utilizes a 9mm pistol mounted to a pivoting stock system that allows the user to shoot around corners. The HD66 system is a bit simpler than the corner shot. 

There is no camera, no screen, and no kitty-cat camouflage. Rather, it’s a 9mm pistol braced on the stock system that uses a more traditional optic. The scope pivots downward into a periscope with a section that can rotate. The user can shoot around corners to the left or the right to shoot around corners without exposing the user. 

I think the HD66 is the simpler and more bizarre option. China also has the CF-06, a more direct copy of the Corner Shot with a camera and screen. However, the HD66 seems easier to aim accurately through the optic rather than trying to use a screen, but honestly, I’d rather just pie the corner than use one of China’s weird guns. 

QTS-11 

I appreciate China’s willingness to pick up the scraps of Western projects. The QTS-11 is China’s take on the old OICW program. It combines an assault rifle with a grenade launcher that promises to be smart—specifically, a 20mm grenade launcher paired with a 5.8x42mm assault rifle. 

The gun will have an onboard computer system to program the grenades for airburst purposes, work as a laser range finder, and allow the user to track their allies. Oh, and an attachment that allows shooters to shoot around corners via a special pair of googles that attach to a soldier’s helmet. 

Also, their 20mm grenades have a blast radius of 7.7 meters, which was a big concern of the American OICW program. Americans found the 20mm grenades to have too small a blast radius, but China claims to have solved the problem. I’m pressing X to doubt, but hey, maybe one of China’s weird guns can figure it out. 

The CS/LW21 E-Shotgun 

As a dedicated shotgun nut, I had to include one here somehow. When I saw the words “E-Shotgun,” I knew I had to jump on it. As far as China’s weird guns go, the e-shotgun might not qualify as a gun, at least not as we know it. The E-Shotgun doesn’t use exploding powder to propel the projectile; instead, it uses electric power. 

It’s a coil gun. This means the E-Shotgun uses an electrified nine-level coil. This causes magnetic fields to generate, which essentially suck the projectile down the barrel. The magnetic fields are like a relay, with each field handing the projectile to the next. This increases acceleration and throws the projectile, or projectiles, out of the barrel. 

It doesn’t throw hard enough to kill a person. It can break glass and hurt badly, but the idea is to have a non-lethal crowd control weapon. It’s ultimately silly, and recreational coil guns are available here in the US for about a grand total. The E-Shotgun is neat, but I don’t think it’s a viable crowd-control weapon. 

China’s Weird Guns 

China’s weird guns come in all shapes and sizes. I’d say they are creative, but it seems like they take other gun designs, which are weird on their own, and create a crappier version of them. Now you’ve taken a tour of China and have seen its weird guns. 

Mini EDC Multi-Tools

With the Gerber Dime Travel and Victorinox Midnight Manager, you'll be ready for anything life throws your way.

In the bustling world of travel and everyday challenges, the right tools can make all the difference—enter the realm of Mini EDC Multi-Tools! With the Gerber Dime Travel and the Victorinox Midnight Manager, you’ll be armed and ready for almost anything life throws your way. 

Whether you’re navigating airport security or tackling an unexpected task in the dark, these compact companions pack a punch well beyond their size. So, let’s dive into the details of these must-have gadgets that prove great things really do come in small packages!

Gerber Dime Travel

The Gerber Dime Travel turns travel headaches into minor bumps in the road. Gerber Gear has cleverly shrunk its popular Dime multi-tool into a TSA-friendly pocket dynamo crafted specifically for air travelers. It recognizes that you need your everyday tools without the stress of airport confiscation. Gerber designed this little titan to be your trusty sidekick, slipping easily into your pocket or travel kit.

At just 2.75 inches when closed and weighing a feather-light 2.2 ounces, the Dime Travel ensures your carry-on stays sleek and light. Gerber stuffed this compact companion with a handy variety of tools, including spring-loaded pliers, wire cutters, a fine-edge blade, scissors, a package opener, a medium flathead driver, a small flathead driver, and tweezers.

While it cleverly leaves out the standard knife blade to play nice with TSA regulations, it still crams in all the essentials you’ll need on your adventures. The Dime Travel shows that great things come in small packages!

Gerber Mini EDC Abroad

I’ve had this little gem with me on approximately 15 flights—international and domestic. 

Only four security checks have asked me to take it out and show them. This stoppage may be due to the tool’s shape and assuming it’s another Mini Multi-Tool with a blade. I don’t blame them. I don’t mind a quick show and tell if it allows me to keep it on me during the flight. Should I need to cut hanging string or trim and file my nails or tighten any screws, I’ll be well equipped. 

The scissors are a huge reason I carry this Mini EDC Multi-Tool. They come in handy for hundreds of things. However, the main feature I like is the bottle opener, which Gerber placed at the end of the tool in a ready position. Regarding bottle openers, this is the best in the Multi-Tools business!

Small and mighty, the Gerber Dime Travel and Victorinox Midnight Manager punch out of their weight class.

Victorinox Midnight Manager

The Victorinox Midnight Manager actively combines everyday practicality with after-hours utility. This compact Swiss Army Knife functions as a mini-toolbox and a beacon in the dark. Victorinox crafts this tool for those who need a reliable companion for daily tasks and unexpected nighttime situations. It actively places a pen, LED light, and the standard suite of Swiss Army Knife tools into a keychain-sized package.

The Midnight Manager boasts dimensions measuring 3.6 inches long and weighing just 1.8 ounces. This sleek Swiss Army knife easily fits in your pocket or keychain. Victorinox smartly integrates a bright LED light into the design, illuminating keyholes or dark corners with a simple button press. It also features a retractable ballpoint pen, perfect for jotting down notes on the go. Furthermore, it actively equips the user with a small blade, scissors, screwdrivers (both Phillips and flat), a nail file, and a bottle opener.

All these tools work together to create a multi-functional tool you can rely on. It’s a testament to Victorinox’s commitment to packing maximum utility into a minimal form factor.

Carrying Mini EDC Multi-Tools

The Victorinox Midnight Manager is not an airplane carry-on Multi-Tool. Due to the blade, you have to check it in. However, once you can carry it, you’ll find it fits into the watch or coin pocket of your favorite pair of blue jeans. The Midnight Manager fits comfortably on a keychain or carabiner for easy access if you don’t want to search for it in your pocket or EDC carry bag. 

These two Mini EDC Multi-Tools are slim and come with a small keyring that allows for several ways of carrying.

The scissors are spring-loaded and pointier than the Gerber Dime Travel. The miniature blade is sharp and won’t turn any sheepish heads when you need it. The retractable pen is super cool and prepares you for quick notes or your John Hancock! 

These two Mini EDC Multi-Tools are perfect for travel and EDC, wherever and whenever the occasion may be! 

For more information, please check out Gerber and Victorinox!

Lighten Up – Illumination Options for Power Outages

power outage

Spring and summer bring storms that can lead to power outages. I mean, sure, they can happen all year round. But this is time of year is when we tend to see the high winds and other factors that can lead to the lights blinking out for a while.

We’ve talked about general severe-weather preps before. This time around, we’re zeroing in on emergency illumination options you might consider. It’s important to get yourself set up for off-grid lighting. It isn’t just a convenience thing, though that’s certainly part of it.

Barking your shin or stubbing your toe isn’t fun, and both are easier to avoid if you can see where you’re walking. If you have young children in the mix, they’ll probably feel better if you can shed some light on the situation.

Flashlights

Power outage flashlights
The author owns numerous Streamlight products, which speaks to their reliability.

Flashlights are typically the first line of defense for emergency illumination. I try to keep several of them scattered throughout the house. Headlamps are great for going hands-free. Personally, I’m a big fan of Streamlight, but there are plenty of other great brands out there as well.

Something to consider when you’re selecting a flashlight is the lumens rating. This indicates the light’s brightness. The higher the lumens, the brighter the light. A high-lumen light is great for some uses but not so awesome for others. As a practical matter, 20-40 lumens will be fine for navigating a dark room. By way of comparison, a cell phone flashlight is around 40 lumens.

Ramping up from there, flashlights with a rating of 100-400 lumens will work well for most routine power outages. If you want to light up the backyard, look for 500-1000 lumens.

One more option in this category is the dynamo-powered flashlight. These have a crank handle on the side that powers the light. Rotate the handle several times, and you’re in business, at least for a little while. These can be great for kids because they can power the light themselves without wasting batteries.

Candles and Lamps

Power outage candles

While I like them for ambiance, I’m not overly keen on using candles and other open-flame sources of illumination during a power outage. We have dogs, cats, and a two-year-old granddaughter. Any of them could accidentally bump into something and knock a candle over.

That said, candles are pretty cheap. Pro tip: head to your local thrift store and see what they have on the shelf. Locally, I can pick up unused taper candles for under a buck a piece. Pillars are better, though, as they’re more stable and don’t require a separate holder. It really doesn’t matter if it has Santa on the side of it, either. Nobody is going to judge you for using out-of-season candles.

Oil lamps and lanterns are very pretty and can provide a surprising amount of light. If you go that route, be sure to stock up on lamp oil as well as extra wicks.

Glow Sticks

Power outage glow sticks
Cyalume Snaplights are an excellent addition to the power outage kit. Photo credit: Amazon.

I like to add Cyalume SnapLights to the power outage supplies. They’re safe for kids and don’t require batteries or any sort of charging. Hang one in the bathroom, and it can make things easier for youngsters in particular.

While dollar stores have plenty of glow-in-the-dark products, Cyalume SnapLights are far brighter and last longer.

Solar Lights

Power outage solar light
Solar landscape lights work great for ambient illumination indoors after sundown.

These can be handy to have around during a power outage. Small solar-powered landscape lights have really come down in price in recent years. You can buy a set of them fairly cheaply. Set them outside in planter boxes and such near walkways. During the day, they absorb solar energy. At night, they use that energy to light up your front walk or whatever.

If the power goes out, you can bring them inside and use them to light up various parts of the home. Set them in vases or prop them up with a small stack of books. They won’t last all night long, but they’ll do great for ambient lighting through the evening.

Training With Gabe White: Pistol Shooting Solutions (Part 3)

Training With Gabe White Pistol Shooting Solutions Handgun

Continued from Part 2

Main Takeaway

For a two-day course, Pistol Shooting Solutions is truly a masterclass in the topic of defensive pistol craft. Both training days are filled with lectures, demonstrations, explanations, and even relevant personal anecdotes. White also manages to touch on various topics throughout the class time. Even some not typically seen in a contemporary defensive class, such as shot-calling or shooting on the move, among other things.

Is Pistol Shooting Solutions an Advanced Class?

Training With Gabe White Pistol Shooting Solutions Glock 17 Class

I wouldn’t call Pistol Shooting Solutions an “advanced” class. I think that term is overused when it comes to describing shooting. But that’s a different article for another time.

While it’s true that most of the students who showed up to train that weekend were objectively “advanced,” it shouldn’t dissuade any prospective students from the opportunity to learn and push their defensive pistolcraft either. After all, there are no preliminary requirements needed to shoot the Technical Skills Tests other than the ability to safely draw a firearm from its holster.

The same is true for Pistol Shooting Solutions. An individual’s ability to execute the collection of drills contained within Technical Skills Tests at an advanced level is welcomed. However, it’s not a requirement for the prospective student.

For students, the most important thing they can do to prepare for this course is to ensure some modicum of comfort and basic proficiency vis-a-vis shooting and drawing from a holster. Some of it will be shooter-dependent.

On a more granular level, the shooting portion of Pistol Shooting Solutions’ curriculum is tailored around White’s Technical Skills Tests. Its elements, such as the Bill Drill, Failure To Stop, etc, aren’t technically “advanced” movements. They’re stand-and-deliver shooting events, and ancillary aspects such as reloads, etc., aren’t really in Pistol Shooting Solutions’ purview.

One of the students on the line that weekend was on the newer side. Despite maybe not being up to speed to the same levels as others in class, their excellent attitude and willingness to “lock-in” probably got them further along in their skill development than had they attended a more basic defensive pistol course. 

The Mental Game 

Following my coverage of White’s lectures and the Middle Path concepts, I really want to reiterate that the inner mental game of shooting was constantly present during training that weekend. 

During Pistol Shooting Solutions, each opportunity to work reps and chances to shoot many of the drills under the pressure of the shot timer was also an opportunity to work on mental management. It wasn’t just on the practice runs before White formally assessed his Technical Skills Tests. There were various drills in class that had an element of friendly competition amongst students, which also served as excellent mental management practice.

Honestly, the more I shoot, the more I see how it’s not about pulling triggers and letting bullets fly across into the berm. I know I’m not the first one to describe this, nor will I be the last, but this notion really stuck with me during this particular class.

Training With Gabe White Pistol Shooting Solutions Glock 17

While some like to dismiss class coins, patches, or pins as range pokemon (gotta catch ‘em all), it’s always worthwhile to try one’s best. I showed up to class with no expectations that I’d earn any pin whatsoever and almost went home with a turbo pin. It came down to two sloppy mikes under pressure on the Split Bill Drill, which left me with a consolation prize of a light pin.

Had I kept up that bulls___ notion in my mind that I wasn’t going to earn anything, I definitely would not have kept shooting light and turbo pin runs during practice like I had been. 

B-G17-E: Big Glock 17 Energy 

Training With Gabe White Pistol Shooting Solutions glock 17
Old reliable: an early Gen5 Glock 17 similar to what Gabe White carries, shoots and trains with.

On a personal level, taking White’s class was very satisfying. It wasn’t just because I got to knock the rust off my atrophied handgun skills for the first time in months or the reward of the light pin that I earned thanks to properly managing my inner thoughts. It was also because training with Gabe White had been on my class bucket list for a long time. 

When I first decided to elevate my own skills and intentionality in handgun shooting a decade ago, Gabe White was one of the first instructors who caught my attention. It wasn’t just due to his skill and speed in shooting from the AIWB position and concealment. It was also because he shot to such a high level with fairly boring guns. Then, it was the Glock 34. I’m pretty sure it was stock.

Nowadays, it’s a standard fifth-generation Glock 17 topped with Ameriglo Bold iron sights. Honestly, his Glock is nothing remarkable in terms of contemporary 9mm handguns. I saw it up close; it’s an early Gen5 with the half-moon cutout on the frontstrap that Glock did away with. I know these guns well because I own one, too. And yet, seeing this man shoot that Glock 17 with more skill than most 2011 owners is a sight to behold.

Running Optics

As for dots, White doesn’t shoot with them, but he’s also not against them either. Off the range, I happened to have a conversation with him about “post-graduate” level iron-sight shooting skills. I was astonished by the level of introspection he applies to shooting with duty-grade irons. It’s an anomaly, but it’s also the result of putting in the work. In the end, his carrying of a full-size 9mm service pistol boils down to another of the concepts he espouses in Pistol Shooting Solutions:

“There’s no such thing as being too good at fighting with your life with a handgun”

 
I’ll admit that when I got home from class, I took out my own bone-stock early Gen5 Glock 17 that usually lives in the back of the safe and admired it.

***

Read Part 1 and Part 2 here.

The Ten Essentials – A Basic Gear List for Outdoors Adventures

Ten Essentials

The Ten Essentials is a concept that’s been around for decades. It first appeared in print in Mountaineering: The Freedom of the Hills (3rd edition) in 1974. It’s a list of gear that is recommended to those who head outdoors for hiking, camping, and similar pursuits.

Over the years, the list has been tweaked by countless instructors, organizations, and Scout troops to suit their individual needs. They might swap one or two items for different ones. But the core purpose remains the same. The Ten Essentials should be enough to get you through one or two nights out in the field in an emergency.

Let’s run through the list. Something that’s important to understand is that while the list is called the Ten Essentials, that doesn’t mean we’re talking about ten and only ten individual items. Look at these as categories of gear that should be represented in what you’re carrying.

Shelter

This doesn’t strictly mean a roof over your head. Instead, it includes everything that will protect you from the elements. Your decision about clothing and outerwear should be informed by the environment and weather conditions you expect to encounter. In addition, a rain poncho or compressible parka might be wise, depending on the season. Likewise, a wide-brimmed hat will help keep the sun and rain out of your eyes.

Fire Starter

To my way of thinking, this includes ready-to-light tinder as well as something with which to light it. A disposable lighter and some cotton dryer lint in a baggie might suffice for many people. Personally, I like to add a ferrocerium rod to the kit as well, just in case the lighter runs out of fuel or somehow gets broken. As a last-ditch backup option, you might consider Pull Start Fire.

Lighting

ten essentials - lighting
An LED headlamp keeps your hands free as you work and move about.

It’s important to be able to see where you’re going and what you’re doing. A bright light can also be used as a signal device if you need assistance. A small LED headlamp allows you to keep your hands free as you move about, and they weigh almost nothing these days.

Knife

This is one of the most important tools in the Ten Essentials. Maybe the single most important one, if we’re being honest. A good-quality knife will help you process firewood, harvest food, and so much more.

Cordage

This can be used to build snares, make expedient shelters, and help you carry things. Paracord is the most common cordage option these days, but there are others you might consider, including tarred bankline and Kevlar kite string. Given the negligible weight, you could carry a fair bit of each in your pack. Do yourself a favor, though, and take time to learn several basic knots so you can make full use of whatever cordage you have with you.

Water

This is a multi-faceted entry on the Ten Essentials list. You should always carry some amount of clean water with you when you head out on the trail. In addition, make sure you have the means to make found water potable. A Sawyer Mini is a great choice in that regard, as it’s small and easy to use.

Navigation

ten essentials - navigation
A map and compass, with the knowledge of how to use them effectively, will help you get home again.

Being able to determine where you are and how to get back to civilization will solve a lot of potential problems. While GPS is great, it isn’t infallible. Batteries can die, and devices can be broken or lost. A map of the area and a compass, coupled with the knowledge of how to use them, is good insurance.

First Aid

Carry what you’d need to treat injuries like burns, scrapes, cuts, and sprains. You may also want to toss into that kit medications for stomach upset, pain relief, and fever. This doesn’t need to be a kit extensive enough to perform surgery, but it should probably go at least a step beyond a boo-boo kit.

Repair Gear

This category on the Ten Essentials list refers to items that will help you make quick fixes in the field, such as patching holes in clothing. Duct tape has dozens of uses. Wrap a few feet of it around an old gift card to keep in your pack. The ripSPOOL from Exotac will give you duct tape along with needle and thread. A multi-tool is also quite handy.

ten essentials - repair gear
The ripSPOOL from Exotac combines a few different repair resources into a handy tool. Photo credit: Exotac.

Bandanna

This is one of the lightest items on the Ten Essentials list, but it has many uses. It can be a sweat mop in hot weather, a scarf in cold weather, and it can remove debris from water before you run it through a filter. A shemagh is a great option for the bandanna category. These typically run 42 inches on a side, so you’ll have more options for use than with the smaller snot rag type.

Use the Ten Essentials list as a reference tool when you plan your next outing.

Two Travel-Ready Packs

The Gossamer Gear Minimalist Travel-Ready Pack has been used for jungle trips, tracking classes, and overnighters in the wilderness and remains a durable force.

A backpack serves as an essential item for any camping or hiking trip. These two travel-ready packs demonstrate how a small, super lightweight pack can function in multiple ways. You can use it as a stuff sack for your cooking or bedding gear and quickly transform it into a summit or exploration pack from base camp.

Minimalist 19 Travel-Ready Pack

The Gossamer Gear Minimalist 19 Daypack is a lightweight and durable backpack. It’s designed for hikers and travelers who value simplicity and functionality. Its 19-liter capacity offers efficient storage for essentials while maintaining a sleek, minimalist design.

Crafted from water-resistant Robic® nylon, it features cushioned shoulder straps, an adjustable sternum strap, dual side pockets for water bottles, and a top zipper pocket for quick-access items. This pack stands out among two travel-ready packs for day hikes or urban adventures!

Pack body weight is 10.6 ounces.

Key Features 

  • Lightweight and Durable Material: The backpack features Robic® nylon, renowned for its lightweight yet durable qualities. This design guarantees durability while keeping the weight down, making it perfect for long hikes or city use.
  • Compact Size with Ample Storage: Its 19-liter capacity balances compactness and sufficient storage space. It can comfortably hold essentials like clothing layers, snacks, water bottles, and small gadgets.
  • Comfortable Carrying: It features cushioned shoulder straps that help distribute weight evenly, reducing strain during extended use. The adjustable sternum strap ensures a secure and customized fit, improving stability while on the move.
  • Accessible Organization: The pack includes dual side pockets for water bottles or other quick-access items. The top zipper pocket is also perfect for smaller items like maps, keys, or snacks you need to grab without rummaging through the main compartment.
  • Minimalist Design: True to its name, the design is clean and straightforward, making it versatile for outdoor adventures and everyday use. Its sleek profile ensures it won’t feel bulky or cumbersome.
  • Water Resistance: While not fully waterproof, the fabric offers a degree of water resistance, helping to protect your gear from light rain or splashes.
The author took his original Gossamer Gear Minimalist to Peru and the Philippines during jungle survival trips with no issues.

It’s an excellent choice for those who prioritize simplicity and efficiency in their travel-ready pack! 

Hacky Pack

I recently discovered Sylvansport’s Hacky Pack, which is lightweight, durable, and perfect for carrying a day’s gear. It features two side mesh pockets for water bottles, a hidden back pocket, and a hydration bag slot. It also transforms into a compact 4-inch ball for easy portability, and at just 4 ounces, it’s impressively light. 

The Sylvansport Hacky Pack is a small, superlightweight nylon day pack or summit pack that compresses small and can hold up to 40 pounds.

I’ve used Gossamer Gear backpacks for fifteen years due to their lightweight options, usually choosing packs that weigh 4 to 8 ounces. While the Hacky Pack isn’t as spacious as those, I was surprised by how much it held for day trips and saw it as a viable summer overnight backpack. Although the website claims a 40-pound capacity, I found it challenging to pack that much for overnight trips.

The Hacky Pack’s compact design and functionality make it a great choice if you want to minimize your gear weight. It helps keep your essentials close and accessible and even allows for a fun trailside game of hacky sack! These two travel-ready packs make it hard to choose which I like best!

Key Travel-Ready Pack Features:

  • Compact and Packable: The Hacky Pack can be folded into a 4-inch ball, making it easy to carry and store when not in use.
  • Lightweight Design: Weighing only 4 ounces minimizes the burden on your shoulders during hikes or travels.
  • 14-Liter Capacity: Offers ample space for day-trip essentials while maintaining a compact profile.
  • Hydration Compatibility: It includes a slot for a 1.5L hydration bladder and a port for the tube, ensuring you stay hydrated on the go.
  • Comfortable Carrying: Adjustable shoulder straps and a convenient grab handle enhance comfort and usability.
  • Organized Storage: Features an internal organizer pouch and hidden zippered pocket for valuables. There are dual-side mesh pockets for water bottles or small items.
  • Durable Material: Made from robust nylon fabric, ensuring durability for outdoor adventures.
  • Reflective Webbing: Improves visibility in low-light conditions, adding a safety element.

These two travel-ready packs are perfect for hiking, traveling, or everyday use while traveling or at the local grocery store!

The Sylvansport Hacky Pack compresses to a 4-inch ball and weighs just 4 ounces, making it easy to pack in a beach bag or luggage while offering great utility.

For more information, please check out Gossamer Gear and Sylvansport!

SME Tip – Clean Your Pocket Pistol (often)

When I say SME, let’s be clear: I’m not a Subject Matter Expert in anything. Well, I’m pretty skilled at drinking beer. However, I’m not a Subject Matter Expert in anything firearms. I call myself a Subject Matter Enthusiast. I like to pass on tips that I’ve found in shooting guns, carrying guns, and being part of the industry. Today’s is all about cleaning your pocket pistol. 

I’m pretty deep into the camp of team “no clean your firearms.” Not that I won’t clean a gun; it’s just that I’m going to shoot it a lot before I do it. I need to put a ton of rounds through a gun before I clean it. I’m not part of cleaning it every time I shoot it. However, I advocate for cleaning your pocket pistol, even if you’re not shooting it. 

Why? Cause your pockets are messy. 

The Typical Pocket Gun 

There are two types of pocket guns. We have micro-sized automatics and J-frame-style revolvers. Both guns tend to be a little more susceptible to crud and crap. Small automatics tend to be less reliable due to their overall design. Everything in the gun has been micro-sized, which can make the short recoil systems a little more finicky in terms of reliability. 

Slide weight and size, combined with proper spring tension, have to work together to work, which gets tough with small guns. These days, we do have some very well-made pocket pistols, like the LCP and S&W BG 2.0, but they are still more susceptible to failures than larger handguns. 

Revolvers are a very popular pocket gun choice but are still susceptible to failure. Crud can get into the cracks and crevices of a revolver and do fun things like get under the extractor star, on the cylinder face, or in the firing pin channel, preventing the gun from working. A good pocket holster helps prevent this, but it can’t do it all! 

The Pocket Gun Problem

I wash my clothes. I never wear a pair of pants for more than a day. Yet somehow, no matter what, crap gets in and seems to stay in my pockets. Gunk, debris, lint, and more accumulate in my pockets. To be fair, it accumulates everywhere, but I notice it in my pocket because it gets stuck to my gun. 

My gun pocket remains empty outside of the gun, so the gun acts as a means to soak up all the crap that hermit crabs into my pocket. Beyond crud, we have to deal with the environment. Sweat is a factor; when your gun gets sweated on the crud, it will stick to it even more. A good pocket holster can reduce this but cannot eliminate it. 

This is how pocket guns get filthy dirty without a shot fired. When it comes to shooting, it’s not uncommon for pocket guns to get a bit dirtier, depending on the gun. The shorter barrels leave a lot of unburnt powder, which finds its way back into the gun. Just like pocket crud, carbon, lead, and copper can reduce the reliability of pocket autos and revolvers. 

Cleaning Your Little Gun 

There aren’t many different things you have to do to clean a pocket gun. It’s all pretty standard. The most important thing you must remember is not to leave it drenched in lube. Wipe it down. If it’s covered in lube, crap will get stuck to it and make your problems even worse. 

Besides cleaning your gun, I’m going to suggest something mind-blowing for some: Clean your holster. Most pocket holsters are textile-based, which means stuff gets stuck to them. Shoving a clean gun into a dirty holster doesn’t make much sense. Clean out your pocket holster and make sure it’s crud-free as well. 

The alternative is to clean your pocket. Either way, some things gotta get cleaned