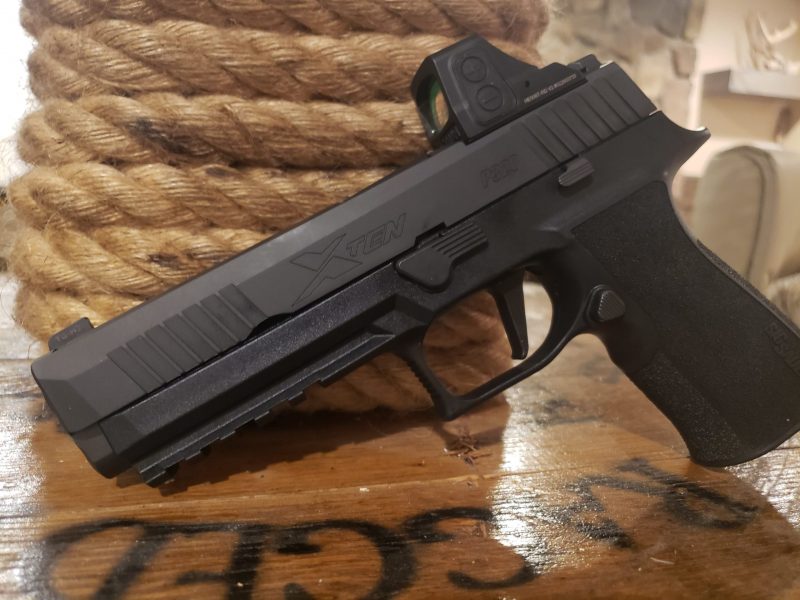
The Pistol Out of the Box
The XTEN is cut for a Romeo2 or Trijicon RMR. This is great as these are two very widely used footprints. However, and SIG even states this in the box, there is a spacer plate needed when mounting an optic. When purchasing and receiving the SIG P320-XTEN there are no options for a plate to come with the pistol as SIG does not offer a plate. Therefore this is on you in finding the correct plate for your optic choice. Remember, this is a Legion slide, and a filler plate is needed.

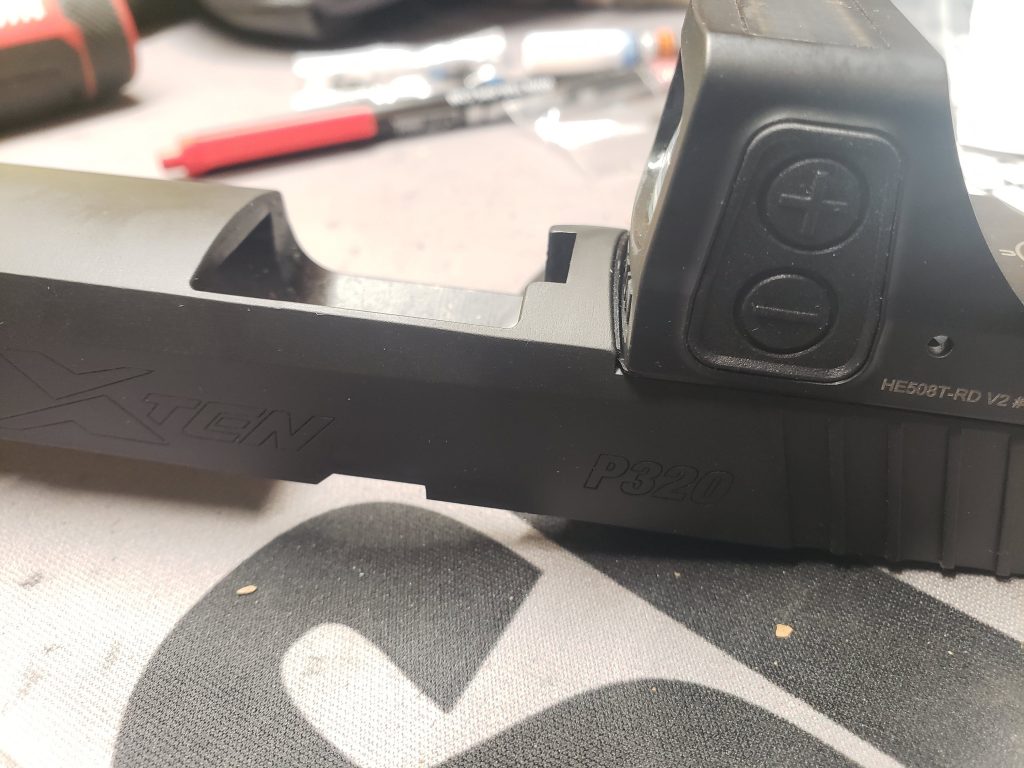
Why a Filler Plate?
Using the Holosun 508T as reference, it is possible to direct mount this optic to the slide however, there is a huuuuuugeee gap in the front of it. This means that every time the pistol is shot and recoil is pushed through the gun the only thing that is harboring that recoil are the screws on the optic. More space, means more room for that optic to move, more chances for the screws to be sheared undur recoil and you to have an even bigger problem. Sheared screws are not easy to remove from a slide and you risk damaging your slide. Therefore, a spacer plate is needed to fill that gap.
Advertisement — Continue Reading Below

The Plate Options
In short, there aren’t many. In your venture of finding the plate you are going to want to search something along the lines of “P320 X5 Legion optic plate”. This will pop up a whole two options. I’ll list them below. If you find another option, let us know in the comments. Note: There have been a few different cuts on the legion slides so ensure that you found the correct plate for the correctly drilled holes.
Advertisement — Continue Reading Below
Forward Controls Design (Holosun specific optics aren’t specified to work but should due to this being an RMR plate. I haven’t myself tried this plate on the gun) Also, the dovetail on this sight is made for Glock sights, not SIG.
Advertisement — Continue Reading Below
Always read the fine print when it comes to optic mounting..
Ben Stoegers pro shop has a good amount of options as far as if you want one with iron sights already thrown onto the plate.
Going back, I do wish I searched harder and found and purchased a Springer Precision plate or the Forward Controls Design plate as the CHPWS plate just doesn’t cut it for me. It is very thin and there is still a gap on the slide cut. Meaning no tight fit to accept the recoil of a 10mm. The Springer Precision plate looks beefier as does the Forward Controls plate considering it is made from steel and not aluminum.
Advertisement — Continue Reading Below
How to Mount Optic
After finding the correct plate there will probably be a couple of sets of screws in front of you. These could be the screws from the company who sent you the plate or the screws that came with the optic itself. No matter, the proper length of screw needs to be used. If they aren’t, a malfunction can be caused or the optic can be loose.
To find the right size of screws..
Advertisement — Continue Reading Below
- Count the threads: Ensure that there are enough threads coming through the optic to mate with the slide. 4 threads is good.
- Ensure the screws are flush: When tightening down the optic, ensure that the screws are flush on the top of the optic. if they aren’t there is a large chance that the optic isn’t totally tightened down.
- Check the extractor: Dependent on the gun, the screw holes can be directly above the extractor. If you are using too long of screws these screws can interfere with the operation of the extractor. After tightening down the optic take your finger or a punch and move the extractor to ensure that it isn’t impeded.
- Look for light under the Optic: If you see light under the optic it may not be totally tightened down to the slide.
Now, the threadlocker. Some use Vibratite, some use the blue Loctite 242. If using Vibratite, let the Vibratite dry before installing the screws. If using other threadlocker ensure that you don’t put too much on. A dab is fine. Threadlocker will now cause the torque to be heavier so when tightening the screws don’t overtighten. There should be an in-lb torque limit listed on the directions that came with the plate.
After installing, don’t forget to witness mark. The screws moving and those witness marks no longer being in line will be the first tell that the optic is loosening.
Advertisement — Continue Reading Below
Iron Sights
The P320-XTEN does not come with tall enough iron sights to be used when an optic is mounted. After mounting a dot, or even before if you’re more prepared than I, be sure to find “suppressor high sights” or “cowitness sights”. Personally, the blacked out rear sights with a fiber optic red/green front work well in not giving my brain too much to focus on. An example being this Sight Set, for Sig P320/M17, Co-witness Black Rear and Fiber Optic Front, by Dawson Precision.
Don’t forget, SIG sights are different and install differently than normal Glock dovetail sights so be sure that you have the correct sight pusher.