Building a fire in a small bio/twig stove isn’t the same as making a campfire. Loading a twig stove seems simpler because of its size. However, there is a learning curve, or so I’ve experienced. For years, I’ve been using small, homemade, and production stoves fueled by twigs and sticks with excellent success. Here’s why!
Campfire vs. Twig Stove
A campfire roars with primal charm, but it guzzles wood like a hungry giant at an all-you-can-eat buffet. A twig stove sips fuel politely, turning twigs into steady heat without leaving a scar on the earth. Campfires demand space, patience, and a tolerance for smoke. Meanwhile, twig stoves light quickly and keep your jacket smelling less like barbecue.
A campfire gathers people in glowing circles, but a twig stove falls short on this. Both deliver warmth and flame, yet one feels like an ancient ritual while the other feels like clever efficiency.
Advertisement — Continue Reading Below
Safety First
The same rules apply as for any fire-making outing. Clear an area of debris using your foot, Y-branches, or any tools at your disposal. Account for the wind that can blow leaves or combustible debris into your fire space. Have extra water in case things get out of control, or be willing to sacrifice drinking water if needed. Use leather gloves if possible to handle hot twig stoves or sticks.
Be cautious and do things slowly. Unless you flipped your canoe, there’s no rush to make fire!
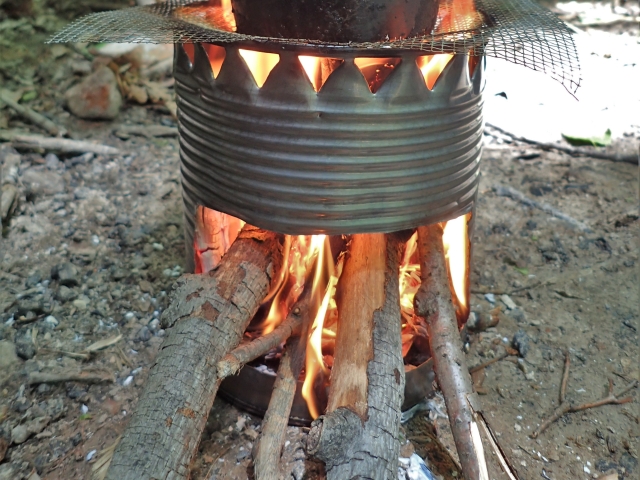
Loading a Twig Stove
Get organized, don’t downplay fire prep because the fire won’t be a bonfire or council fire. Take the proper steps to achieve greater success.
Advertisement — Continue Reading Below
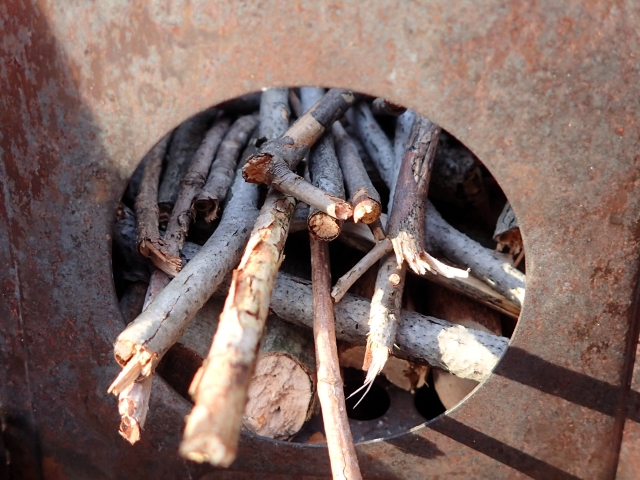
Picture this: an endless fuel stash in the wild. Twigs, pinecones, dry leaves, and grasses await you. Even larger sticks and dry moss are fair game. Don’t forget the humble piece of paper. Anything that burns can be your trusty fuel source. It’s no wonder folks also call it a hobo stove!
Stack It – The stack method of loading a twig stove is similar to a conventional campfire. Igniting tinder, then adding fuel to the top, is ok for a campfire, but it gets choked out in a small, confined space like a twig stove. It’s even worse without a breeze to help accelerate airflow.
Advertisement — Continue Reading Below
Depending on how deep your twig stove is, you’ll have to ignite tinder inside or drop it down the top. Then, you need to drop small twigs on it from 4 to 6 inches above. Tinder is somewhat delicate, and I hate dropping debris on it and building from there. There are two methods for creating a general fire that also work for loading a twig stove. These are common arrangements called fire lays!
Top-down Fire Lay
I’ve been using a top-down burn method for years, especially during winter. It opens with a fierce flame to boil water while the fuel continues to burn down. In the colder months, it warms the hands and gets the blood flowing. This approach lights up the larger wood and gets those coals going.
Advertisement — Continue Reading Below
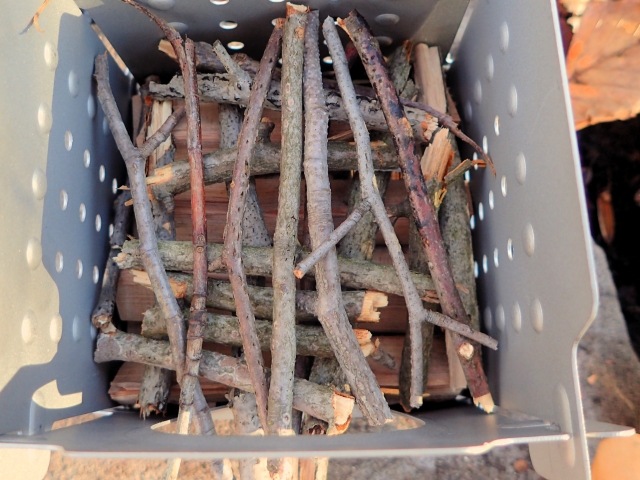
I start by layering thicker hardwoods, such as maple and oak, at the bottom of the stove. I cut them with a saw to ensure a perfect fit and arrange them neatly and uniformly. Next, I place slightly thinner sticks on top, crossing them over the bottom layer. I repeat this process, filling the top third of the stove with twigs as thin as toothpicks, stacking them like a log cabin. Here’s where loading a twig stove resembles playing Lincoln Logs.
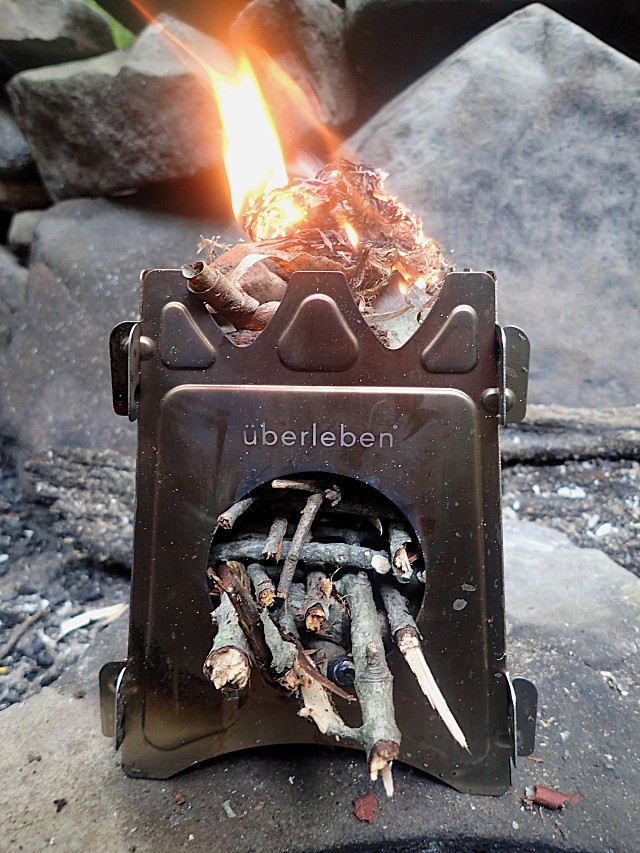
Finally, I crown it all with fine feather sticks, shredded poplar bark, dry grass, or cotton balls smeared with Vaseline. Have a good supply of thin twigs, ready to add if needed, up to pencil-thick sticks.
Advertisement — Continue Reading Below
Bottom-up Fire Lay
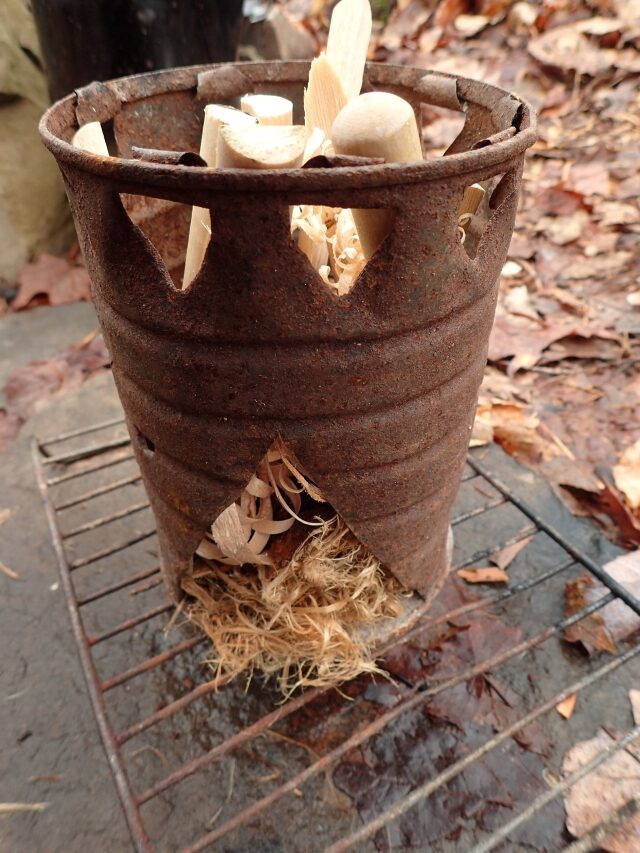
This setup works like a traditional fire, burning from the bottom up. Start by placing tinder at the bottom of your stove, where you can easily ignite it. Next, add some feather sticks, shavings, or sticks that are about the thickness of a toothpick. After that, layer in some pencil-thick and finger-thick sticks.
Finally, crown your masterpiece with larger hardwood pieces on top. Another idea is to save the hardwood fuel for last. Then, place the wood on or in the stove once it’s going full-bore.
Advertisement — Continue Reading Below
Just remember, building a fire is all about the right pace. Add these layers gradually—don’t stuff everything in at once! It’s just like preparing a delicious meal; you can’t rush the best recipes!
Loading a Twig Stove Summary
These tips can make using these fuel- and time-efficient stoves more enjoyable while practicing fire-building skills. Try them both on DIY Hobo Stoves and manufactured stoves. See what works, be safe, and have a blast!