Cognitive dissonance: the state of having inconsistent thoughts, beliefs, or attitudes, especially as relating to behavioral decisions and attitude change.
The Question
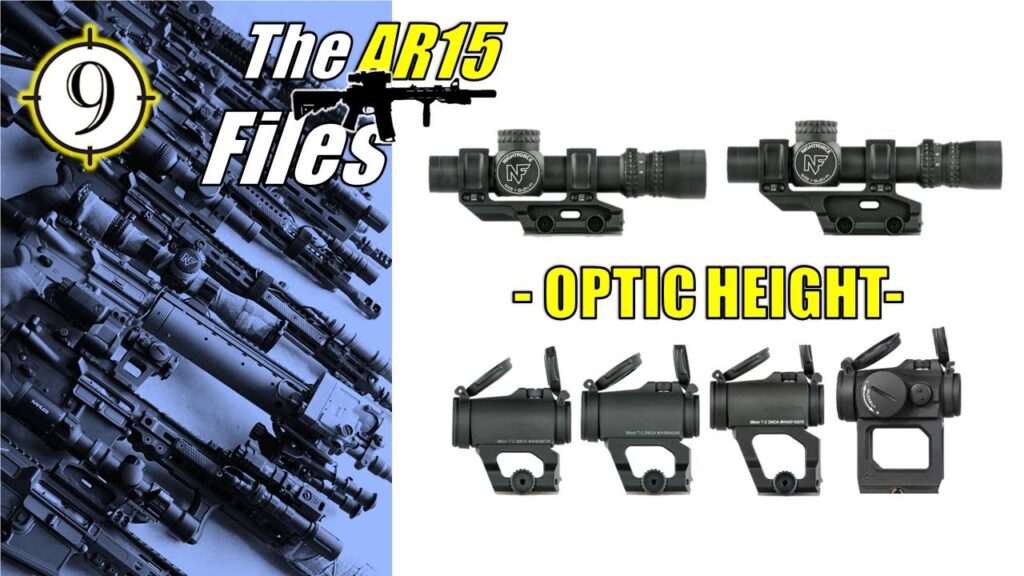
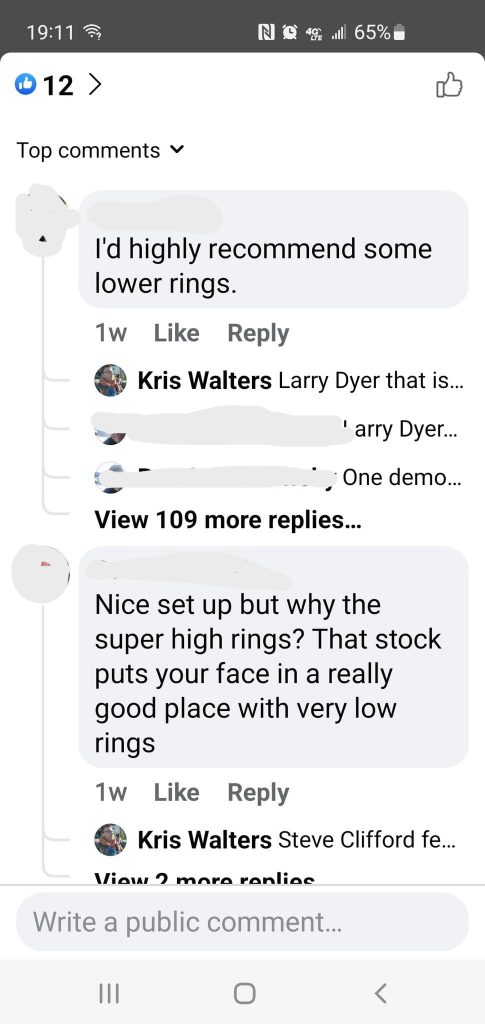
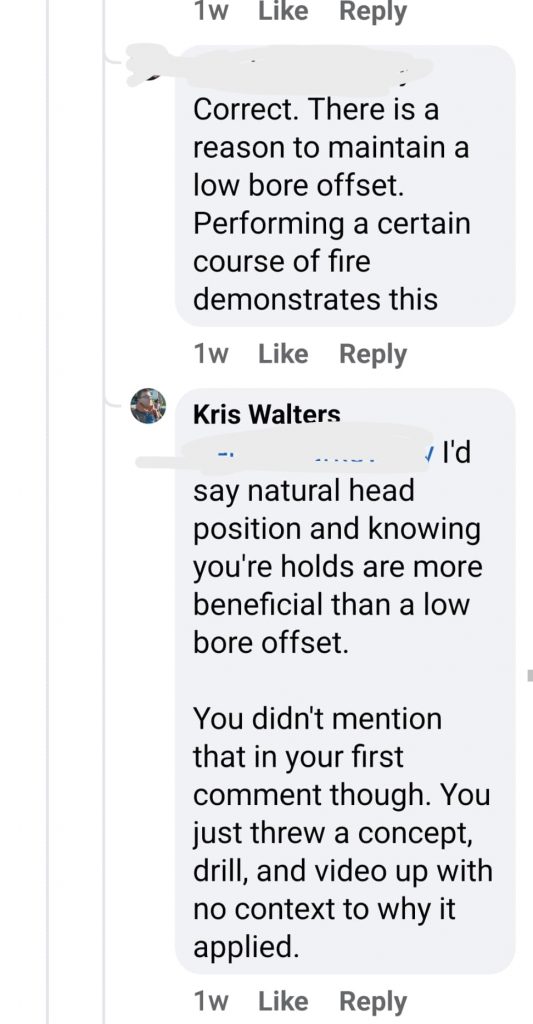
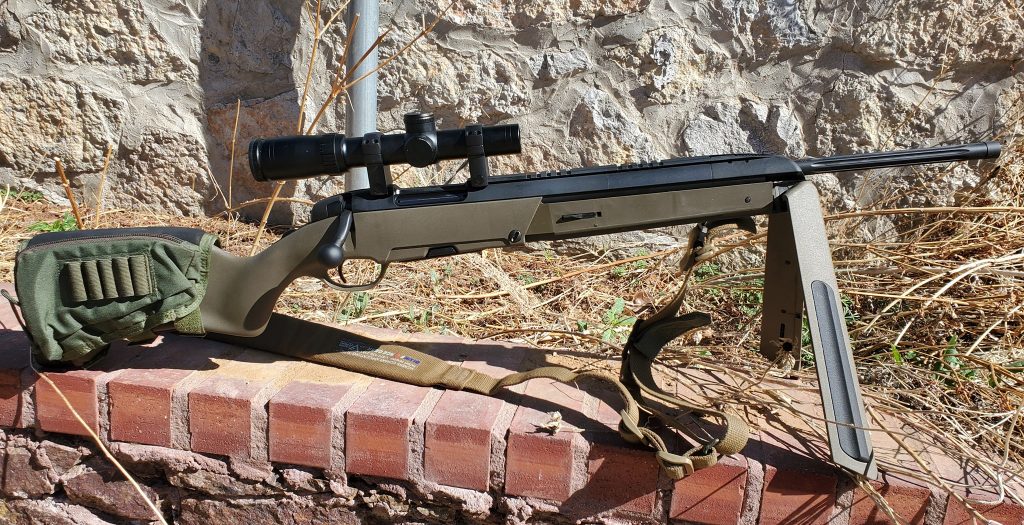
Kris Walters, currently a platoon sergeant for a BN scout/sniper platoon, made a post in a Jeff Cooper Scout Rifle group showing his latest scout rifle build. This brought out a myriad of comments about scope ring height, low cheek weld, head position, bore offset etc. Many of the comments stated that having a higher scope height will hurt you as a shooter rather than help, especially in the applications today.
Advertisement — Continue Reading Below
Advertisement — Continue Reading Below
Who these comments are coming from doesn’t matter, what their background is, none of it matters if these statements have merit. Well, one of the best field shooters in the game decided to test the theory.
Below, Andy Reinhardt, a Precision Rifle Instructor and Competitor within field shooting disciplines (such as within Competition Dynamics Steel Safari and NRL Hunter) decided to test if having a lower cheek comb or higher scope height will help or hurt when shooting to distance. His findings below.
Note: All of these findings apply to Andy and his style of shooting. While these findings have been substantiated with a lot of other shooters in the same discipline, (ie: field style shooting, positional shooting) it is up to you to decide if it is right for you. There isn’t an end all be all when it comes to these things. We all have different body structure, shooting applications, equipment. The goal is just to not live in the “it has always been this way” and to challenge yourself to be open to new ideas and grow from it. Shooting is art, discipline, and science.
Advertisement — Continue Reading Below
Andy’s Findings
“Ok, I’d like to address a common falsely held belief about scope ring height and traditional “cheek weld” This post was spurred by the previous post from Kris and his Steyr Scout on the Scout Rifle page. First 6 comments it received was. “Why are your rings so high!?!” or “I would lower those rings”….. I like most everyone else was caught up into that dogma for years…but no more….Let me preface my next statements. I have been a firearms instructor by trade for almost 2 decades now and have been shooting long range precision rifle as a sponsored factory shooter for a dozen different companies for the last 10 + years. I have always been of the opinion that you should set up your rifle optic in as low a position as you can comfortably get behind the rifle….why?….Because thats how I was taught and my instructors before me…etc…etc.
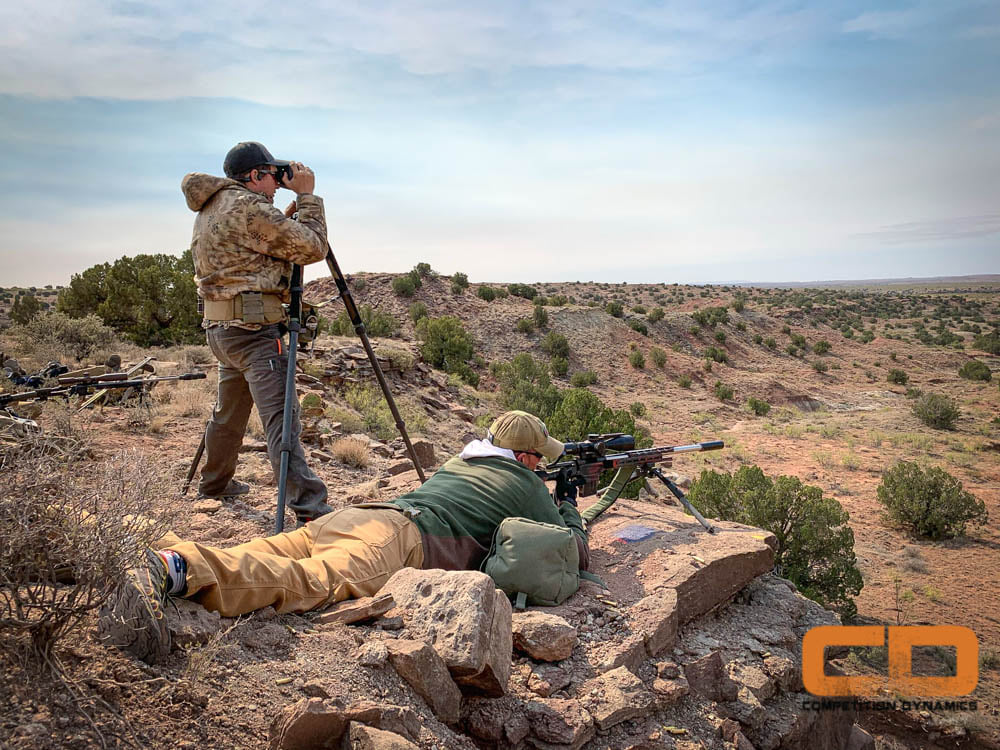
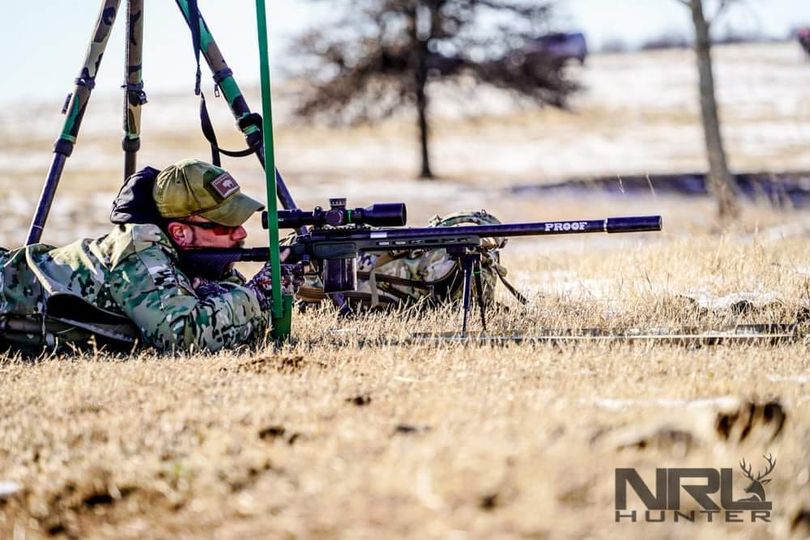
Photo by CD
Advertisement — Continue Reading Below
About 4 years ago now, I was shooting a match at Rifles Only in Texas with a good friend of mine Nico Detour who is a former Marine, Sponsored shooter, firearms instructor and currently does contract work for several agencies. As I was prepping for my next stage I took a look at his rifle and started asking questions…“why is your scope so high?” ” why is your cheek piece as low as it can go?…did you just take your bolt out and forget to raise it back up?” He informed me that he and another competitor friend of ours, Solomon Mansalla (who is also a Marine Sniper Instructor), had been doing alot of testing of equipment and particularly rifle/scope setups and found this particular position to be the most precise over every different position they had shot it from. I was immediately skeptical…but since I know the high level of proficiency and skill of both of these men, I decided to start doing some tests of my own to see if I could replicate their finding……
Testing
When I got home I immediately went to work. I wanted to get some baseline testing done before I started changing anything about my rifle setup. I have always been a huge proponents of shooting dot drills on close range paper targets to address fundamental errors, so I started their and recorded myself on video shooting the drill to try and diagnose any common problems.
My tests involved shooting both rimfire precision rifles at 50 yards on .25″ circles (as I could afford to shoot alot more) and verifying those results on my centerfire rifle on .5″ targets at 100 yds. Each test was on a 8.5×11 piece of paper that had 25 dots…5 rows of 5 dots. I shot 2 round per dot on a particular line, each dot from a different position for a total of 10 shots per line fired from 5 different positions. I would then repeat 5 times for a total of 50 rounds on target.
Advertisement — Continue Reading Below
Dot #1 was fired from a low prone position using a bipod for a control group , (all subsequent shots are fired off a barricade using an Armageddon gear Mini Wax Canvas Heavy fill Game Changer bag for front support which I had previously established to be the most solid position and bag possible using this same method), #2 dot was High Prone, #3 dot Low Kneeling, #4 dot High Kneeling and #5 dot Standing.
I immediately noticed something interesting as soon as I finished shooting my first 50rd drill! The further I got off the ground…the lower my shots were in relation to the dots!! IE, from a prone position both my rounds were in the same hole and were perfectly centered in the circle. When I moved the rifle up to a higher position, my bullets still shared the same hole, but started to get lower in relation to the circles and when I reached a full standing position were touching the bottom of the circle and even breaking out below the bottom edge…..Interesting!
I kept shooting these drill about 4-5 time a week with my rimfire and at least once a week on my centerfire rifle, keeping each test target and reviewing it against the rest. After a couple weeks I was satisfied that the results were consistent enough to start messing with my setup to see if I could change the outcome of my performance and make my standing, kneeling and prone group placement match each other…I first went to the videos I had taken of me shooting these drills and noticed that when I was prone, my head was in the traditional prone “turkey neck” position…but as I started to get higher off the ground, my head came into a more erect natural position.
Advertisement — Continue Reading Below
When keeping my traditional cheek weld position on the stock, this caused my eye to get farther from the scope and made it higher in relation to the scope position, which in turn was making my shots go lower…my eye was not looking through the same place in the scope every time! Even though I was well within my comfortable and clear eye relief (eye box) the small shift in eye placement was changing my POI (point of impact). In essence was inducing a small parallax error! I kept running this test over the next several months changing LOP (length of pull), facial anchor point (cheek weld), comb height and scope ring heights.
Conclusions: After 6 months and several thousand rounds of both rimfire and centerfire ammo this is what I have found. I have made a few adjustments to my stock and shooting position. First, I shortened my LOP by an inch…this has made the rifle sit closer to the centerline of my body/shooting eye across all position. Second, I have raised the height of my scope rings (from medium to tall), which puts my head in a more upright and natural position. This has made my shooting more consistent and puts less strain on my neck and back when holding a prone or compromised position for a long period of time.Third, I have moved my cheek piece to a lower position and changed my facial anchor point from a high face, right under the cheek bone, to a low jaw position right were the teeth and gums meet on the lower jaw. This in conjunction with the higher scope gives me more consistent accuracy across every position, especially when shooting from a compromised position.
Final Conclusions
Since a shot is very rarely taken in the field from a low prone position (grass and other obstructions typically don’t allow it), making these changes have been highly beneficial to me and I have passed them on to all my students. I have seen my (and my students) scores and placements in matches get more consistently higher since making these changes. With these changes to the rifle, I do have to take a slightly higher, yet comfortable prone position, but across the board all shots are more consistent and repeatable especially when in a compromised position.
I am able to hold a prone position longer when forced to do observation on the rifle as I am more comfortable and in a natural body position. Our body naturally wants to have our head in an upright and neutral position squared above our shoulders. This has changed the way I shoot rifle for the better and I will continue to keep trying to improve. We all tend to set up our rifle in the most stable (prone position) and never think that it will shoot any different from any other position.
Since I did these tests, I have been talking to a lot of top 3 Gun competitors and they have also come to the same conclusions using the AR based platforms as well..Higher scope, lower facial anchor point (cheek weld) and shorter length of pull lead to a more stable, natural and sustainable position leading to greater accuracy potential. I had noticed when shooting the same targets at distance from prone and then from a kneeling and standing position, that my shots would typically come in lower on the target or would miss low. I had always assumed that this was a function of not performing a fundamental correctly from the less stable position or was induced by shot anticipation etc…What I have come to learn is that I was inducing that parallax error because my rifle was set up strictly for a prone position and when I went to anything else my eye was farther away from and slightly higher than in prone and therefore was causing my shots to drop low!!!
I had always heard Brian Whalen mention in his classes that he would lower his cheek rest and shorten LOP when he shot from a barricade or standing position and I just never put 2 and 2 together that this was the main reason for doing this!! (I just figured it was because be had no neck! Since the majority of the stocks I own did not have a quick adjust turn wheel feature, I opted to change my rifle setup to optimize it for the more compromised positions and slightly raise my prone position to accommodate the change. This has all but eliminated my low shots from positions above prone.
So why have we been stuck doing the same old thing for years and where did this all start?!?
From my experience, the firearms community tends to be very dogmatic and resistant to change. Many of the top shooters and trainers have come from a military background and their instructor taught it this way, as did their instructors instructor, etc, etc. Nobody is ever stopping to ask …why do we do it that way?!?! Or having the ability to test a different method and change equipment or settings to see what worked best. It was a run what you have been provided and make it work scenario.
This also has come a lot from bench rest type or prone square range shooting that only utilizes one position and therefore has never seen the need to look into any other way. I have seen a lot of students and shooters over the years try and contort their body around an ill fitted rifle and then wonder why their results where sub par. Always be learning and questioning why we do what we do, as this is the only thing that leads to innovation…imagine if Col Cooper had never questioned the handgun techniques of his day…we’d all still be shooting the old FBI one hand crouch position with our support hand in our pocket! Always a student…sometimes an instructor.”
So how can you as a new or seasoned shooter start testing this method? Well, try these three adjustments that Andy mentioned.
- First, I shortened my LOP by an inch…this has made the rifle sit closer to the centerline of my body/shooting eye across all position.
- Second, I have raised the height of my scope rings (from medium to tall), which puts my head in a more upright and natural position. This has made my shooting more consistent and puts less strain on my neck and back when holding a prone or compromised position for a long period of time.
- Third, I have moved my cheek piece to a lower position and changed my facial anchor point from a high face, right under the cheek bone, to a low jaw position right were the teeth and gums meet on the lower jaw. This in conjunction with the higher scope gives me more consistent accuracy across every position, especially when shooting from a compromised position.
If you don’t want to go that crazy with adjusting your equipment, maybe run your cheek comb down a rotation/click and shoot some groups prone then barricade. Maybe after that shorten your LOP. You don’t have to go wild and start chasing it, but your bullet doesn’t lie. Shoot the weird positions and see where you’re hitting after doing any sort of adjustment. Even before this post I have heard of shooters moving their cheek down a touch and shooting a two day match. Doing this gave them more comfort in both prone and on barricades.
Thank you to Andy’s sponsors, which ultimately help him to be able to do these tests. Steiner optics, XLR, Proof Research, Hawkins Precision, Thunder Beast Arms.
And if you want to read up on the scout rifle from the man himself Jeff Cooper, click Americanrifleman.org (reposted from September 1985. RIP Jeff Cooper)