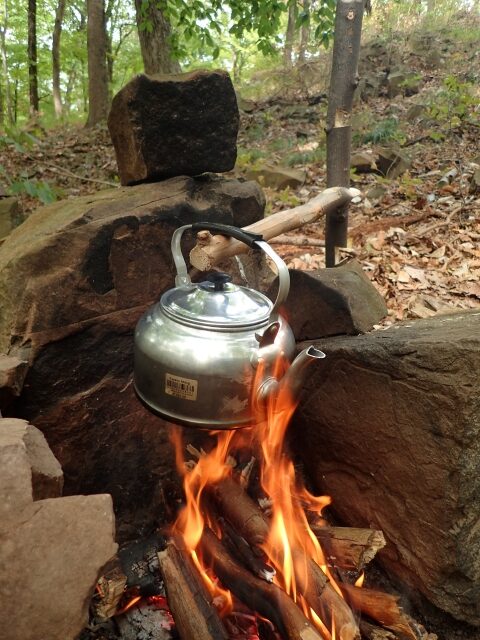
For me, cook systems are one of the highlights of any camping trip, day camp trip, or wilderness adventure. Hang your cookpot like a champ with these out-of-the-box tips, and wow your friends and family!
Cook Systems
When it comes to outdoor cooking, you might envision those classic tripods with a pot swinging from them. These setups are likely among the oldest cooking contraptions around, appearing in countless period films, TV shows, novels, and instruction manuals.
But why stick to the same old routine? Besides a tripod, which is versatile for hanging a pot or used to create a smoker, there are countless other tried-and-true cooking methods.
Advertisement — Continue Reading Below
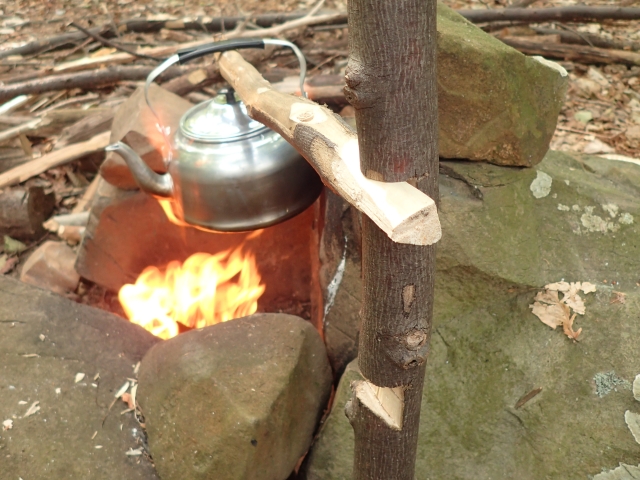
Hang Your Cookpot: Dovetail Rig
I discovered an old Boy Scout manual that explained how to use a dovetail notch to hold a support stick and pot over a fire, referred to as the One-Legged Fire Crane. Inspired by the single notch it showed, I decided to modernize the design for adjustable heights to suspend pots, meat, or kettles.
I got to work using a 24-inch bucksaw, a 15-inch bolo knife, and my Victorinox Swiss Army Camper knife. A pilot stick—a sturdy stake for drilling holes—was essential. I cut a vertical pole about 28 to 30 inches tall and a shorter horizontal piece. The vertical piece was thick like a wrist, while the horizontal was a broomstick thin. The horizontal arm is where you’ll hang your cookpot.
Advertisement — Continue Reading Below
I shaped one end of the vertical pole into a chisel tip with the bolo, then chamfered the top while it rested upside down on wood. Next, used the pilot stick to create a hole and marked where I wanted the notches. I sawed diagonal cuts—three in total—before cutting down the middle of those to outline the dovetail notch.
With the bolo, I pried out the wood from the notch easily. Then, I shaped the dovetail fitting using the bolo for a three-sided triangle. I left a small knot at the opposite end to prevent the cookpot from slipping. And just like that, my project was complete!
Cookpot Hanging Arm
This cooking setup is more complex than simpler rigs. I first learned about it from Dan Wowoak in a Coalcracker Bushcraft video, and it’s great for those who enjoy crafting with tools.
Advertisement — Continue Reading Below
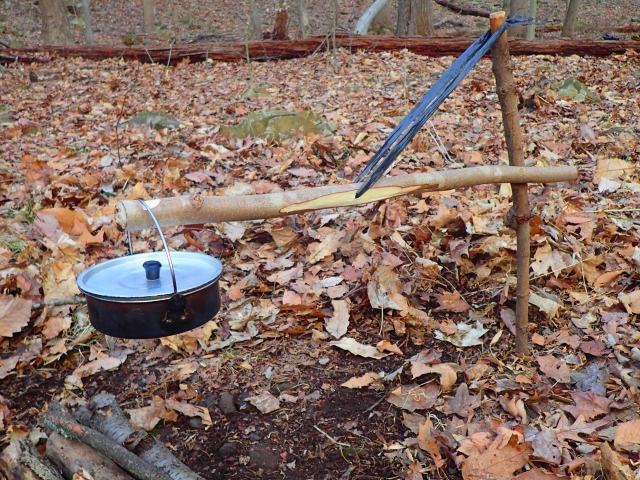
To create this system, you’ll need some cordage, two sticks about two feet long, and a “Y” stick. Using greenwood is best since it handles heat well and has the strength to hang your cookpot.
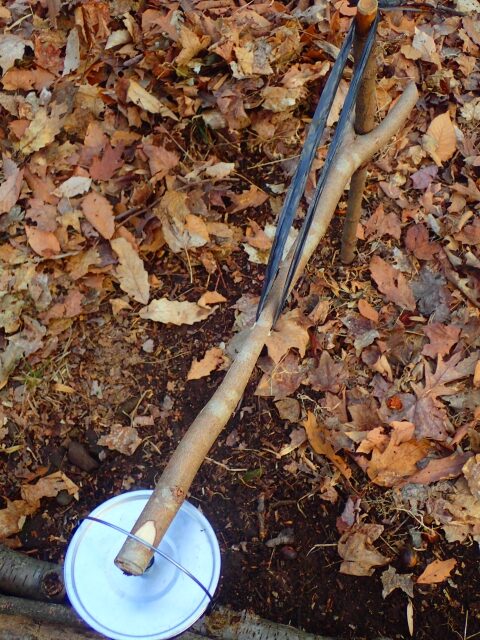
Start by finding the center of the “Y” stick and carving two flat spots. Drill holes into these flats to connect them, which you can do with a knife or awl. Dan used a gimlet in his video.
Advertisement — Continue Reading Below
Drive the straight stick into the ground with help from a pilot stick. To set it up, thread cordage through the hole and place the “Y” on the upright pole. Level the stick, wrap the cord around the top, angle it up for stretch, and tie it off. Carve a notch at the top to secure the cord, then create a “V” notch on the end of the “Y” stick to keep cookpots from sliding off.
Now Hang Your Cookpot Like a Champ!
With these two reliable methods, you’ll add adventure while warming your water and cooking your food. Come on—give them a try!
Advertisement — Continue Reading Below