Keith our resident instructor and build fanatic is back again to share his journey of mumbled profanity commonly known as his building an AR series.
Advertisement — Continue Reading Below
[divider]
This time around we are focusing on actually building the AR rifle as opposed to the decision to build or buy. Personally this is my 6th AR15 (not counting the M16A2’s, M16A4’s, M4’s or M27’s during my time in the Marine Corps.) and it was time, to build one exactly the way I wanted it.
For this second installment we will be focusing on the assembly of the lower receiver. The lower is easier and less expensive to assemble than the upper and, as those familiar with the AR will know, it is also what the law considers the actual firearm because it bears the serial number (needs an FFL for purchase, background check, etc.).
Advertisement — Continue Reading Below
Lower Reciever 
Done!
Thanks to York Arms for providing the custom engraved lowers for both me and my lovely young lady. York Arms was absolutely awesome to deal with. They cared so much about getting me a product they were proud of that they willingly scrapped some lowers they were not satisfied with. This, if you were unaware, is EXPENSIVE for them to do. That’s one of the reasons you can find “blemished” lowers for so cheap online, they would just be a total loss to the manufacturer otherwise so they try and recoup some money and sell them to a customer not concerned with the cosmetic finish of the lower.
Unlike a generic lower with a minor blemish my lowers were both custom cut, custom serial numbers, custom engraving. York Arms had next to no chance of being able to sell them after the fact unless another person wanted exactly what I wanted plus the addition of them looking not so great.
Advertisement — Continue Reading Below
York Arms ate that cost for me, I didn’t have to ask, they flat refused to sell a product they weren’t satisfied with. I greatly admire that and York has secured my future business should such a need arise (maybe rifles for kiddos?)
Anyway, on to the assembly processes to which we can fully credit with giving this article its title.
Ladies first, I started putting my girl’s rifle together. This also had something to do with having all the parts for her rifle and still waiting on mine, but that was only a minor factor I swear.
Advertisement — Continue Reading Below
I located some online resources to follow along with in the week prior to my build. Watching videos or reading tutorials in advance of building is a great way to save yourself wasted time as well as avoid finding yourself mid build and missing parts or tools. Nick Leghorn (A TheTruthAboutGuns contributor) and nsz85 both had great videos on the process (I used nsz85’s). They also had a distinct lack of spending mind numbing amounts of time listing all the tools that they sell on their website that you will “absolutely” need to build the AR. (End Sarcasm… but seriously I’m looking at you MidWay and Brownells)
Protecting the Lower’s Finish
One of the first things often addressed in the build process is protecting the lower’s finish. I recommend electric tape. I also recommend using more than I did to cover any area near where you might be swinging a tool (like a hammer).
I failed to leave my lowers unblemished, oh well. The guns weren’t going to stay pristine anyhow.
Advertisement — Continue Reading Below
There is no super-secret special order you must put the parts onto the lower receiver but certain items are easier to install earlier in the process and a few, like the detent that holds the buffer, must go in prior to other parts going on.
I started here…

Advertisement — Continue Reading Below
And out of this mess you get when buying a full lower parts kit (also needed) and while following the video, I started with…

Sorry for poor quality cell cam, still haven’t upgraded that particular capability
Magazine Catch
What you see are the three pieces of the magazine catch and release assembly. A simple place to start the build and this allows you to secure the lower to any number of available vice blocks that will use the magazine release to provide additional secure locking. Not necessary, but helpful for the remainder of the build.
Putting this on is fairly straight forward. Magazine catch goes through the proper hole in the left side of the receiver so that the magazine catch tab is inside the magazine well cut.
The spring then goes over the threaded rod of the catch from the right side.
You then put the button on, with the textured side facing out so your finger can take advantage of the extra friction and not slip off. You will press the button into the receiver so that it aligns with hole, like you would release a magazine normally, and then rotate the magazine catch clockwise to screw it into the button. Keep turning the catch until the rod’s end is about flush with the top of the button.

This will require you to press the button very far into the lower so the catch can keep rotating without running into the two protective guides on the left side.
I recommend, pushing the button in with the eraser on a pencil. Fine tune the amount the catch is screwed into the button by using a magazine, be certain it isn’t overly difficult to insert or remove the magazine, drop free is ideal while still having the magazine fully seated and secured (unable to be pulled out without pressing the release).
This first step assured me this would be a bit more challenging than I anticipated just due to fighting spring tension. I failed to use a vice to aid in holding the lower, it isn’t needed (I do have the proper blocks, just didn’t use them in a vice) but in hindsight it would make things MUCH easier. The vice is an easy third hand, but since mine is outside in the cold (at the time) I said no.
That decision made it more challenging and greatly increased my use of profanity throughout the build. Let’s get to that!

This is what happens when you have a hammer and miss hitting one of these.

Trigger Guard
The punch slipped while I was installing the trigger guard and my hammer strike instead split my finger, not overly painful but I was now bleeding on my girlfriend’s gun and it wasn’t anywhere near functional. (Not the first time and not the last profanity was used during this build)
Other than the possibility of the punches moving around while knocking in the roll pin for the trigger guard, it’s an easy install. I tried and failed for an hour without the punches, don’t be me, make a trip and get a set.
Support the two little ears on a firm surface, I used a pine wood ammo box, and then start the roll pin. A few good taps with a good heavy hammer will start the pin but not push it into the space between the two ears.
I found it helpful to place the spring loaded hinge lock into its place at the front of the trigger guard so all that it could do was pivot at the proper distance until the roll pin secured it. It likes to move while you hit the roll pin so be aware this could take a bit.
Once the roll pin had the guard secure I hammered it flush into the receiver and made sure the hinge worked.
Takedown Pin and Detent
Next up was my kryptonite, the front take down pin and detent, or as I found out, spring loaded and incredibly tiny parts that love to catapult away into the abyss…

This was another task a vice would make easier and I choose to ignore that fact due to the cold. (Editor note: Either get a vice inside, wait till summer or put a heater in your garage a vice makes life much easier)
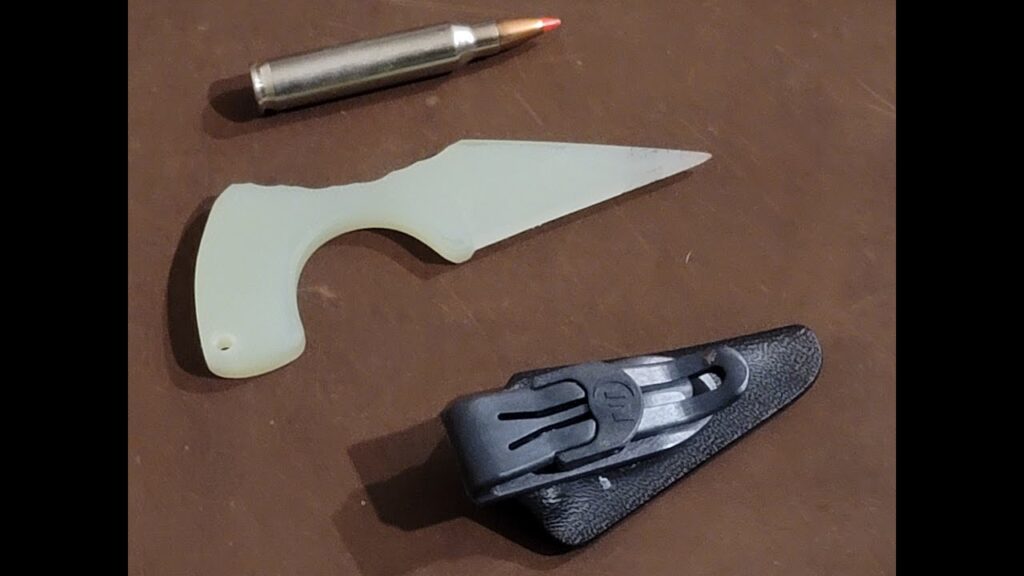
Using a flat thin blade like that found on a multi-tool I put the detent spring and detent into the hole. Using the flat of the blade with the sharpened edge pointing toward the lower I applied pressure and forced the spring and detent into the hole. Then whilst grabbing the take down pin to insert it overtop the blade (which is why thinner blades are more useful) I tilted the multi-tool due to the weight of the handle and released the spring and detent.
I found the detent quite quickly while quietly profaning the air around me but the spring was, and still is, gone. I used the one frommy lower parts kit to replace hers and completed that process. I would later buy replacements from Brownells for mine.
Bolt Catch

Next up, and the last truly difficult piece (but not the last vanishing one) was the bolt catch.
The bolt catch ( just left of pliers in above photo) consists of three parts. The catch itself, a tensioning spring, and a plunger that pushes against the catch that goes in the spring.
At this stage I grabbed my hex wrench set and put the smallest one through the holes for the roll pin in order to hold the catch in place. This worked VERY well and saved me chasing flying parts launched by the spring. I then hammered the roll pin through and it forced the hex wrench out as it went. Simple, but took a great deal of hammering. Put a little lubricant on the roll pin end and it becomes easier, also don’t be afraid to whack the pin hard with punch and hammer, it takes some force.
As you can see the punch slipped and I didn’t have electrical tape on that part near the bolt catch so I knocked the lower and scarred the finish, oops.
Trigger
After this I installed the trigger (see my ALG Defense ACT article for more on that.) A very simple operation at this point because, despite fighting the spring tension (on the hammer especially), the pins can be pushed in by hand fairly easily. Some minor finagling is necessary to keep holes aligned but that is it. Also be sure to put the trigger in first, then the hammer, and that the hammer’s spring is putting tension on the back of the hammer as you put it in. nsz85’s video is very good about illustrating this, I highly recommend watching that as you go.

Selector and Pistol Grip
Next was the safety selector switch, for a normal one that part slides right in. For the STS from Noveske/Magpul you must use gorilla like force to snap the selector lever onto the drum, then a really tiny screw driver to tighten the really tiny screw into the lever so it doesn’t walk itself off the drum, and then it drops right in.
Once your selector switch of choice is in you can flip the lower upside down and drop the safety detent into its place. Then take the pistol grip, pistol grip screw, crush washer, and safety detent spring and put them on.
Put the pistol grip onto the receiver to test the fit and flex the polymer a little, this will make putting it on when it has the spring inside it much easier. Next place the selector spring into the pistol grip, line it up with the small hole the detent is in, and put the pistol grip back on fully. You will need to use some force to keep it on as the selector spring will force the pistol grip partially off, not a big issue.
Next, grab your pistol grip screw, put the crush washer over the threads and drop it threads down into the pistol grip. Follow it with a screw driver and tighten it down, this will likely take a little time in order to get the screw to line up and start on the threads, a magnetic tip screw driver could help.
Almost done now!
Buffer Tube
Next up, the receiver extension, also called the buffer tube. This is threaded and depending on which you choose, rifle or carbine, will determine the complexity of install. Carbine is more difficult due to the adjustable stock, more parts.
For a carbine stock assembly take the receiver tube and take all the parts off. This will consist of the receiver end plate and castle nut. Next put the castle nut back on so the crenulation cuts are facing the closed end (these cuts mate up with a stock wrench so they need to face away from the end plate), screw it all the way on to the very end of the threading. Add the end plate next, there should be a small cut in the receiver extension and a matching one on the end plate that help minimize rotation, there is also a slightly extruded bit below the tube that should be facing so it goes inside the receiver, this also helps with anti-rotation.
Screw the receiver extension into the receiver until it nearly meets up with the small hole where the buffer detent and spring sit. Place the buffer detent spring and buffer detent into the hole and use your thumb (leather gloved helps with comfort) to push the detent down and screw the receiver extension in so the tube now holds the detent in place, the narrow pin like top of the detent will rest against the edge of the tube.
Be sure you screw the tube in enough! I didn’t, and said detent spring went flying away to join it’s brother, the front take down pin detent spring, in the abyss… luckily I already raided my other lower parts kit so I did so again for the other spring.
The tube may need a little bit of adjusting to get the stock to align correctly but that is quite simple.
Before we finish the stock install we must detour and put in the rear takedown pin, which is much easier than the front. Take the pin and put it into the receiver with the cut for the detent facing the rear of the receiver, don’t put it all the way in as you will likely have to turn it a bit to seat the detent into the cut. Next take the detent and put it into the small hole in the back of the receiver, follow that with the spring, these will be held in place by the receiver end plate (or the stock on a fixed stock rifle with a rifle receiver extension)
Back to the receiver extension now, push the end plate against the receiver and hand tighten the castle nut to close it up.
Back to the take down pin, now that the detent has tension try to rotate it and make sure the detent is in the cut. It should not rotate once the detent has found its place. It should slide in and out of the receiver however with the detent capturing it.
Next grab your stock wrench and tighten the castle nut down snugly (yet another area where a vice would be helpful). Check as you are tightening to see that the receiver extension does not rotate with it and make your stock crooked (unless you want it that way)
Finally, adding the stock itself. Put the stock onto the receiver extension. Pull down on adjustment tab until the spring and detent inside the stock are all the way depressed and then pull/push the stock onto the adjustment rail of the receiver extension. It should lock in all the positions now. Each adjustable stock has a slightly different way to pull the tab down depending on its design. You’ll figure it out, just do not try and push the stock on without depressing the tab fully, you will fail miserably.
For a fixed stock rifle it’s even easier, no castle nut, no end plate, and no aligning the stock so it isn’t crooked. Just screw the rifle receiver extension on and place the buffer detent and its spring in their proper place. Next add the take down pin, detent, and spring. Finally slide the fixed stock on and tighten the provided screw. For an A2 stock you will also have a small spacer to add on the end of the receiver extension, I used a Magpul MOE stock and it has no spacer. Much cooler and more comfortable stock too.
Last and by far your easiest step, put the recoil buffer into the buffer spring and slide them into the receiver extension. Spring first and with the flat end of the buffer facing out. It will click into place behind the buffer retention detent and…
You’re done!
Ready to add an upper and go test! You can now cease quietly swearing like I was.