Learning Basic Survival Camping Knots is one of the fastest ways to build confidence outdoors. These knots aren’t fancy—they’re practical, reliable, and easy to master. Whether you’re building a shelter, bundling gear, or tying into anchors, they give you control and security in the field. Practice them until your hands move without thinking. Because when conditions get tough, speed and clean execution matter most.
The Knots You Should Know
Basic Knot Lingo
Standing end (or standing part): The long portion of the rope or cordage that isn’t actively moving. It’s the main line that carries the load.
Working end (also called the live end, running end, or bitter end): The free end you’re moving around to form loops, hitches, or knots.
Advertisement — Continue Reading Below
Bight: A simple bend or curve in the rope without crossing over itself.
Loop: A full circle made when the working end crosses over or under the standing part.
Turn: A single wrap around an object.
Advertisement — Continue Reading Below
Round turn: Two wraps around an object.
Tag End: Extra cordage/rope at end.
Square Knot (Reef Knot)
What It’s For: The square knot joins two ropes of equal diameter. It lies flat and neat, making it helpful in tying bundles or packages under steady tension. It’s simple but must be tied correctly, because a sloppy version can slip.
Advertisement — Continue Reading Below
How To Tie It: Hold one rope’s working end in your right hand and the other in your left. Cross the right working end over the left working end, tuck it under the standing part, and pull snug. Next, cross the left working end over the right and tuck it under the standing part again. Pull both ends tight so the knot lies flat.
Remember the rhyme “right over left, left over right” to keep it square and avoid a granny knot. Useful and the easiest of the basic survival camping knots.
Advertisement — Continue Reading Below
Bowline Knot
What It’s For: The bowline creates a fixed loop at the end of a rope. It’s strong, secure, and easy to untie even under heavy strain, making it ideal for rescue, mooring, or tying to a post.
How To Tie It: Form a small bight near the end of the rope—this is the rabbit hole. The working end is the rabbit. Pass the working end up through the bight, then wrap it around the standing part (the tree). Bring the working end back down through the bight. Pull both the standing part and the working end to set the loop.
The bowline creates a fixed loop that won’t slip, and the rabbit‑hole story makes it easy to remember. This knot is one of the strongest, yet easily untied, of the basic survival camping knots.
Advertisement — Continue Reading Below
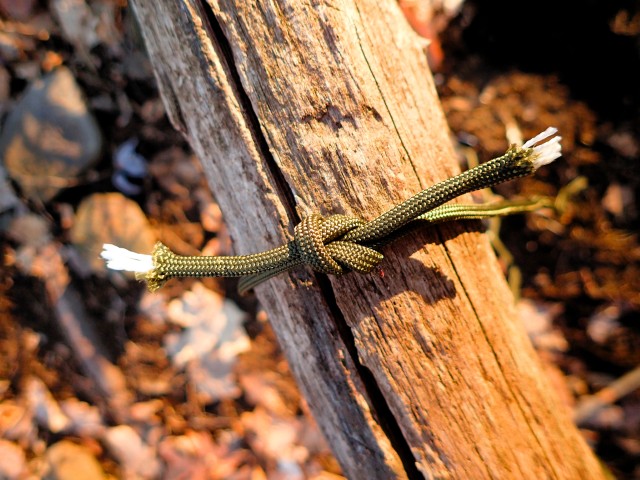
Jam Knot (Canadian Jam Knot)
What It’s For: The jam knot tightly binds and cinches bundles, tarps, or gear. It slides under tension and then locks in place, holding firm until you release it. It’s possibly the most used bushcraft knot.
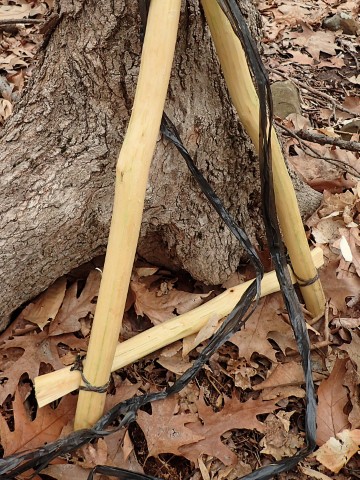
How To Tie It: First, wrap the rope all the way around your bundle or tree, like you’re giving it a belt. Take one end and make an overhand knot near the end, leaving about half an inch sticking out (tag end). Now make another overhand knot an inch or so down from the first knot. Leave it a little loose so the working end can slide through it up towards the first knot near the end.
Advertisement — Continue Reading Below
When you pull the working end to tighten the bundle, the knot slides towards the first knot and squeezes tight. Then pull the working end more, yanking left-to-right or up-and-down, jamming the knots against the bundle. It’s like making a rope zip‑tie: it pulls tight and stays locked until you decide to undo it. Arguably, the most-used basic survival camping knot for campers and arborists.
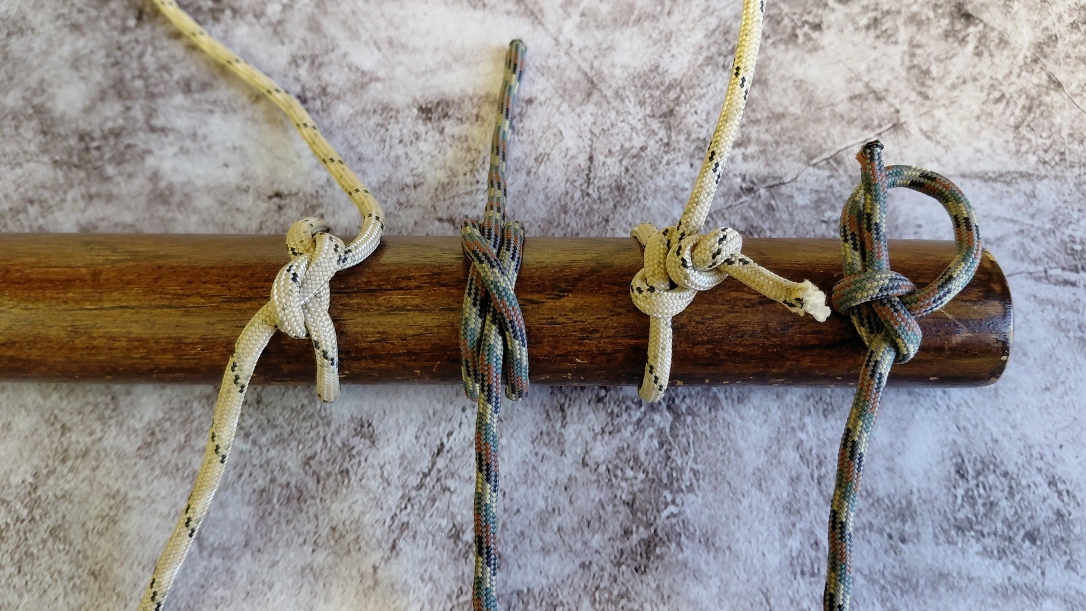
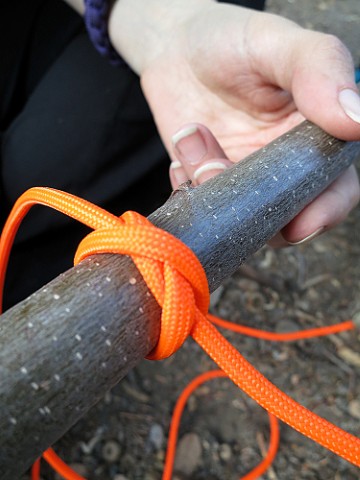
Clove Hitch
What It’s For: The clove hitch attaches a rope quickly to a post, tree, or pole. It grips well under steady tension and is easy to adjust, making it perfect for shelter ridgelines and fast lashings.
Advertisement — Continue Reading Below
How To Tie It: Take the working end and wrap it once around the post, crossing over the standing part. Make a second turn just above the first, then tuck the working end under the second turn near the cross. Pull both the standing part and the working end tight to set the hitch. The two turns form an X that grips the post. Under load, the hitch tightens; lift the working end to loosen and release it quickly.
Overview of Basic Survival Camping Knots
Learning these knots can enhance survival skills and make any outdoor experience more enjoyable and safer. Practice them regularly to ensure you can tie them quickly and effectively when needed!
Advertisement — Continue Reading Below