A Harris Bipod Mod That You Didn’t Know Existed

The Harris bipod is a staple in the gun household being a fast and reliable bipod. One thing that is slowing this bipod down is the tensioning wheel on the Swivel Style Harris Bipod. This wheel is not very finger friendly. Now there is the tensioning lever modification. It takes two minutes to install and allows the shooter to adjust the tension of the cant with ease and in a prone position.

The Problem

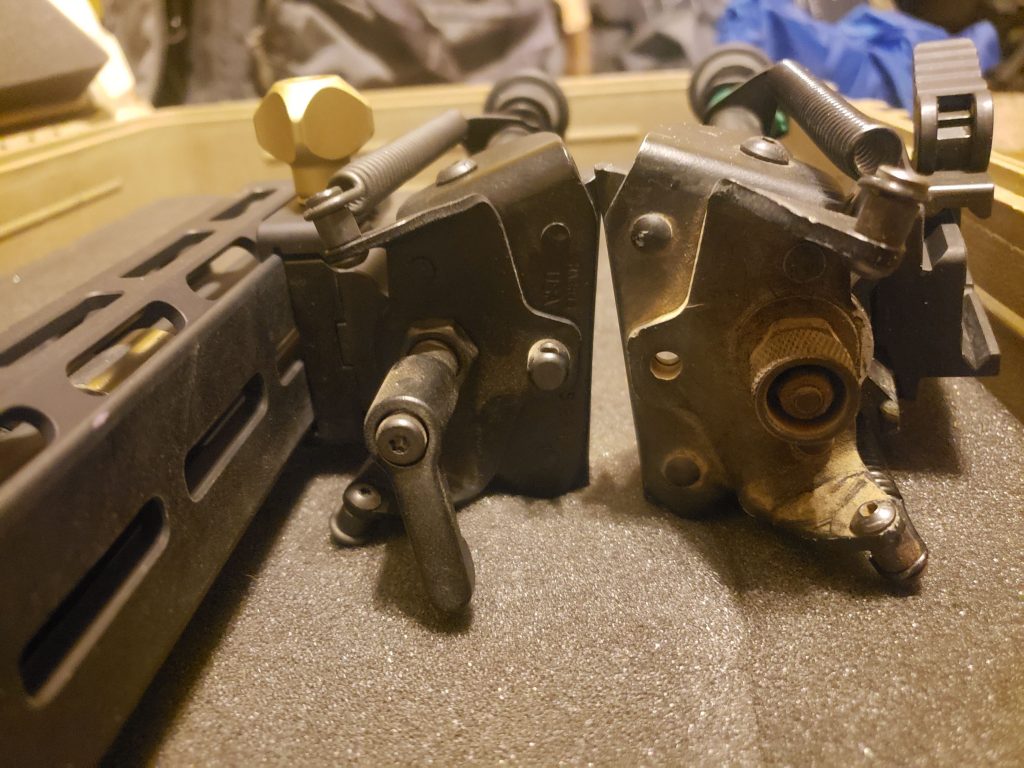
Bipods are often about tension. Tension in the legs ensuring that they don’t collapse under the weight of the gun. Tension in the locking of the legs ensuring that they stay tall. Then, tension in the cant of the bipod ensuring that the gun stays level. Currently in the S/Swivel Series of Harris bipods there is a plastic wheel in the rear of the bipod that adjusts the tension of the swivel. Meaning, if you turn it one way, it tightens it up allowing less movement, if you loosen it it allows the gun to cant freely to each side. While the wheel has ridges for finger grip, it isn’t really ergonomically friendly, especially on the clock. In comes the locking handle.

On the left, the new swivel locking lever after a dusty gas gun match. On the right, the old style wheel. This wheel now has a larger plastic wheel that you will see on the market. The lever is still the way to go though.

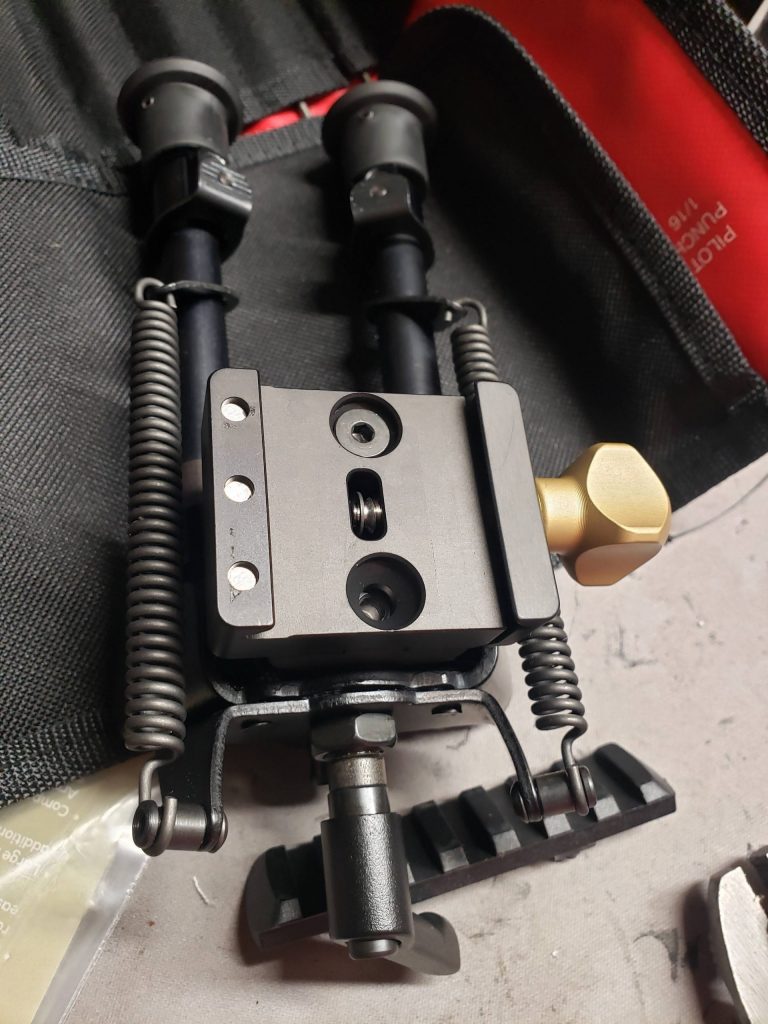
The Harris Swivel Bipod Locking Handle

Instead of a wheel, the locking handle is a normal L-shaped lever that allows you to simply push it to the left or the right to adjust tension. It is cheap and easy to install and will save the shooter a lot of time and frustration.

The cheapest I have found it is on Short Action Precision’s website for $15.00 however Harris Bipods offers it and Midway USA.

This is what my current Harris BRMS 6-9 Short Swivel Bipod looks like. Due to wanting a Harris on my precision gas gun that has an IWI ARCA rail, I took off the normal clamping style Harris lock and installed the Area 419 ARCA plate, and the Swivel Lock Lever.

Installation

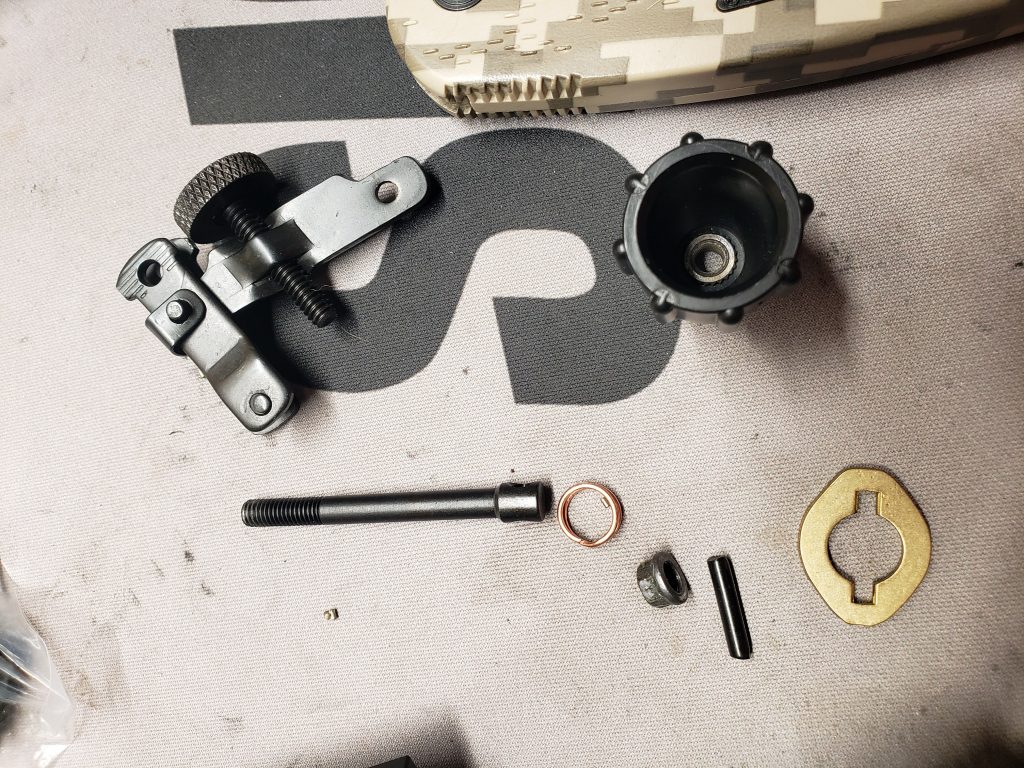
Tools Needed: Ratchet with 1/4in socket and a 3mm allen.

The install is very simple. It is as easy as removing a nut and replacing with an a screw.

These are the parts that will be removed and reinstalled during the lever install. Some of these parts were also removed due to installing an Area 419 ARCA plate on my Harris BRMS 6-9 Short Swivel Bipod. This wheel is the newer style tensioning wheel.

Below is a video from Short Action Precision going over the install.

Note: The video below shows the nut instead of the wheel. They are the same installation instructions though between the plastic ridged wheel and nut.

Anna Martinez
Anna is a Federal Weapons Gunsmith with 8 years of previous experience within the US Army Ordnance Corps (91F). She has taken multiple armorer and weapons proficiency classes to include FN, Knights Armament, and Small Arms Weapons Expert course. She also writes for American Gunsmith, AR Build Junkie, and is active in Precision Rifle sports around the nation.